Simple blocks
In this tutorial, we will generate a simple level consisting of blocks (tiles) with a uniform size - 1 cubic meter. We will use the great Prototype Textures asset pack by Kenney.
Simple example
Blocks
The first step is to create some blocks that we will later use to create our room templates. We will use an orange block for walls and a black block for floors.
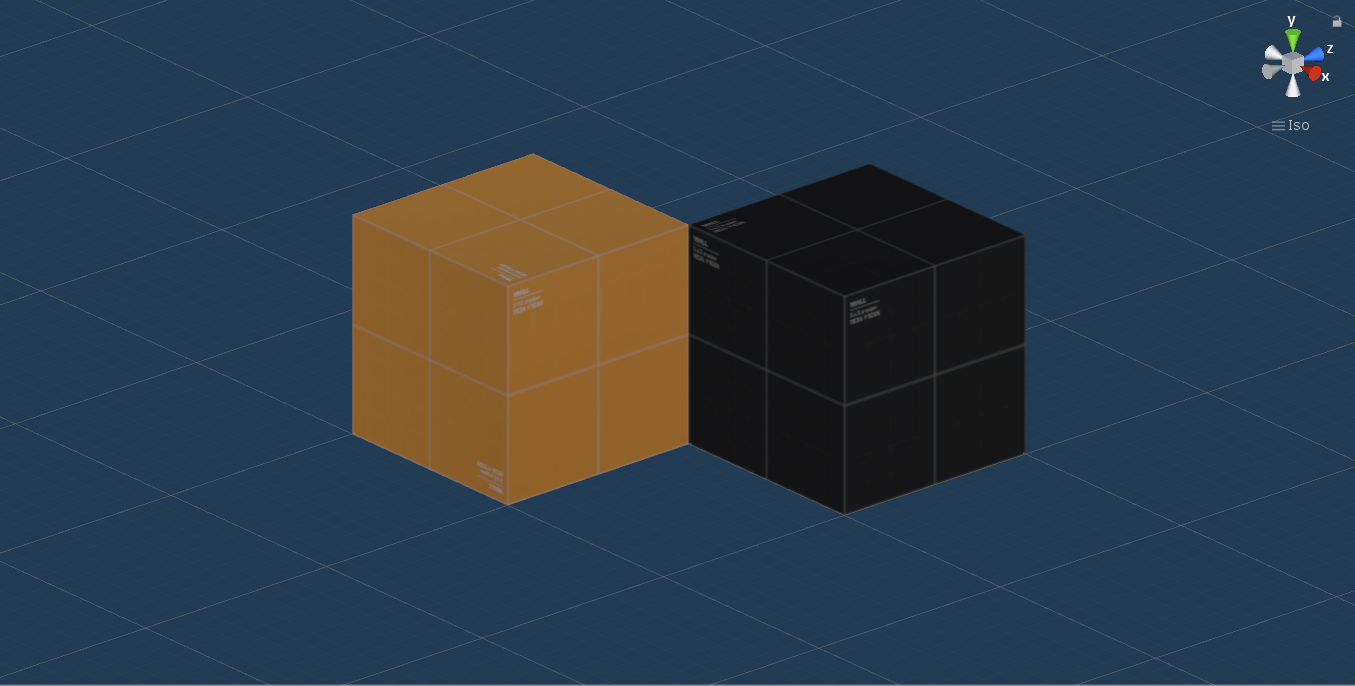
Create an empty prefab game object and add a Door Marker (Grid3D) component. Then add a cube as a child object (3D Object → Cube). Assign the corresponding material to the cube together with a Box Collider.
Note: If you forget to add the Door Marker (Grid3D) component, the block will not be recognized when computing the outline of a room template.
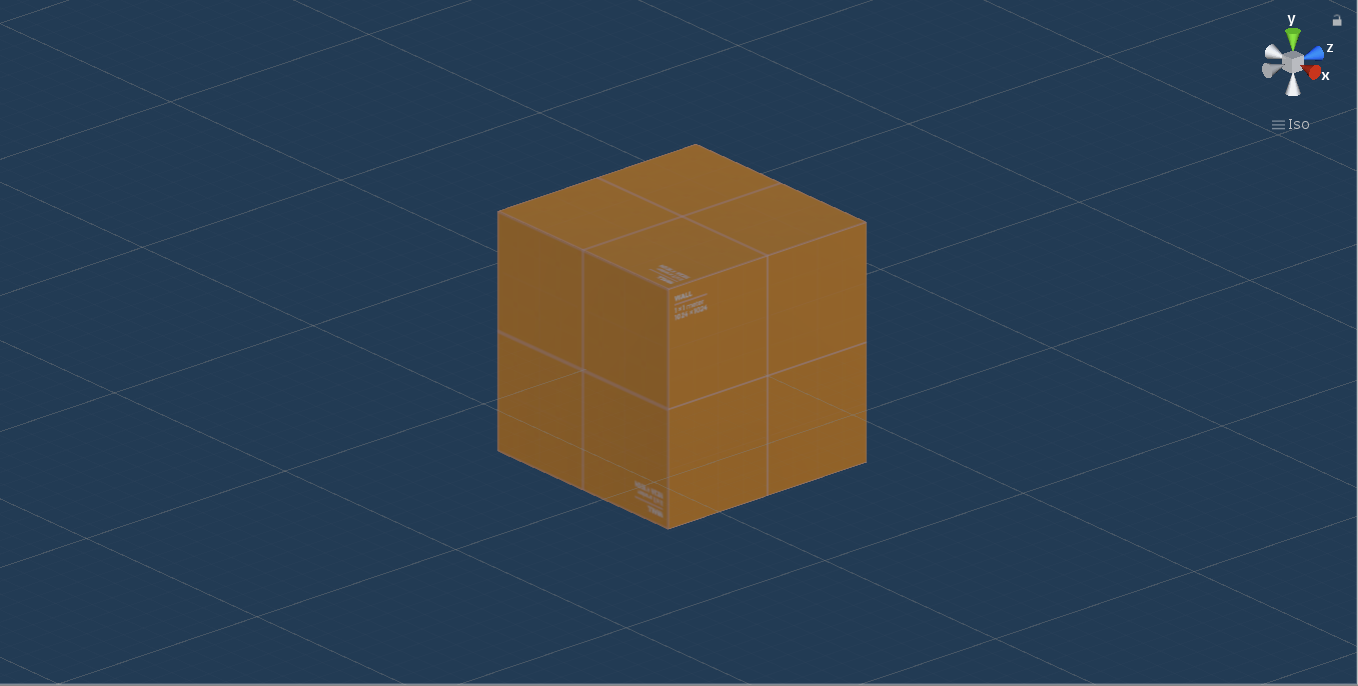
The last step is to set the position of the cube to (0.5, 0.5, 0.5). As you can see in the image (left) above, the block is not aligned to the grid in the background, but we want it to be.
Doors
The next step is to prepare a door prefab that we will use to mark our potential door positions. The setup is very simple. Create an empty game object and save it as a prefab. Then open the prefab and add the Door Handler (Grid3D) component. The door should look similar to the image below.
There are multiple settings that can be changed in the component, but we can keep the default values for now.
Room templates
The next step is to prepare a simple room template. Create an empty room template prefab by navigating to Create → Edgar (Grid3D) → Dungeon room template. If you open the prefab, you should see that there are two child game objects - Blocks and Doors.
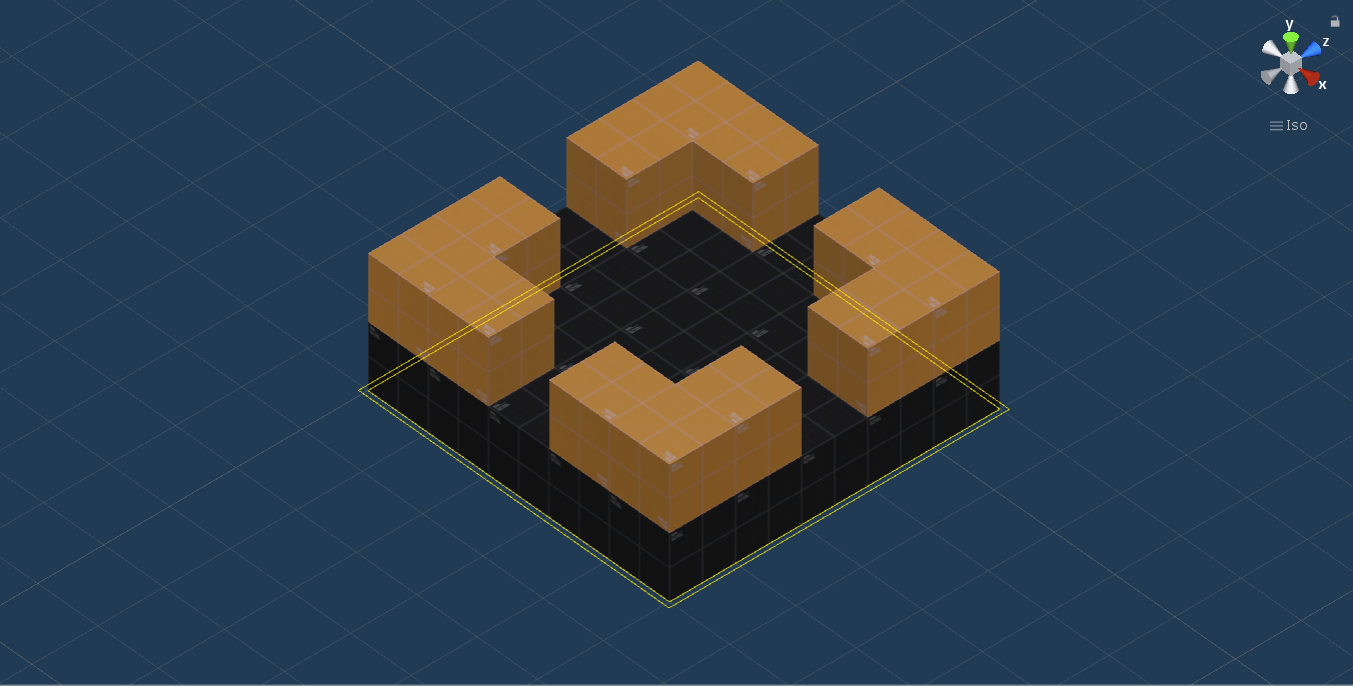
First, place some previously created block prefabs as children of the Blocks object and build a simple room. For now, keep holes at places where you plan to have doors. Also, make sure that you only use integer coordinates when moving the blocks. Otherwise, you might get unexpected results when computing the outline of the room template. Also, remember to always use the prefabs of the blocks, so that if you later decide to change some textures or colliders, the changes are automatically propagated.
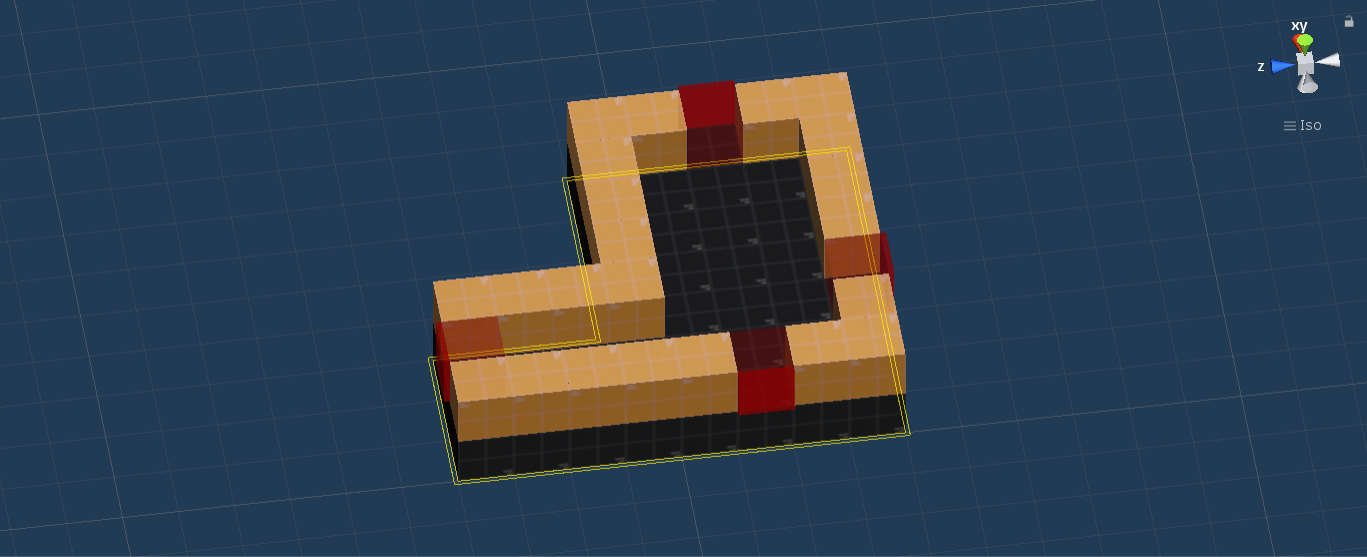
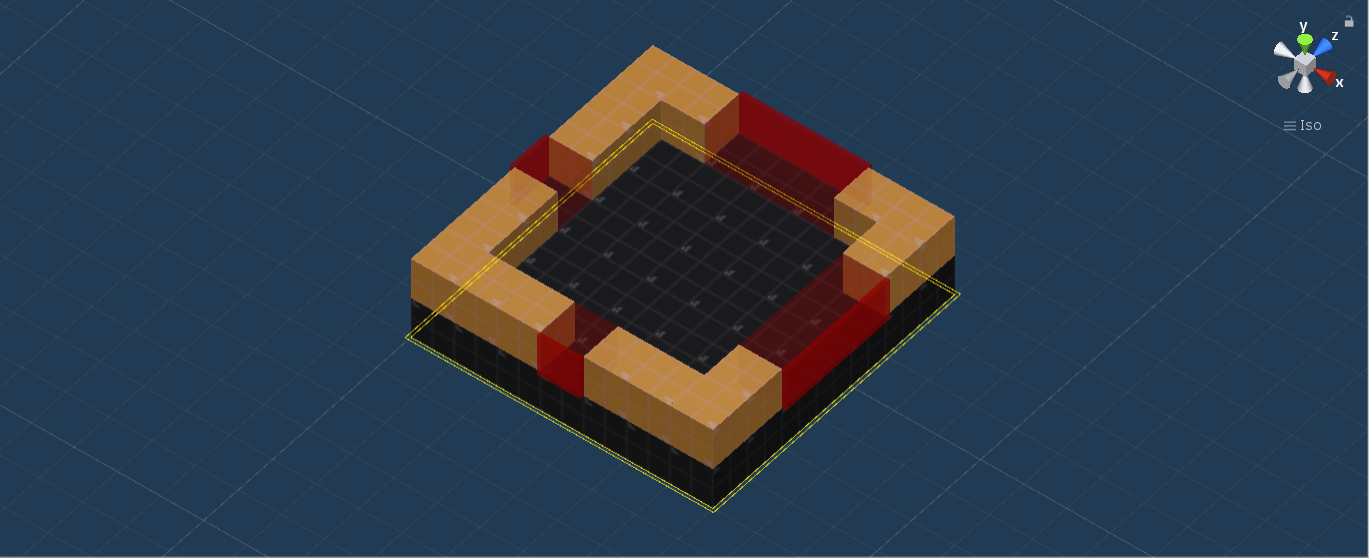
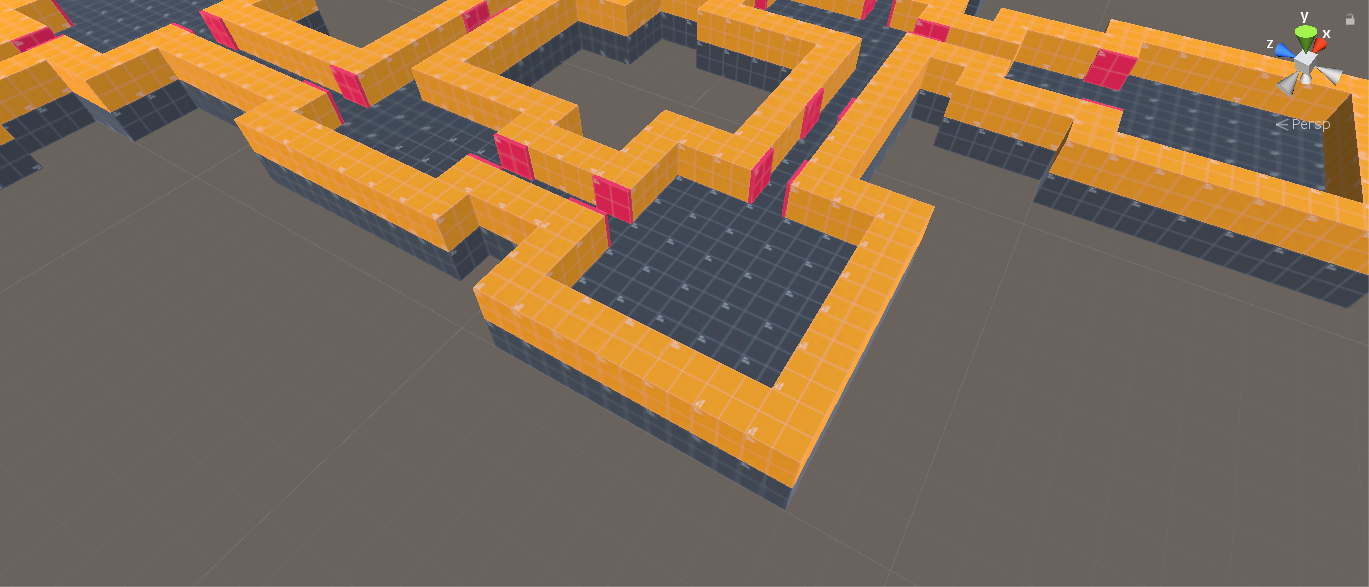
The result should look something like the image below (left). If everything works correctly, you should see a double yellow line around the outline of the room template.
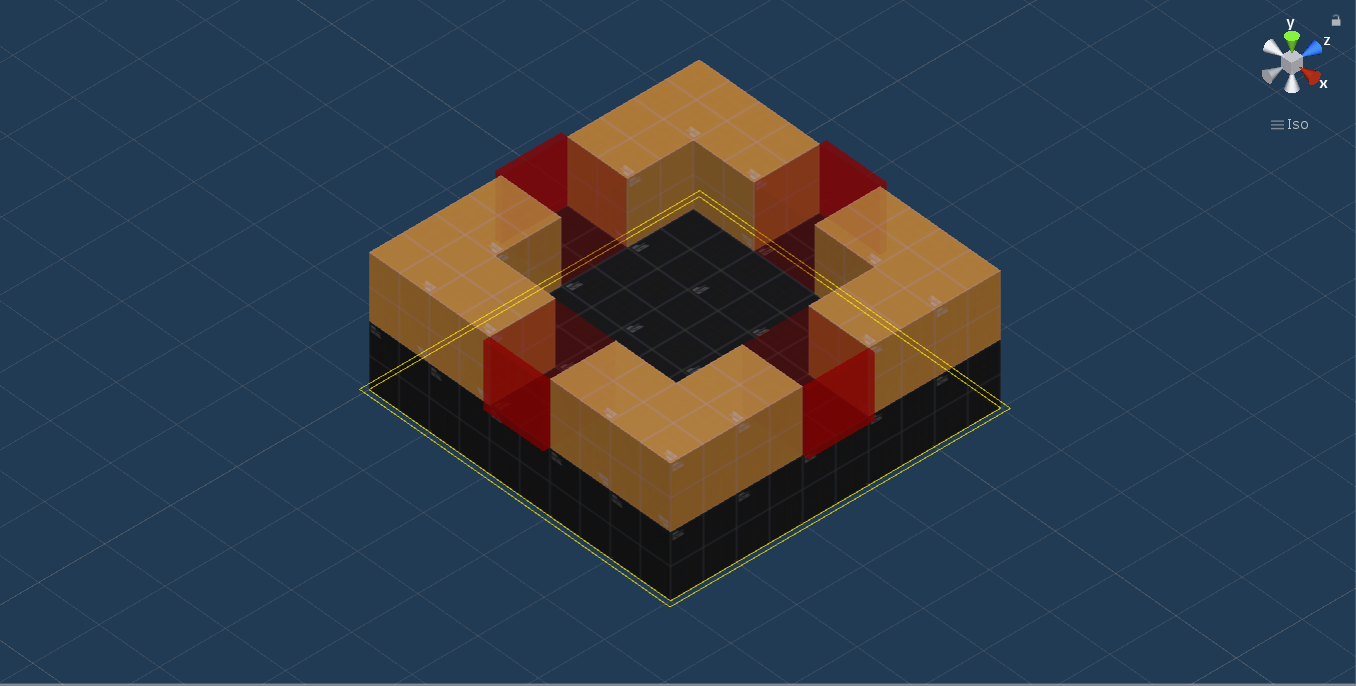
Next, we have to mark the doors. Use the prefab that we created previously and place it under the Doors game object. For each door, use the Rotate -90/Rotate +90 buttons to rotate the door in a way the darker-red side points away from the room. The result should look like the image above (right).
Corridors
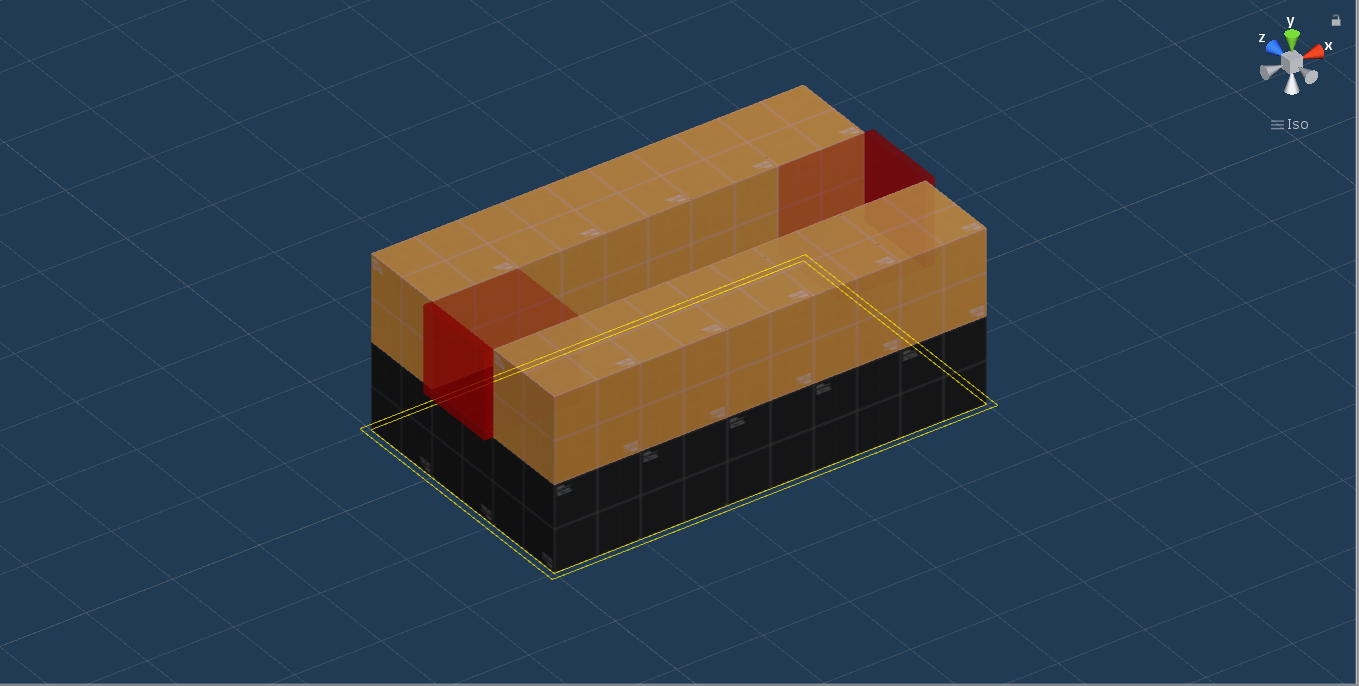
The next step is creating a corridor that will connect rooms. The process is the same as for normal rooms, just make sure that there are exactly two doors.
Level graph
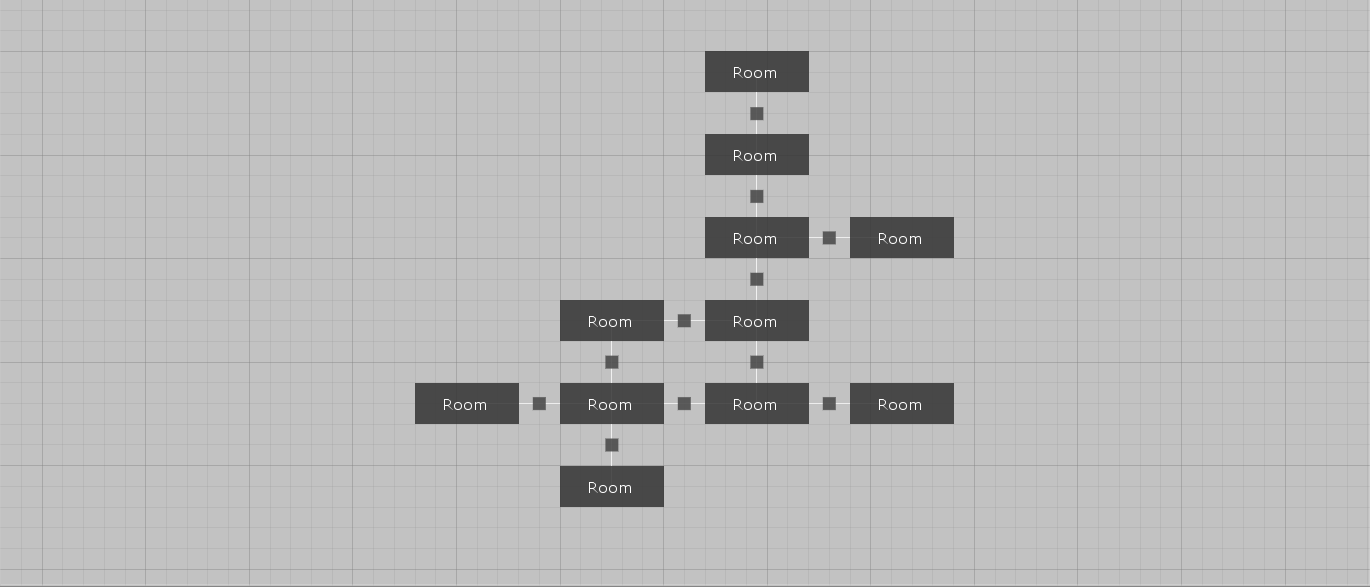
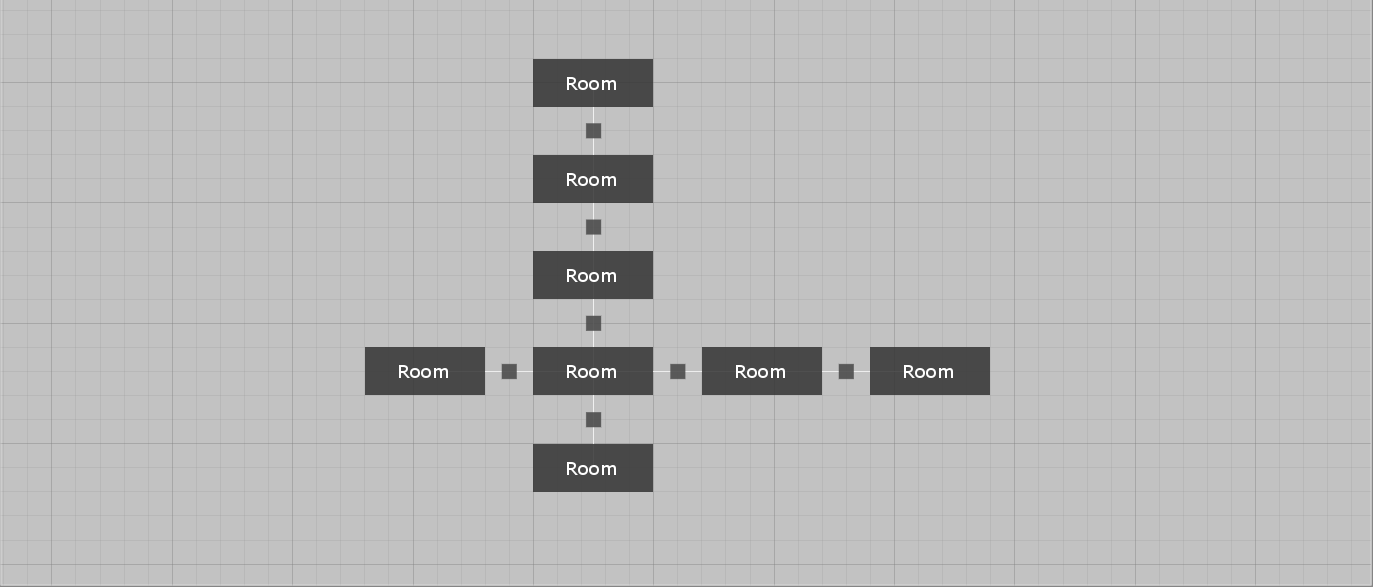
For this simple variant of this example, we will use a very simple acyclic level graph that will guarantee superfast generation times.
Door blockers
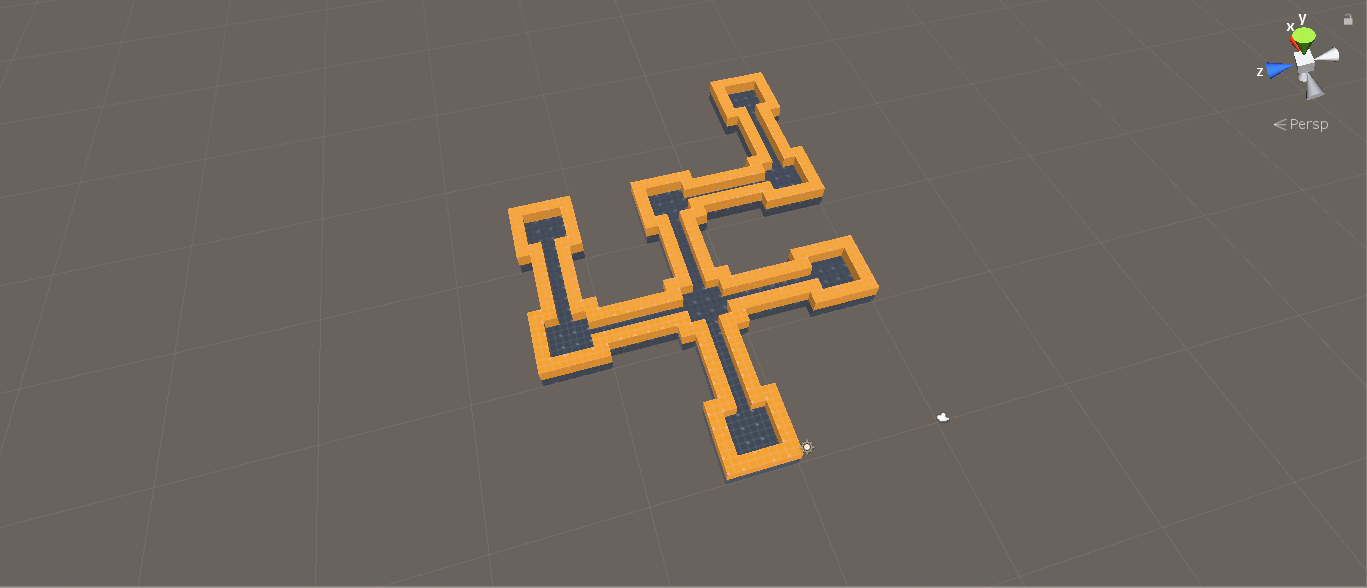
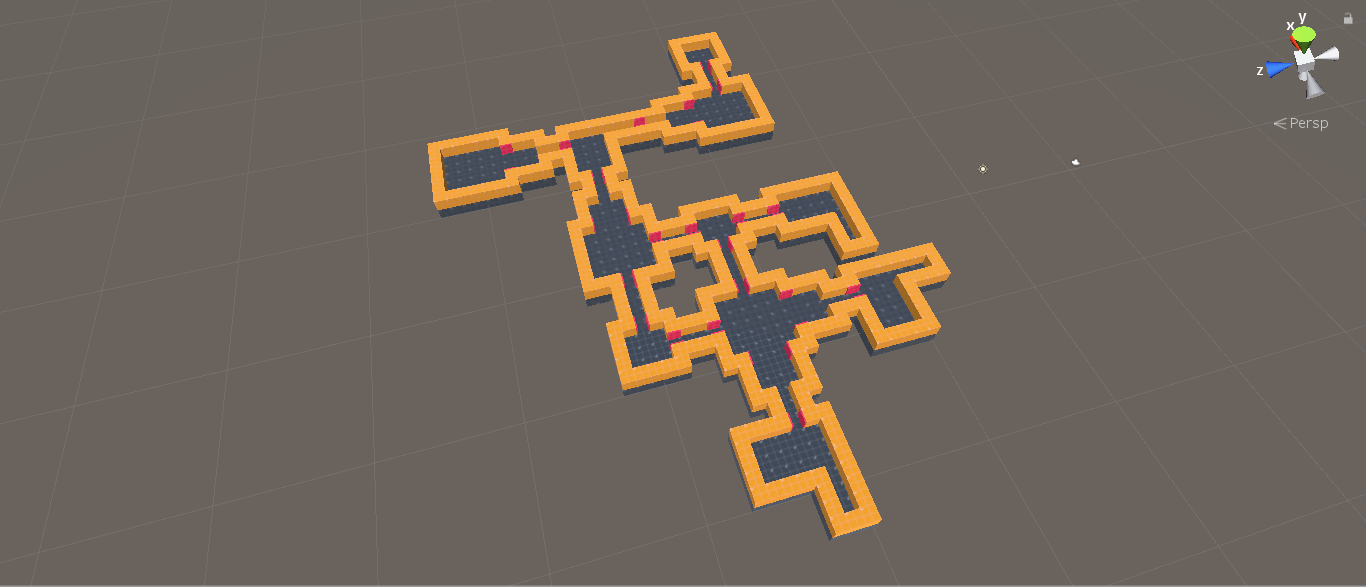
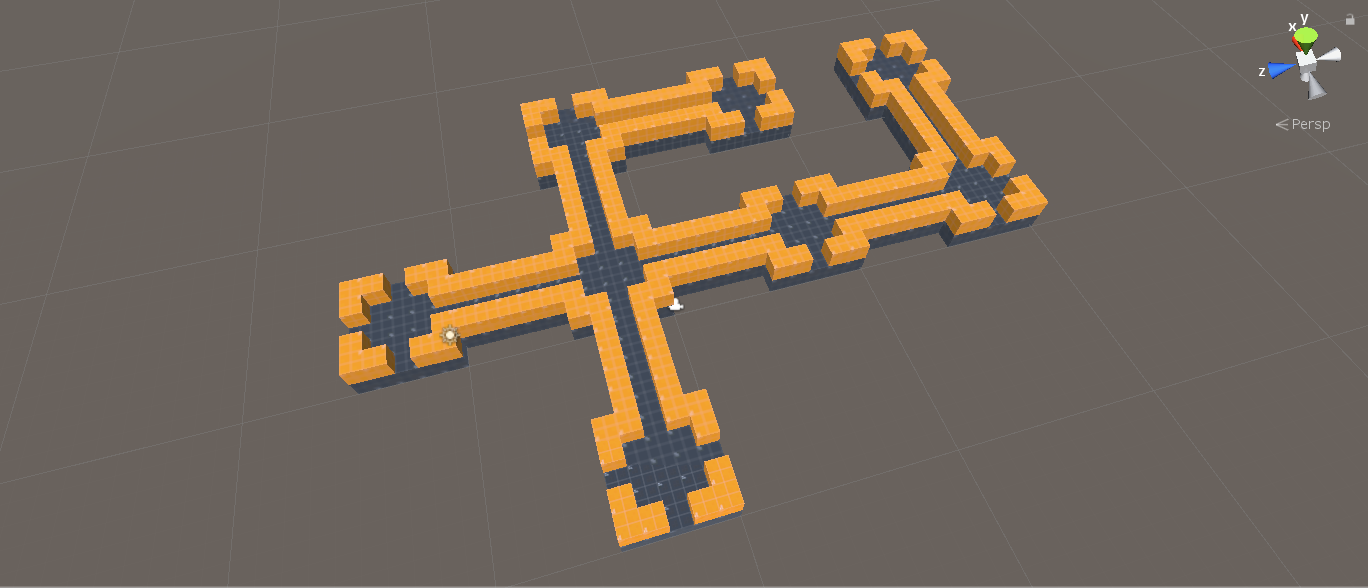
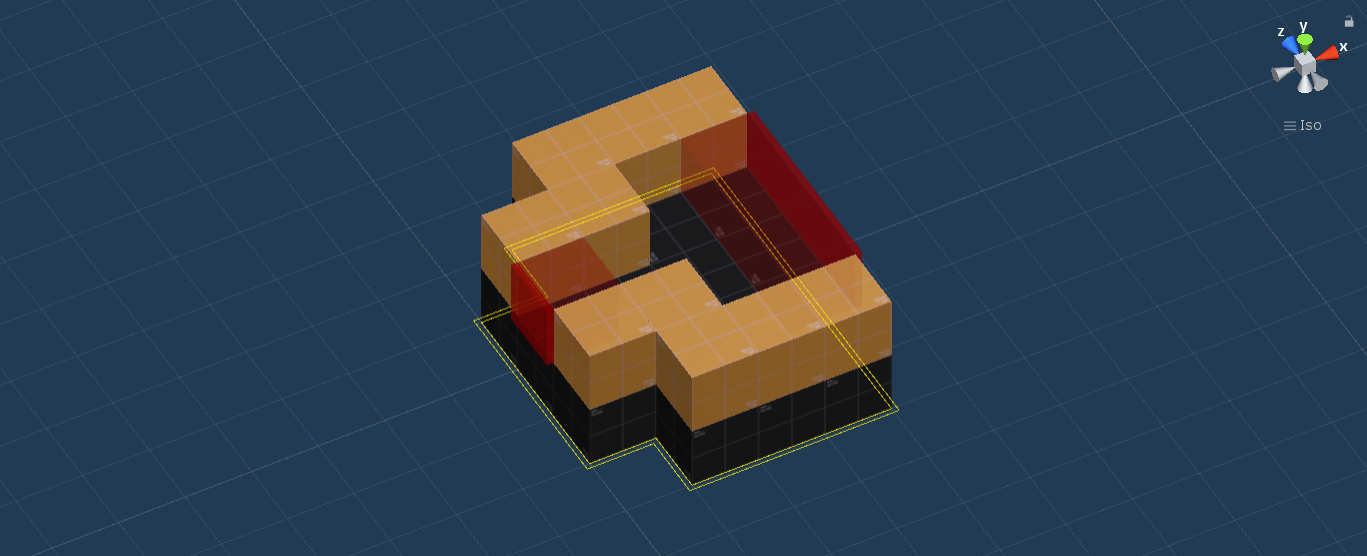
If we now generate a level, we will get something similar to the image below. As you can see, there are holes at the places where we marked potential doors, which were later not used by the generator.
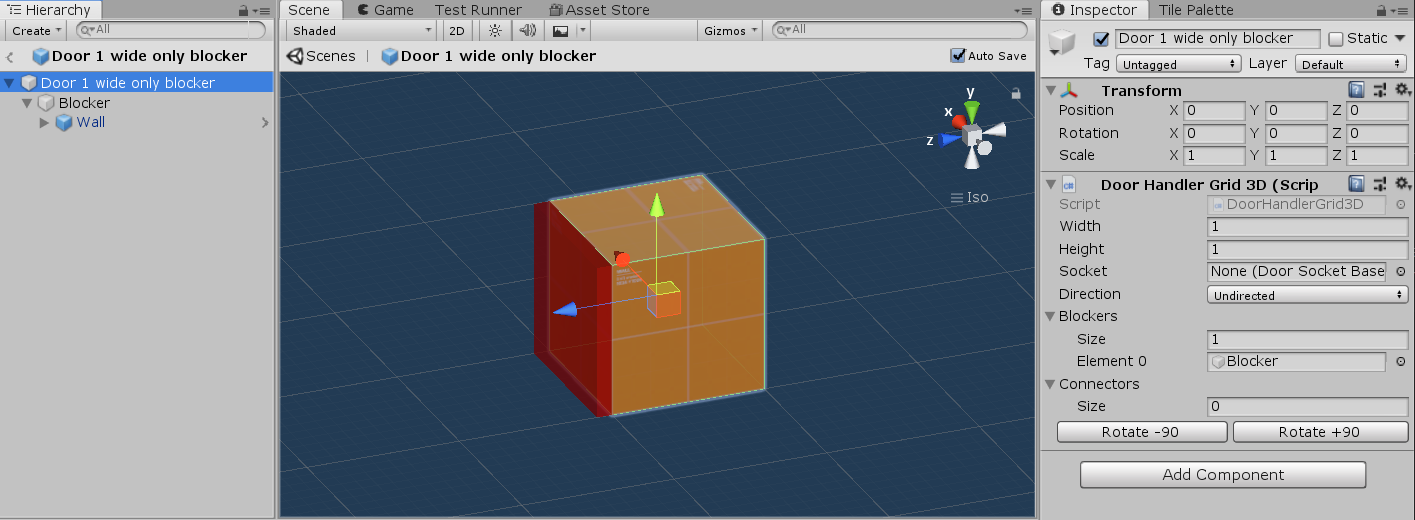
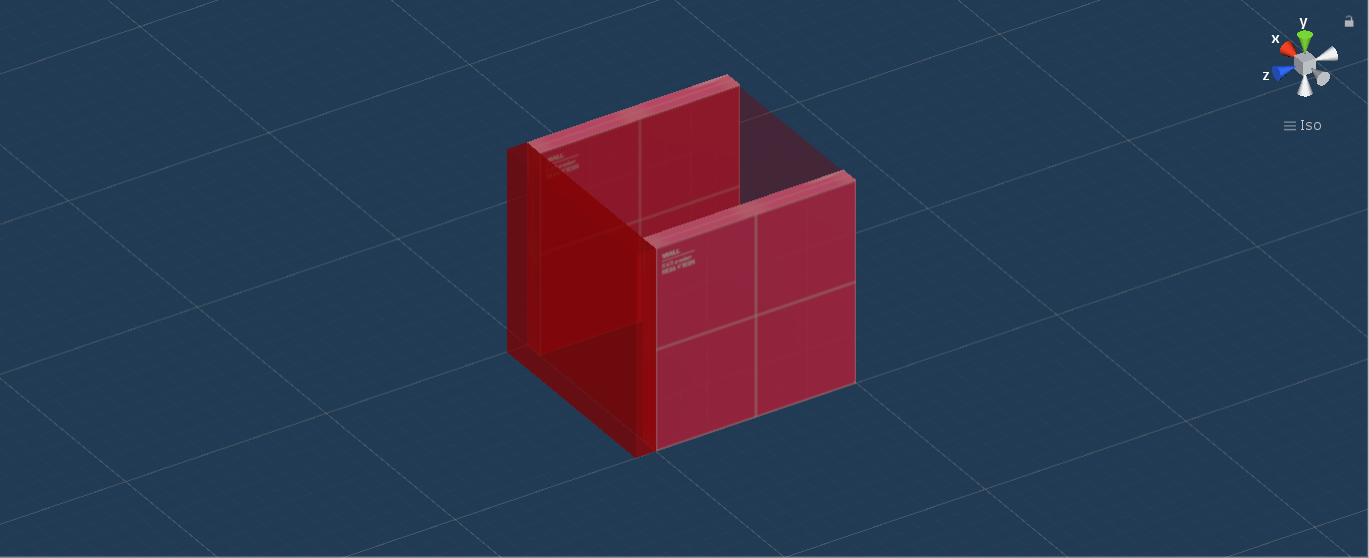
The solution to this problem is so-called door blockers. These are game objects that will be used when a door is not connected to any other room in a generated level. Open the door prefab, create an empty child game object called Blocker and inside place anything that you want to block the door with when not used. For this example, I used the wall block prefab. Also, make sure that the blocker is correctly aligned to the red door gizmo.
The last step is to assign the blocker game object to the Blockers field in the Door Handler Grid 3D script. By doing so, you let the generator know that the Blocker is not an ordinary game object and needs some special care after a level is generated.
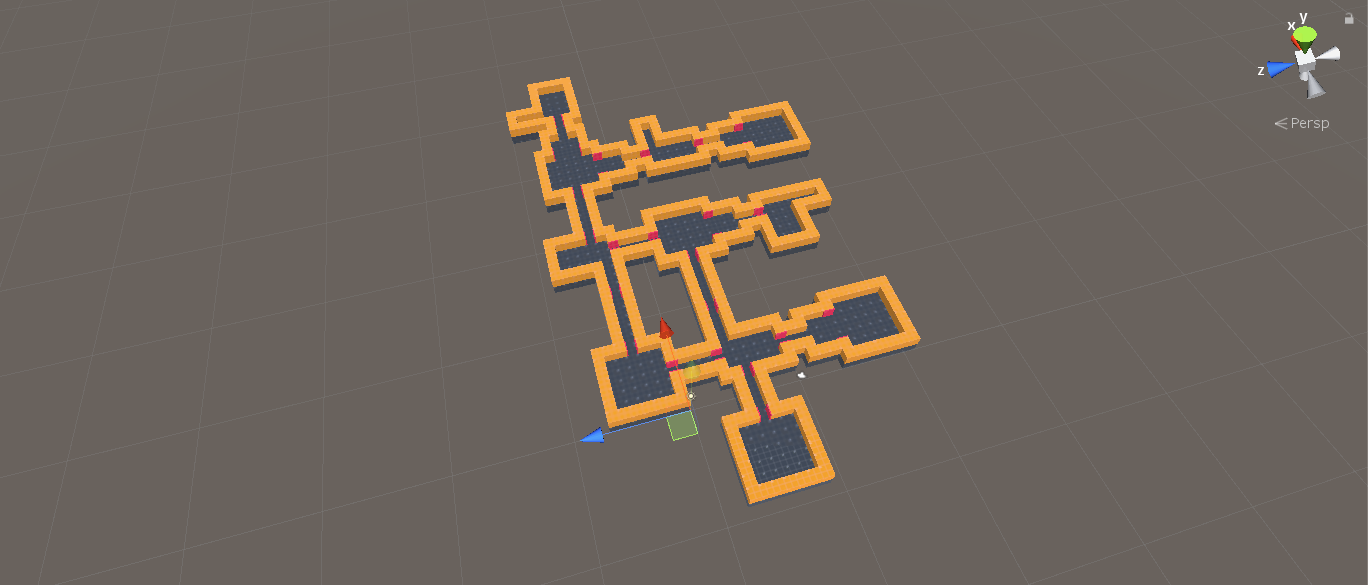
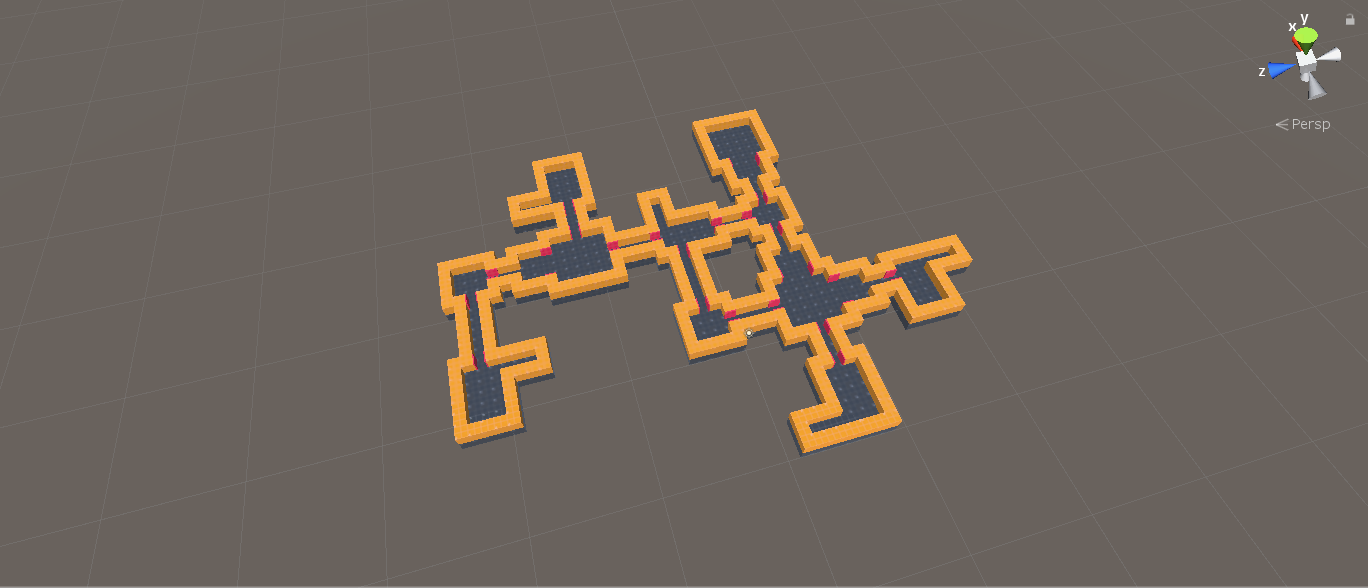
Results
Real-life example
Additional room templates
We can create some more room templates to make the levels more diverse.

Wider doors
We can also use doors that are wider than a single block - just increase the Width parameter on the Door Handler script.
Door connectors
Previously, we used a door blocker to make sure that a door hole is blocked if it is not used. But we can also do the opposite thing - use a so-called door connector each time a door used. We can use that to place some decorations around doors.
The process is the same as for blockers. Create a child object called Connector and place any decorations inside. Then assign this game object to the Connectors field of the Door Handler script.
Level graph
We will use a level graph that contains a cycle. However, you must be very careful when using cycles in level graphs. For example, with the current set of room templates and corridors, it is very hard to generate a cycle that contains exactly 5 rooms. The reason is that there are only a very few ways of arranging the rooms and corridors so that they can form a cycle on 5 rooms. But if we use a cycle that contains 4 or 6 rooms, everything gets much simpler and the generator can produce a level quite quickly.