Multi-tile rules
This feature makes it possible to define rules that span multiple tiles in a level.

Multi-tile rules
It's very simple to create a multi-tile rule. Just select the Multi-tile rule output and click the Add output button:
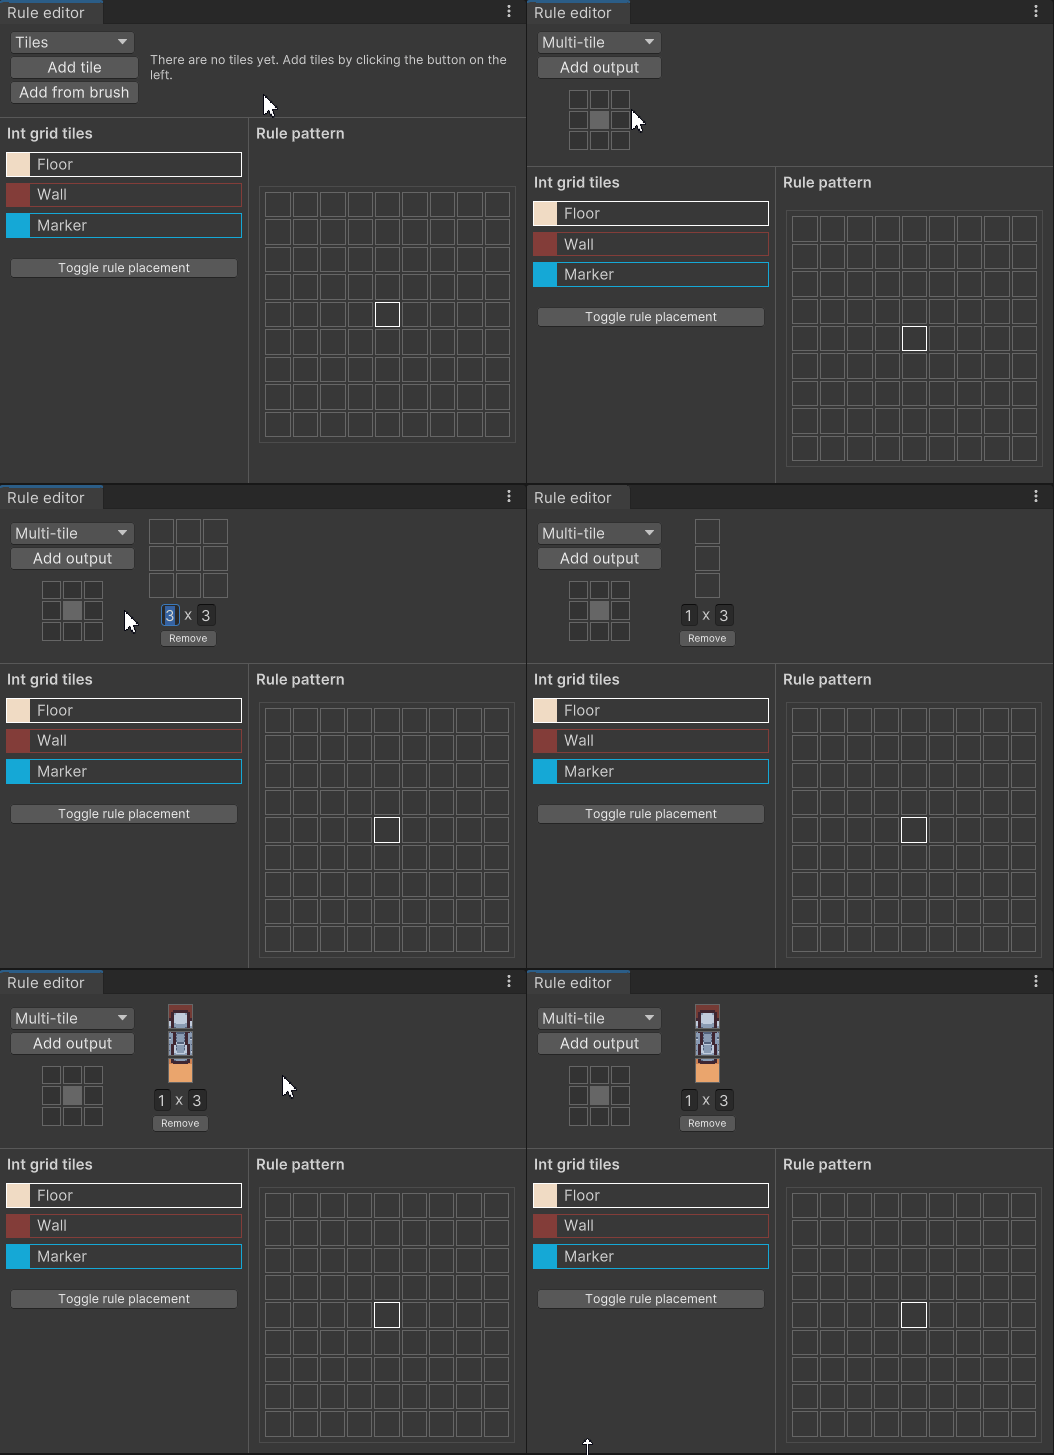
The multi-tile output has the following controls when clicking on individual cells:
- left click to paste the tile selected in the current brush
- right click to open a dialog window to select the tile
- middle click to remove the tile
Rule anchor
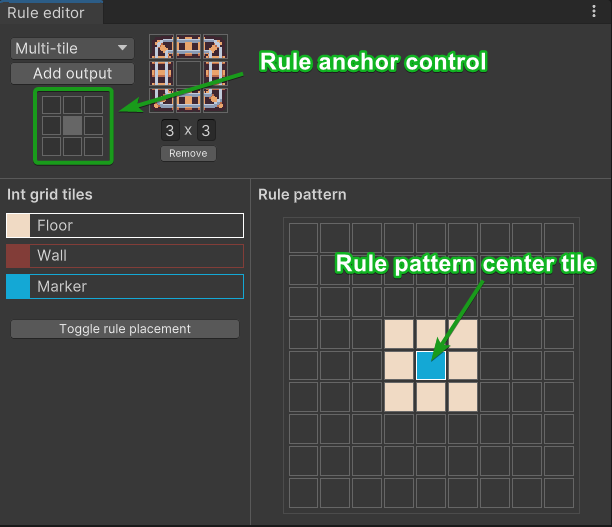
When working with multi-tile rules, it is important to understand the concept of the rule anchor. The rule anchor controls the position of the multi-tile output relative to the center tile of the rule pattern.
Let's apply the rule to a level like this:
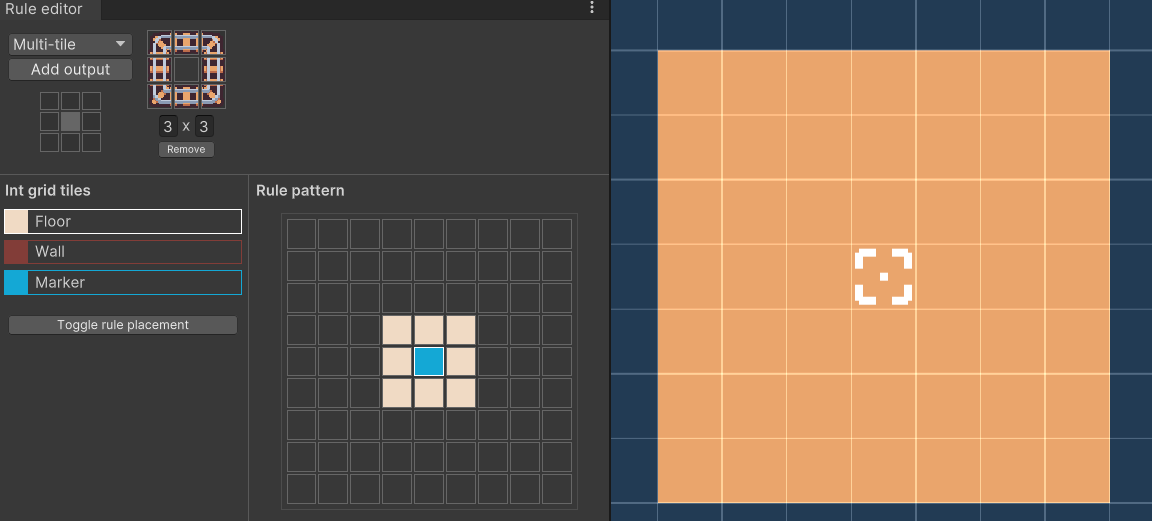
We will get this result because the anchor is in the center, so the marker tile ends up in the center of the multi-tile rule:
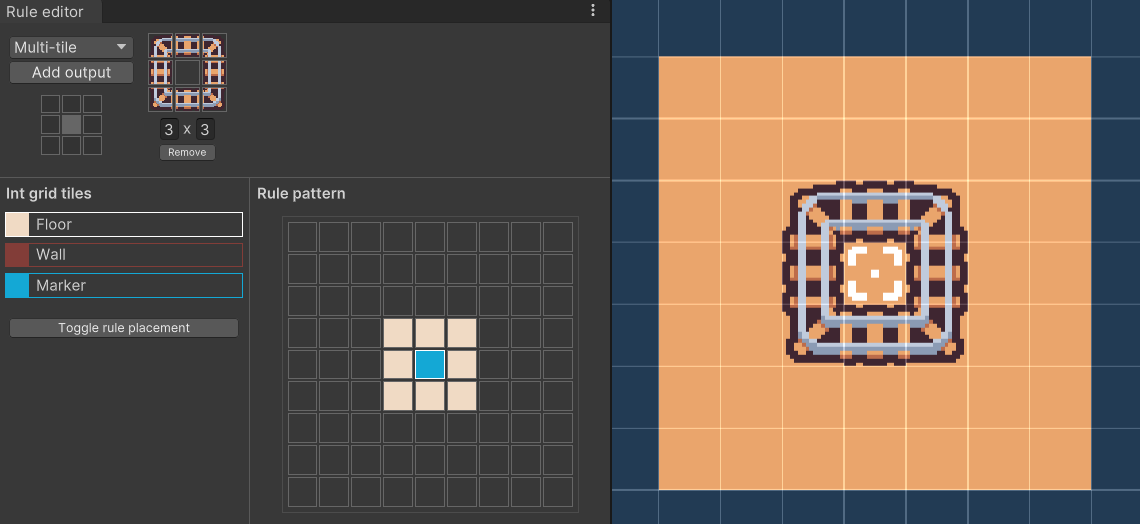
If we move the anchor to the bottom left corner, the marker tile will end up in the bottom left corner of the multi-tile rule:
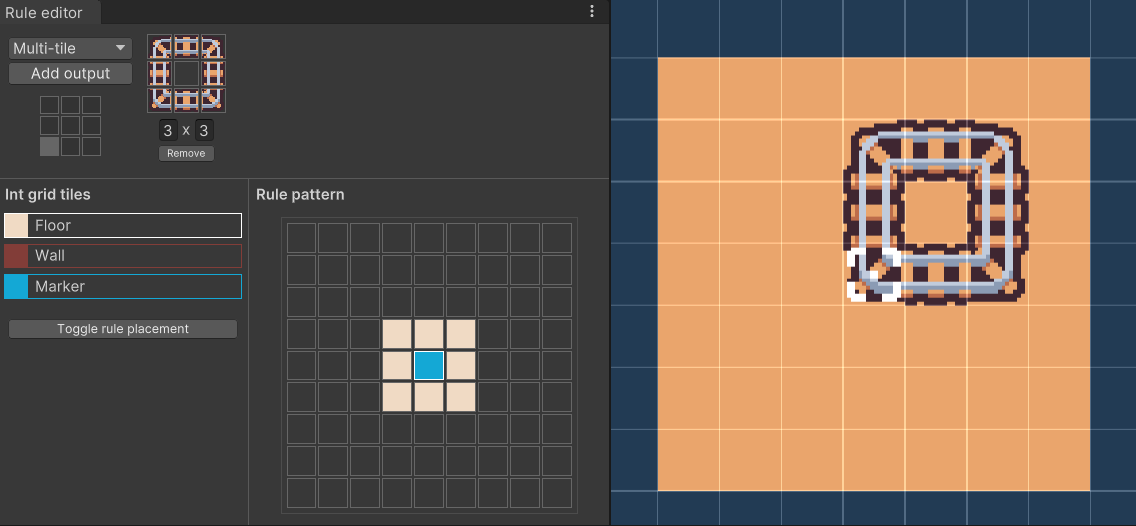
It's very important to understand the rule anchor concept as it affects how you define the rule pattern.
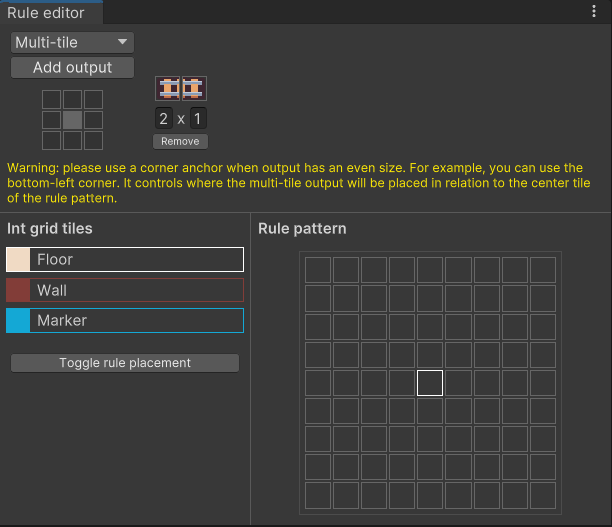
There's one caveat with the rule anchor: if you have a rule that has an even size in one dimension, you'll get a warning if your anchor is not set to one of the corners. This is because we need to be able to place the rule in a way that fits the grid, and with even-sized outputs, the result might be unintuitive.
Multi-tile game objects
It is also possible to define multi-tile rules with game objects. This is done by creating a game object output as usual and then changing the size of the output.
Rule anchor
We already discussed rule anchors in the previous section, but there are some important differences when working with game objects. The rule of thumb is that the rule anchor should be the same as the anchor point of the game object itself. For example, if you have a game object that has an anchor point in the center, you should set the rule anchor to the center. Similarly, if you have a game object that has an anchor point in the bottom left corner, you should set the rule anchor to the bottom left corner.
One tricky aspect is that the rule anchor is the same for all outputs in the rule, which means that either all the game objects should have the same anchor point, or you should split the rule into multiple rules with independent anchor points.
Caveats
Only rectangular shapes are supported
Only rectangular shapes can be used when defining rules. This means it is not possible to have a rule consisting of multiple tiles in shapes like a cross or a T shape.

Not a constraint solver
The theme engine is not a constraint solver. This means that multi-tile rules should not be used to assemble levels made of intricate multi-tile pieces that require precise positioning. You should always have a fallback single-tile rule that will fill the gaps between multi-tile rules.
Level editor flickering
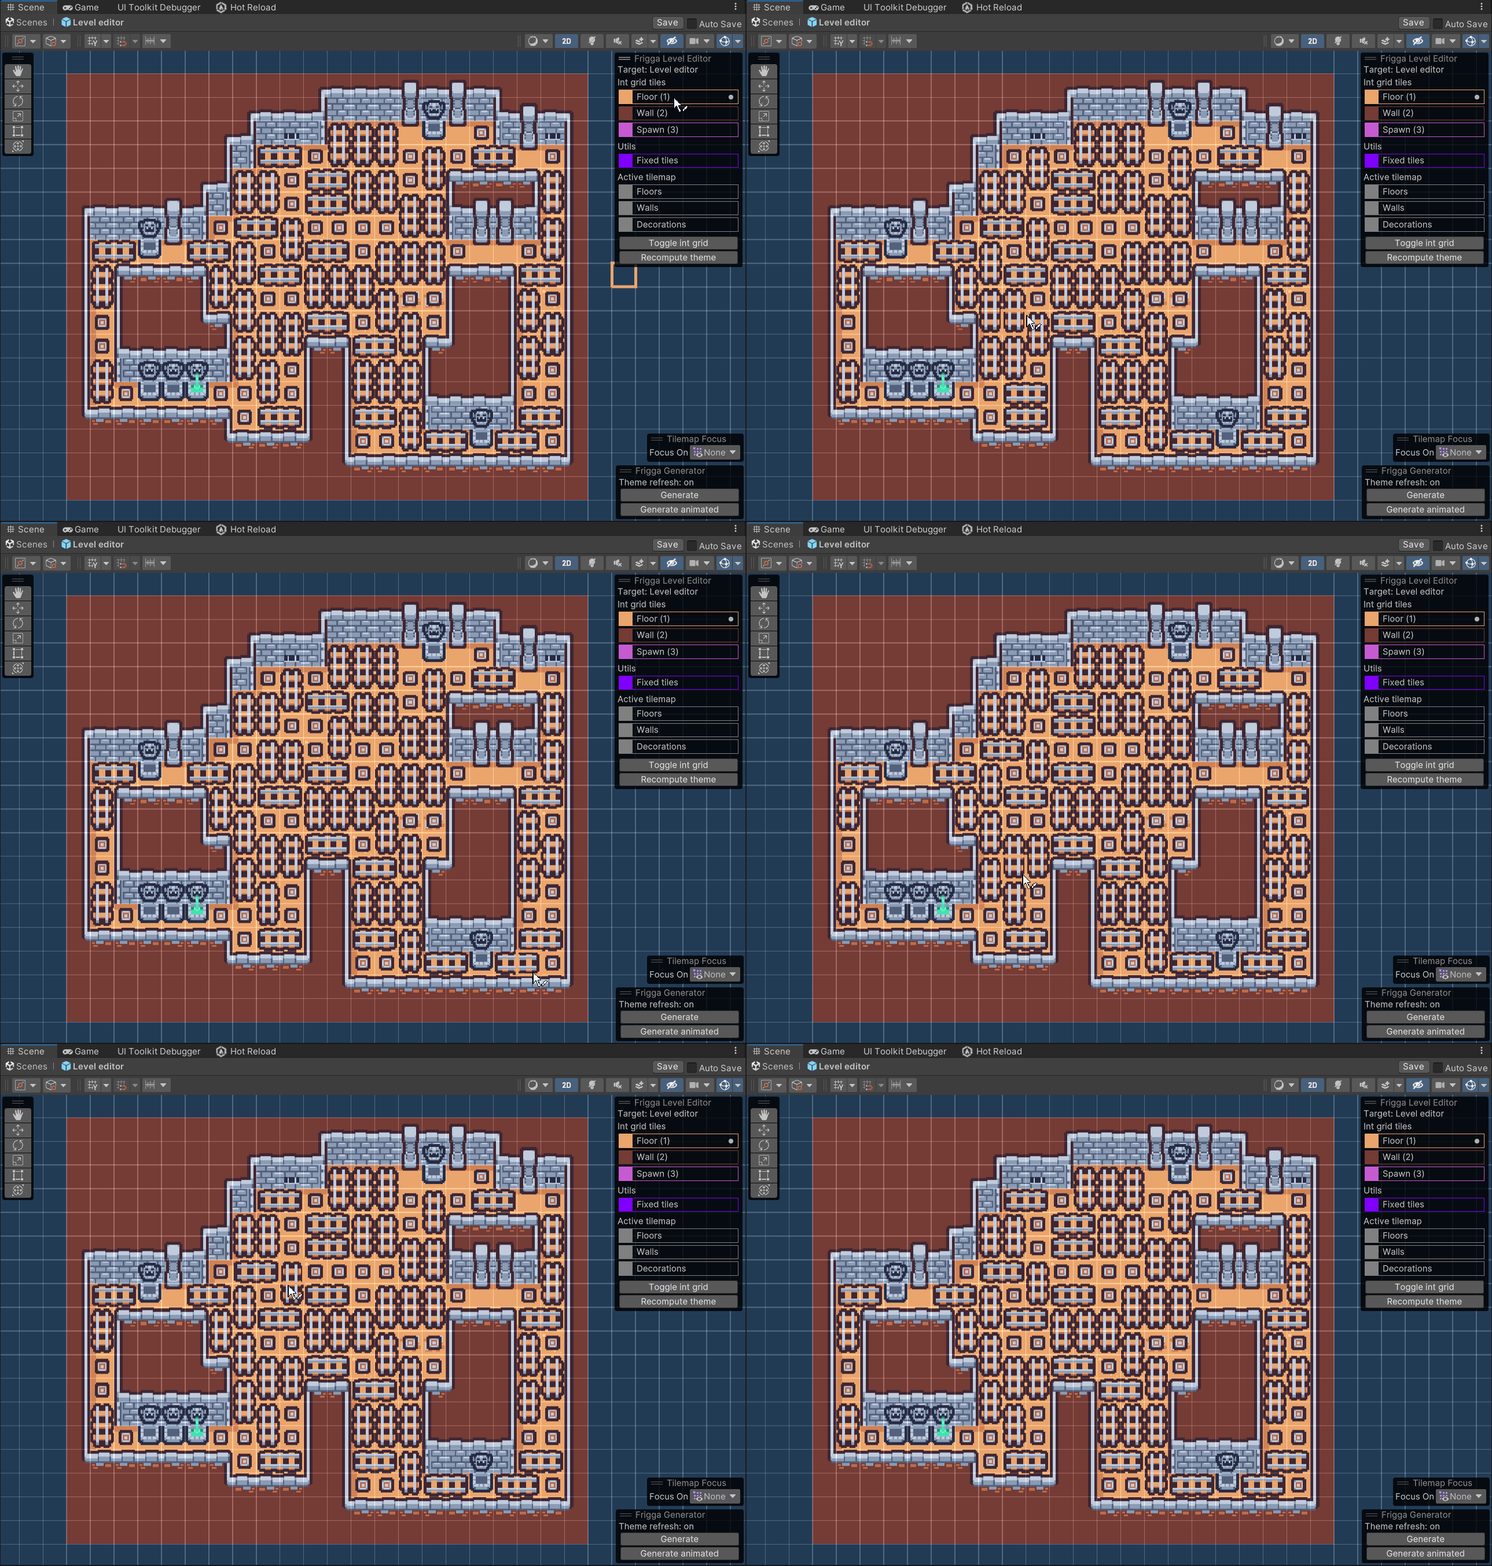
When using multi-tile rules inside the Level editor, you might notice that the multi-tile rules change positions even though you haven't changed the underlying int grid. This occurs because the Level editor recomputes only a small part of the whole level, which means that rules might be applied in a different order. Since multi-tile rules affect their neighbors, their overall positions might change.
Rule placements
All multi-tile rules must contain the Cell placement because there can be at most one multi-tile rule applied to each cell in a theme layer. If the Cell placement is not provided, it will be added automatically when the rule is processed.