Basics
On this page, we learn the basics of using the theme engine.
Theme
Theme is the entry point to the whole theme engine. It is a scriptable object that can be created by right-clicking in the project view and going to Create -> Frigga -> Theme. You need to create a theme first before using the procedural generator.

Configuration
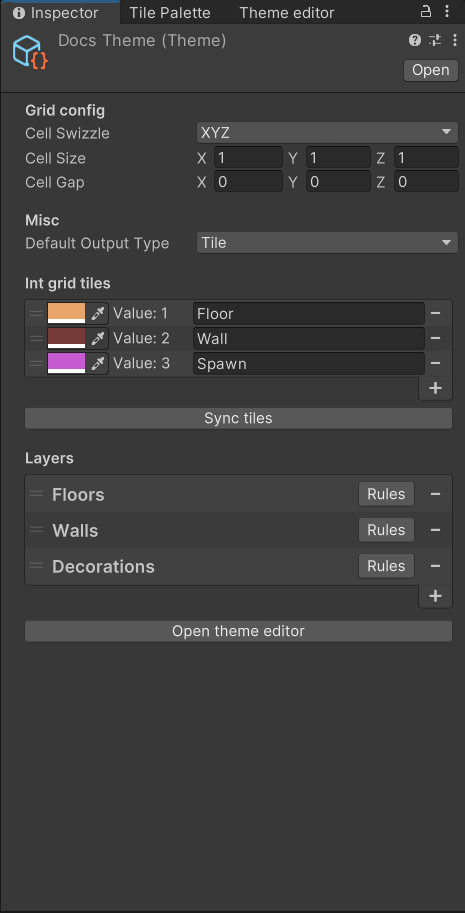
At the top of the inspector window, we can see a few configurable fields.
- Cell Swizzle - orientation of generated levels
- Cell Size - the size of cells in generated levels
- Cell Gap - the gap between cells
- Default Output Type - whether the default output of rules should be Tiles or Game objects, comes in handy for 3D levels where Game objects are usually used as the primary output type
Make sure to change the Cell Swizzle to XZY if you want to generate 3D levels.
Int grid tiles
We already talked about the Int grid in the section dedicated to it. To sum it up, Int grid is a simplified level representation that the layout generator works with. Int grid tiles are single-color tiles that are used in the layout before we apply actual graphics.
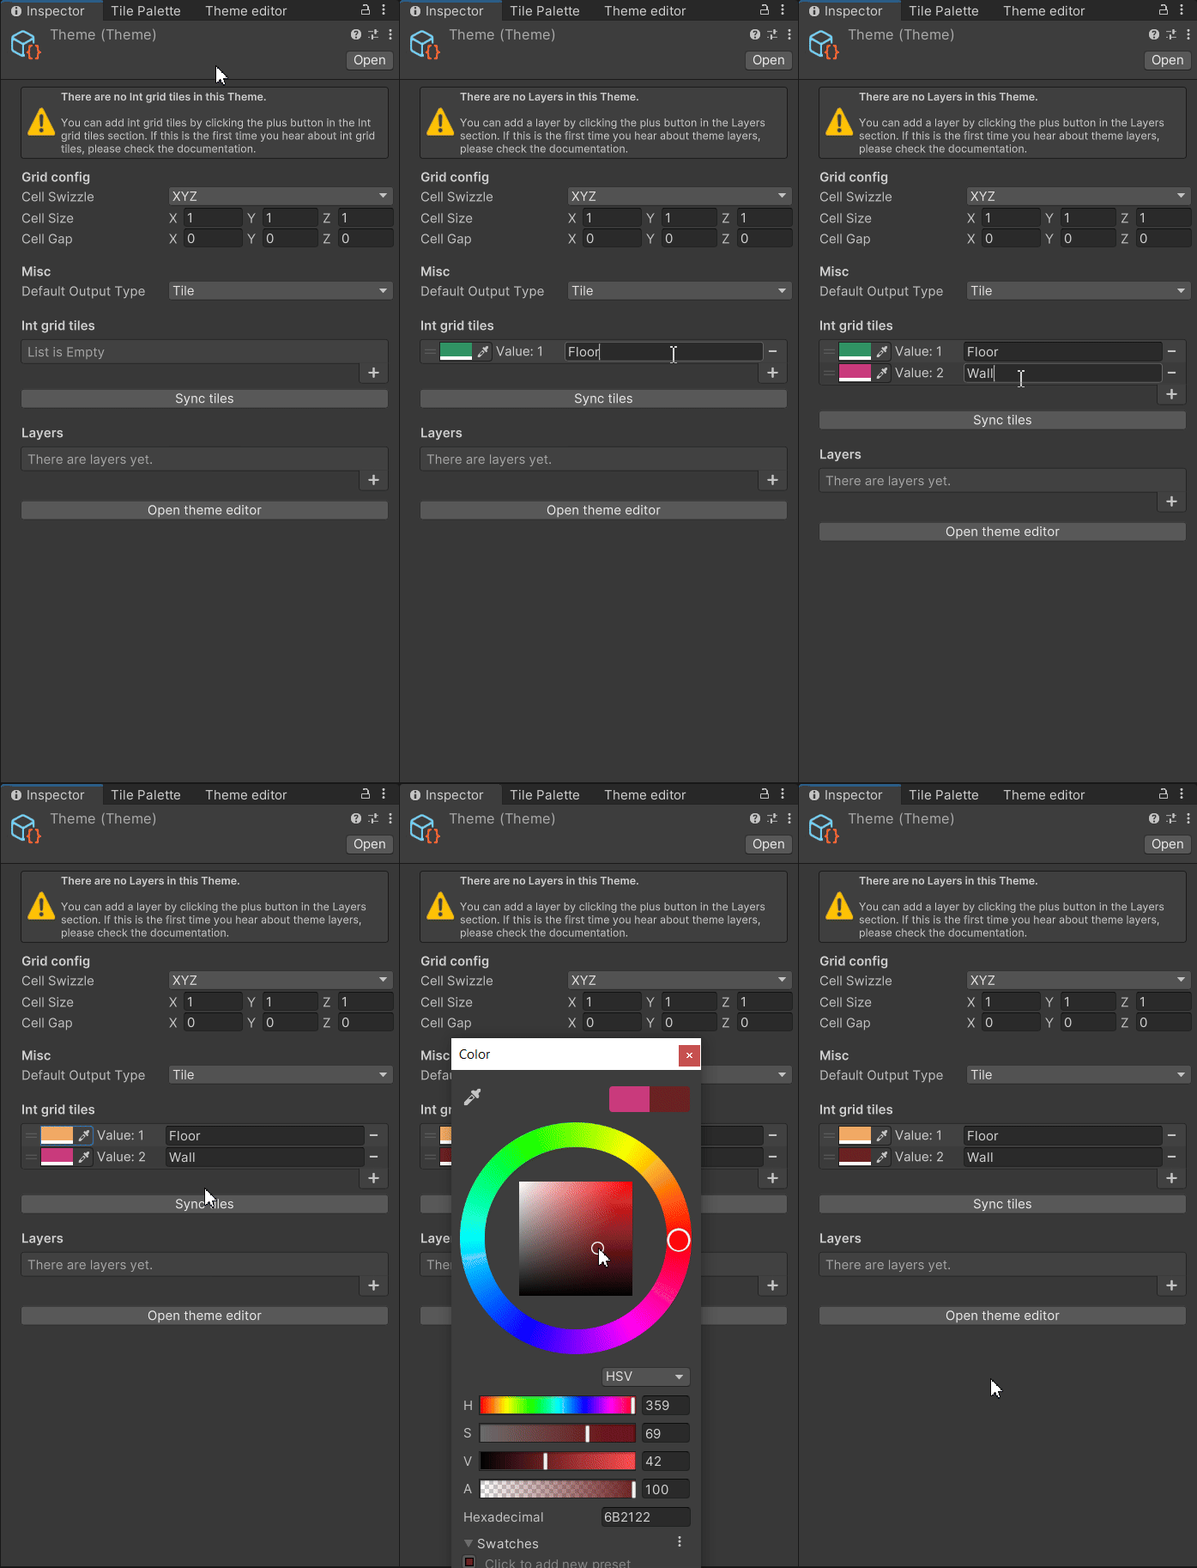
Int grid tiles are defined for each theme separately. The most common setup is to start with 2 int grid tiles - one for walkable areas and one for unwalkable areas. For example, we could have Walls and Floor, or Ground and Water, whatever fits your needs. After you create the tiles, it is a good idea to assign meaningful colors to them so that they can be easily recognized.

Below the tiles, you can see a Sync tiles button. This button needs to be used whenever you change the Cell size inside the theme because we need to recreate the tiles to use the new size. After syncing the tiles, you might need to regenerate any level that you generated before changing the Cell Size.
Layers
Theme Layers make it possible to place multiple tiles or game objects at the same position inside a level. Each layer will produce a game object with a Tilemap component attached to it.
The way Frigga works is that there can always be at most one rule applied for each tile/cell in a single layer. That means that if we want to place an enemy on top of a floor tile, we need to have at least 2 layers. This applies to both 2D and 3D levels.
My go-to structure for layers is the following:
- Floor
- Walls
- Decorations
We do not strictly need a separate layer for both Floor and Wall tiles but if we do have them, it is later super simple to add different colliders to each layer or to set up a navmesh.
Rule groups and Theme editor
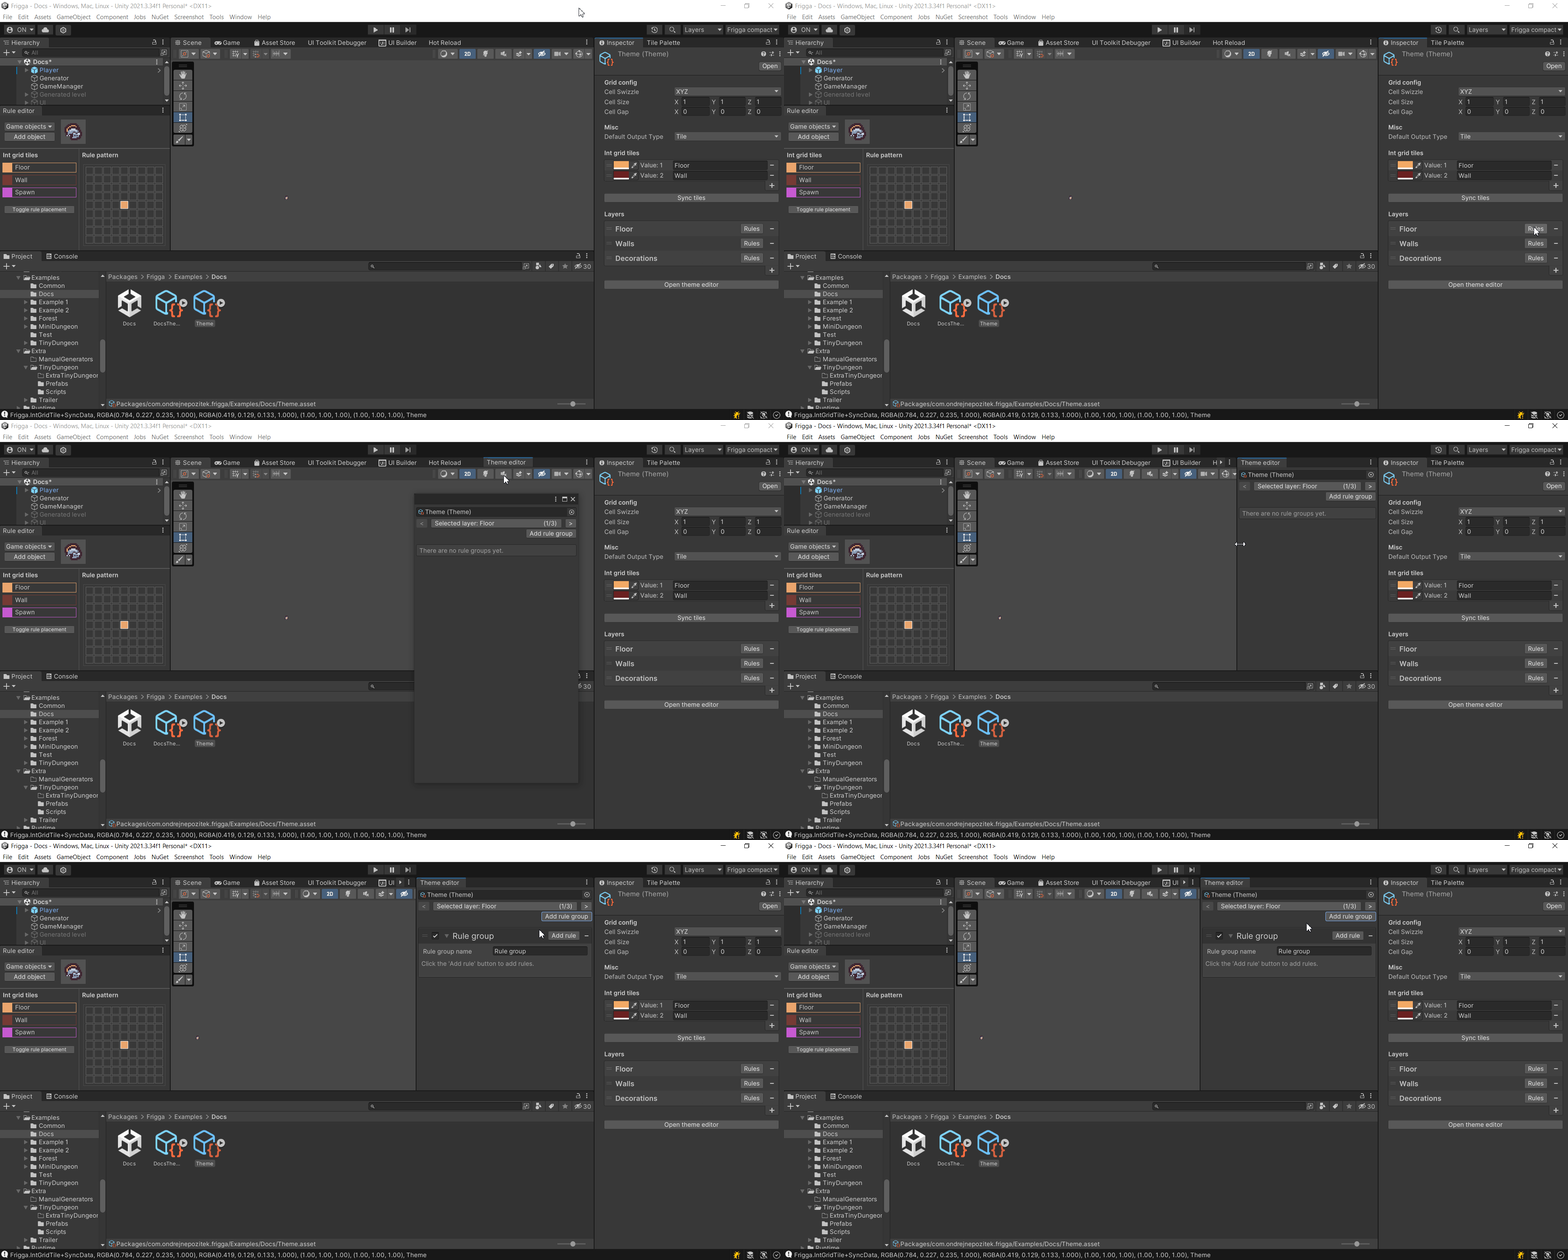
Next to each layer, you can find the Rules button which opens the Theme Editor window and lets you modify the rules of the selected layer. You can also achieve the same by clicking the Open theme editor button.
Before you start adding rules, you need to create at least one Rule group. Rule groups are used solely for organizing rules. If you want, you can create just a single rule group and put all the rules inside. However, there are some benefits to using rule groups. First, you can add names to rule groups and group similar tiles together. Second, you can also disable a whole rule group, disabling all rules inside the group with a single click. Third, you can move rule groups between layers if you right-click on the header.
If you want, you can create just a single rule group and put all the rules inside. However, there are some benefits to using rule groups:
- You can add names to rule groups and group similar tiles together.
- You can also disable a whole rule group, disabling all rules inside the group with a single click.
- You can move rule groups between layers if you right-click on the header.

Rules
Rules are probably the most important part of a Theme so they have a whole next page dedicated to them.