Basics
In this example, we will generate a very simple level consisting of 5 rooms with rectangular shapes.
Room templates
First, we will create our room templates. To do that, we need to create a polygon that defines the outline of the room template and also provide a list of possible door positions.
Outline
In the Grid2D setting, the outline of a room template is an orthogonal polygon where each point has integer coordinates. In other words, it is a polygon that we can draw on an integer grid using 1x1 square tiles.
The first outline that we create is a 6x10 rectangle:
var squareRoomOutline = new PolygonGrid2DBuilder().AddPoint(0, 0).AddPoint(0, 10).AddPoint(6, 10).AddPoint(6, 0).Build();
Note: Orthogonal (or rectilinear) polygon is a polygon of whose edge intersections are at right angles. When on an integer grid, each side of an orthogonal polygon is aligned with one of the axes.
Note: There are several ways of constructing polygons:
PolygonGrid2D.GetSquare(width)for squaresPolygonGrid2D.GetRectangle(width, height)for rectanglesPolygonGrid2DBuilderwith the.AddPoint(x, y)method- or the
PolygonGrid2D(IEnumerable<Vector2Int> points)constructor
Doors
In order to tell the generator how it can connect individual room templates, we need to specify all the available door positions. The main idea is that the more door positions we provide, the easier it is for the generator to find a valid layout. To define door positions, we use the IDoorModeGrid2D interface. The most simple door mode is the SimpleDoorModeGrid2D - it lets us specify the length of doors and how far from corners of the outline they must be. In this tutorial, we will use doors with length of 1 tile and at least 1 tile away from corners.
var doors = new SimpleDoorModeGrid2D(doorLength: 1, cornerDistance: 1);
Note: There is also an additional door mode available -
ManualDoorModeGrid2D. This mode lets you specify exactly which door positions are available. It is useful for example when we want to have doors only on the two opposite sides of a corridor.
Allowed transformations
Optionally, it is also possible to let the generator apply some transformations to the room, e.g. rotate it by 90 degrees or mirror it by the X axis. An advantage of this approach is that the algorithm automatically handles door positions and we do not have to manually define all the variations of the room template.
var transformations = new List<TransformationGrid2D>(){TransformationGrid2D.Identity,TransformationGrid2D.Rotate90};
Putting it all together
We can now combine the outline, door mode and allowed transformations together to create our first room template. We also provide a name which is optional but it may come in handy if we need to debug something.
var rectangleRoomTemplate = new RoomTemplateGrid2D(squareRoomOutline,doors,allowedTransformations: transformations,name: "Rectangle 6x10");
We can also create a room template in-place with a single expression.
var squareRoomTemplate = new RoomTemplateGrid2D(PolygonGrid2D.GetSquare(8),new SimpleDoorModeGrid2D(doorLength: 1, cornerDistance: 1),name: "Square 8x8");
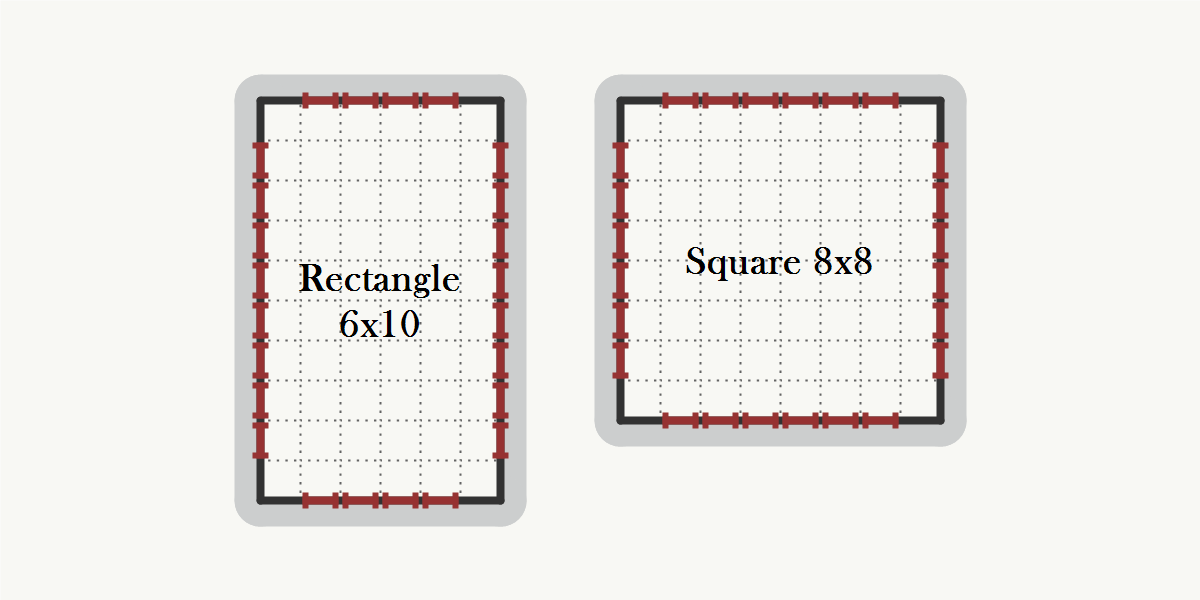
Below we can see a visualization of the two room templates. Individual door positions are shown in red.
Room description
When we have our room templates ready, we need to create an instance of the RoomDescriptionGrid2D class which describes the properties of individual rooms in the level. In this tutorial, all the rooms use the same pool of room templates, so we can create only a single room description and reuse it. However, it is also possible to use different room description for different types of rooms. For example, we may want to have a boss room and a spawn room that should use different room templates than normal rooms.
var roomDescription = new RoomDescriptionGrid2D(isCorridor: false,roomTemplates: new List<RoomTemplateGrid2D>() { rectangleRoomTemplate, squareRoomTemplate });
Level description
The final step is to describe the structure of the level. We will use a very simple graph of rooms that we can see below:

First, we have to create an instance of the LevelDescriptionGrid2D<TRoom> class. For simplicity, We will use integers to identify individual rooms. But it is also possible to use a custom room type by using a different generic type parameter.
var levelDescription = new LevelDescriptionGrid2D<int>();
Next, we add individual rooms to the level description.
levelDescription.AddRoom(0, roomDescription);levelDescription.AddRoom(1, roomDescription);levelDescription.AddRoom(2, roomDescription);levelDescription.AddRoom(3, roomDescription);levelDescription.AddRoom(4, roomDescription);
And lastly, we describe how should individual rooms be connected.
levelDescription.AddConnection(0, 1);levelDescription.AddConnection(0, 3);levelDescription.AddConnection(0, 4);levelDescription.AddConnection(1, 2);levelDescription.AddConnection(2, 3);
Generating the level
To generate the level, we need to create an instance of the GraphBasedGenerator<TRoom> class. As we use integers to identify individual rooms, we will substitute the generic type parameter with int and pass the level description to the constructor of the generator.
var generator = new GraphBasedGeneratorGrid2D<int>(levelDescription);
When we have an instance of the generator, we simply call the GenerateLayout() method and wait until the generator finds a valid layout based on our level description.
var layout = generator.GenerateLayout();
The result contains information about all the rooms in the level such as outline of the room or its position.
Saving the result
If we want to quickly visualize the result, we can use the DungeonDrawer<TRoom> class and export the layout as a PNG image.
var drawer = new DungeonDrawer<int>();drawer.DrawLayoutAndSave(layout, "basics.png", new DungeonDrawerOptions(){Width = 2000,Height = 2000,});
Results
Below you can see some of the results generated from this example:
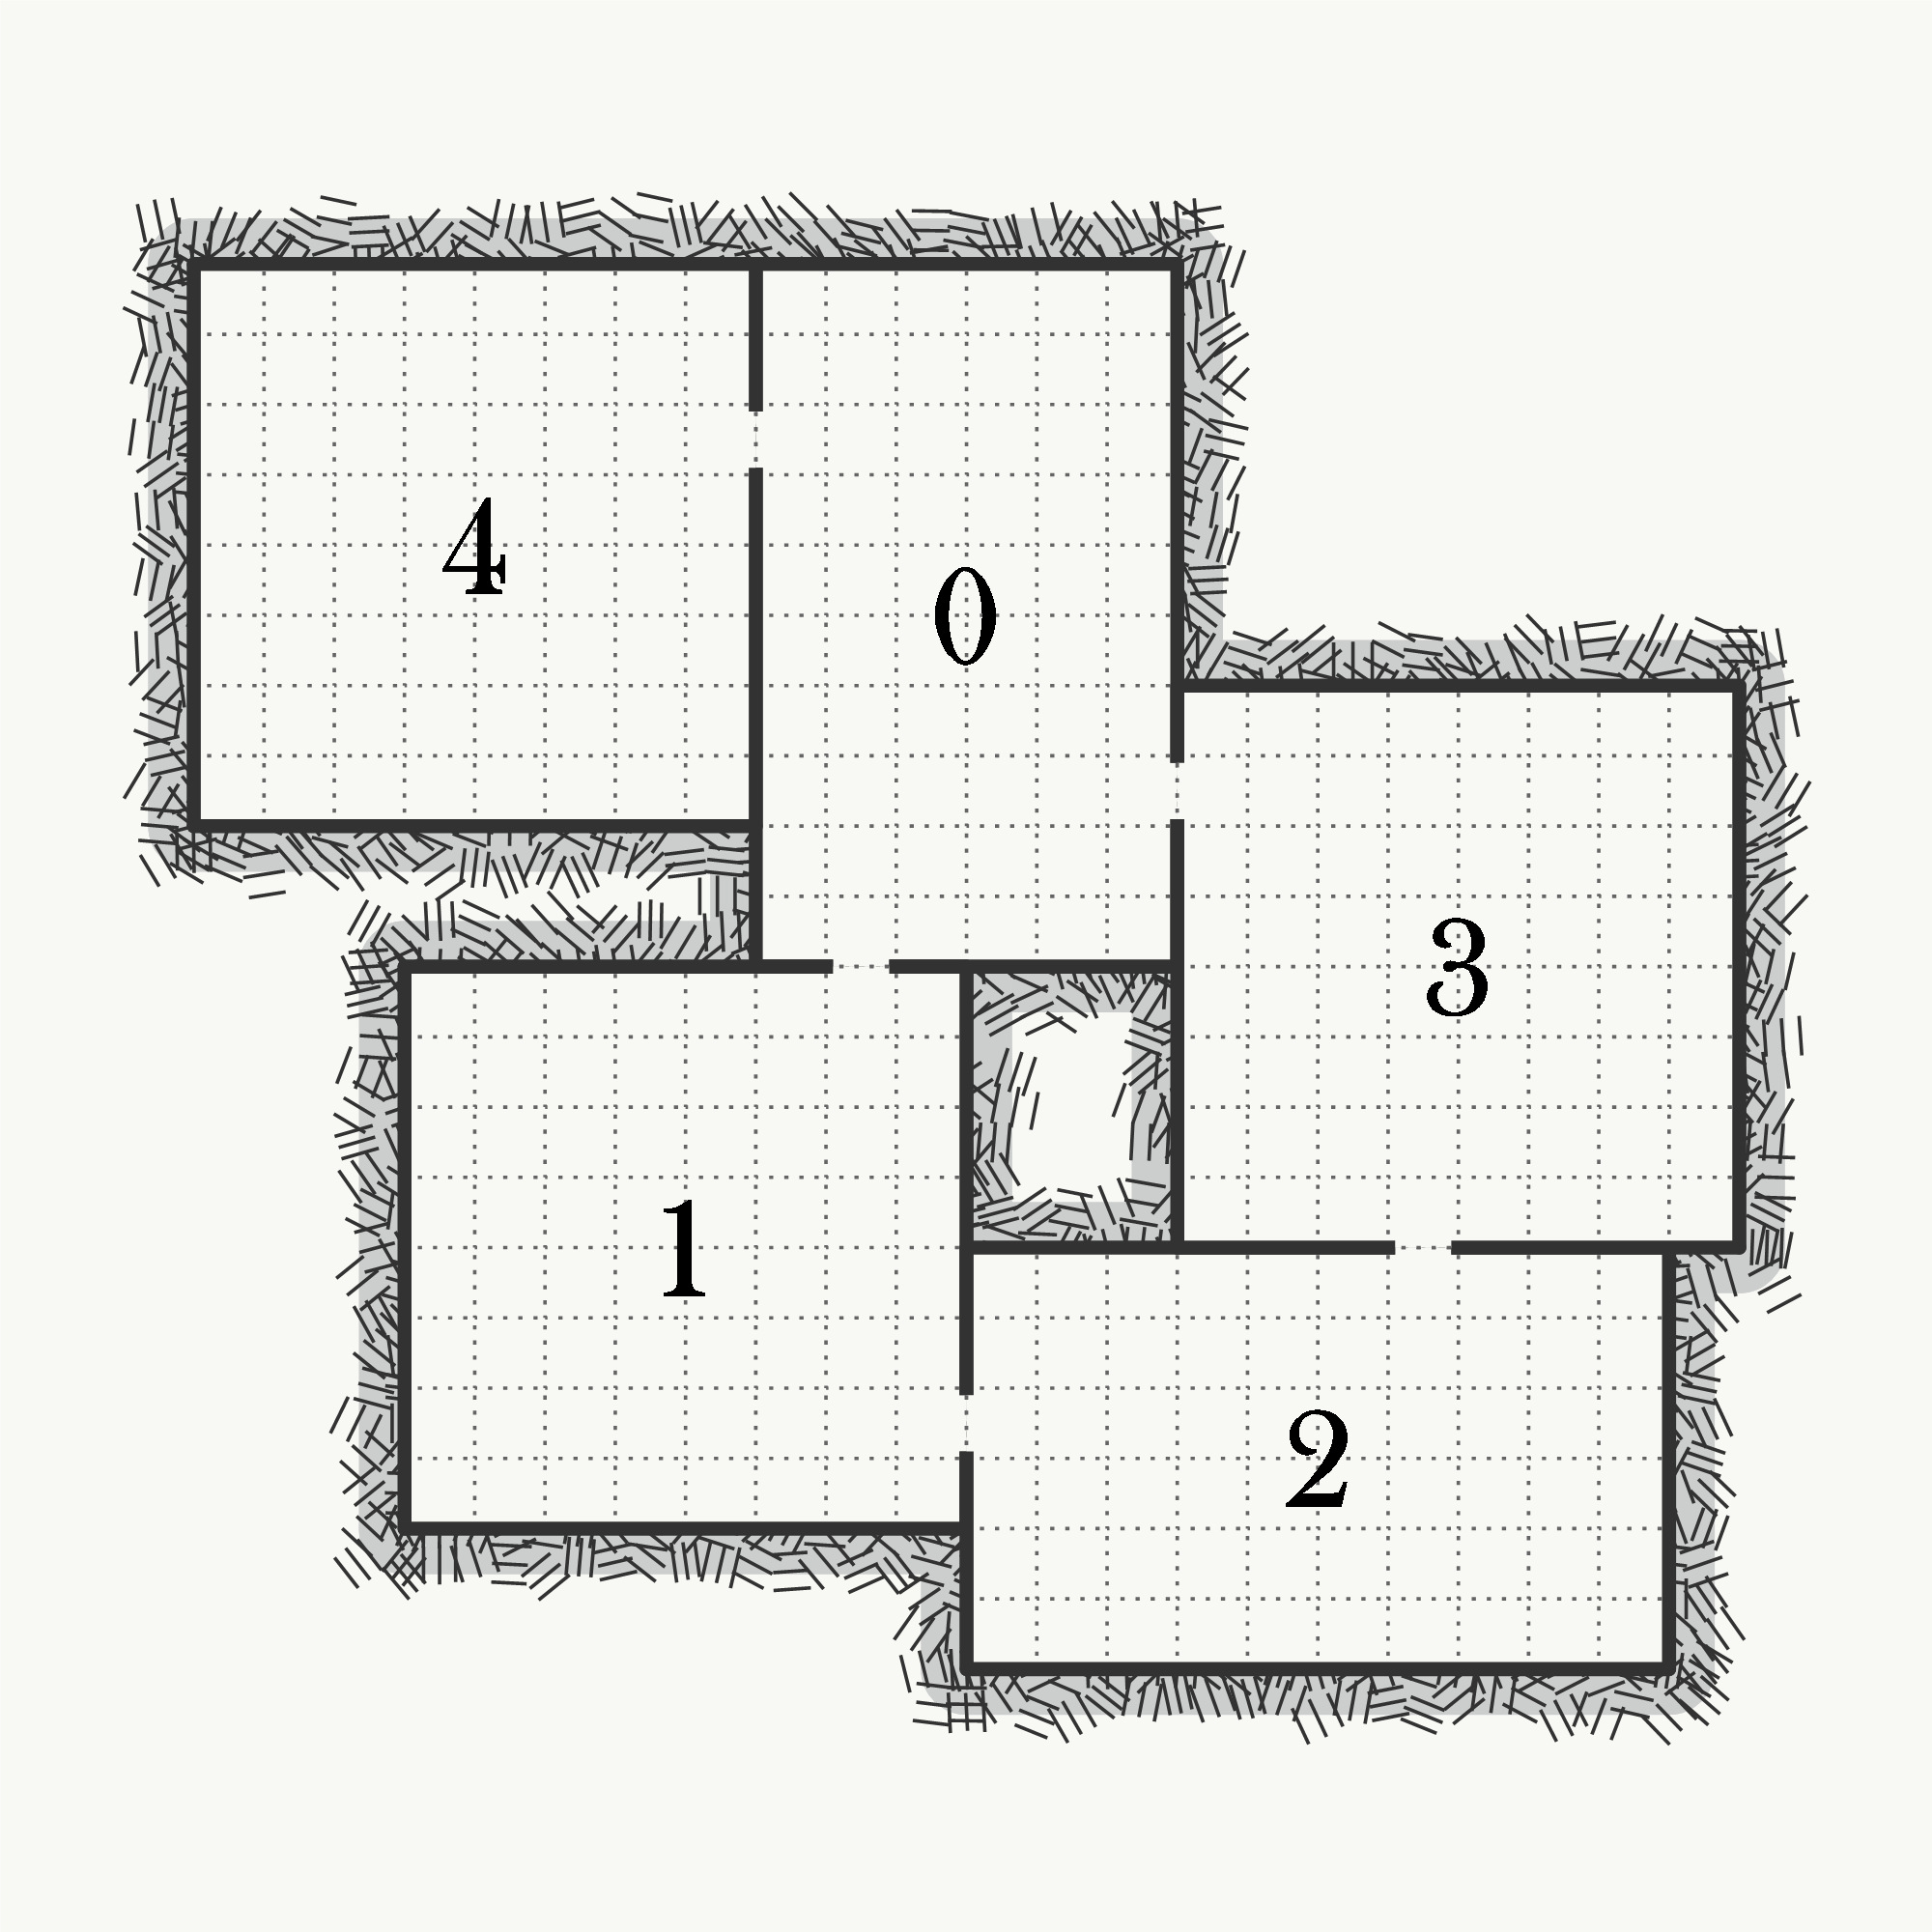
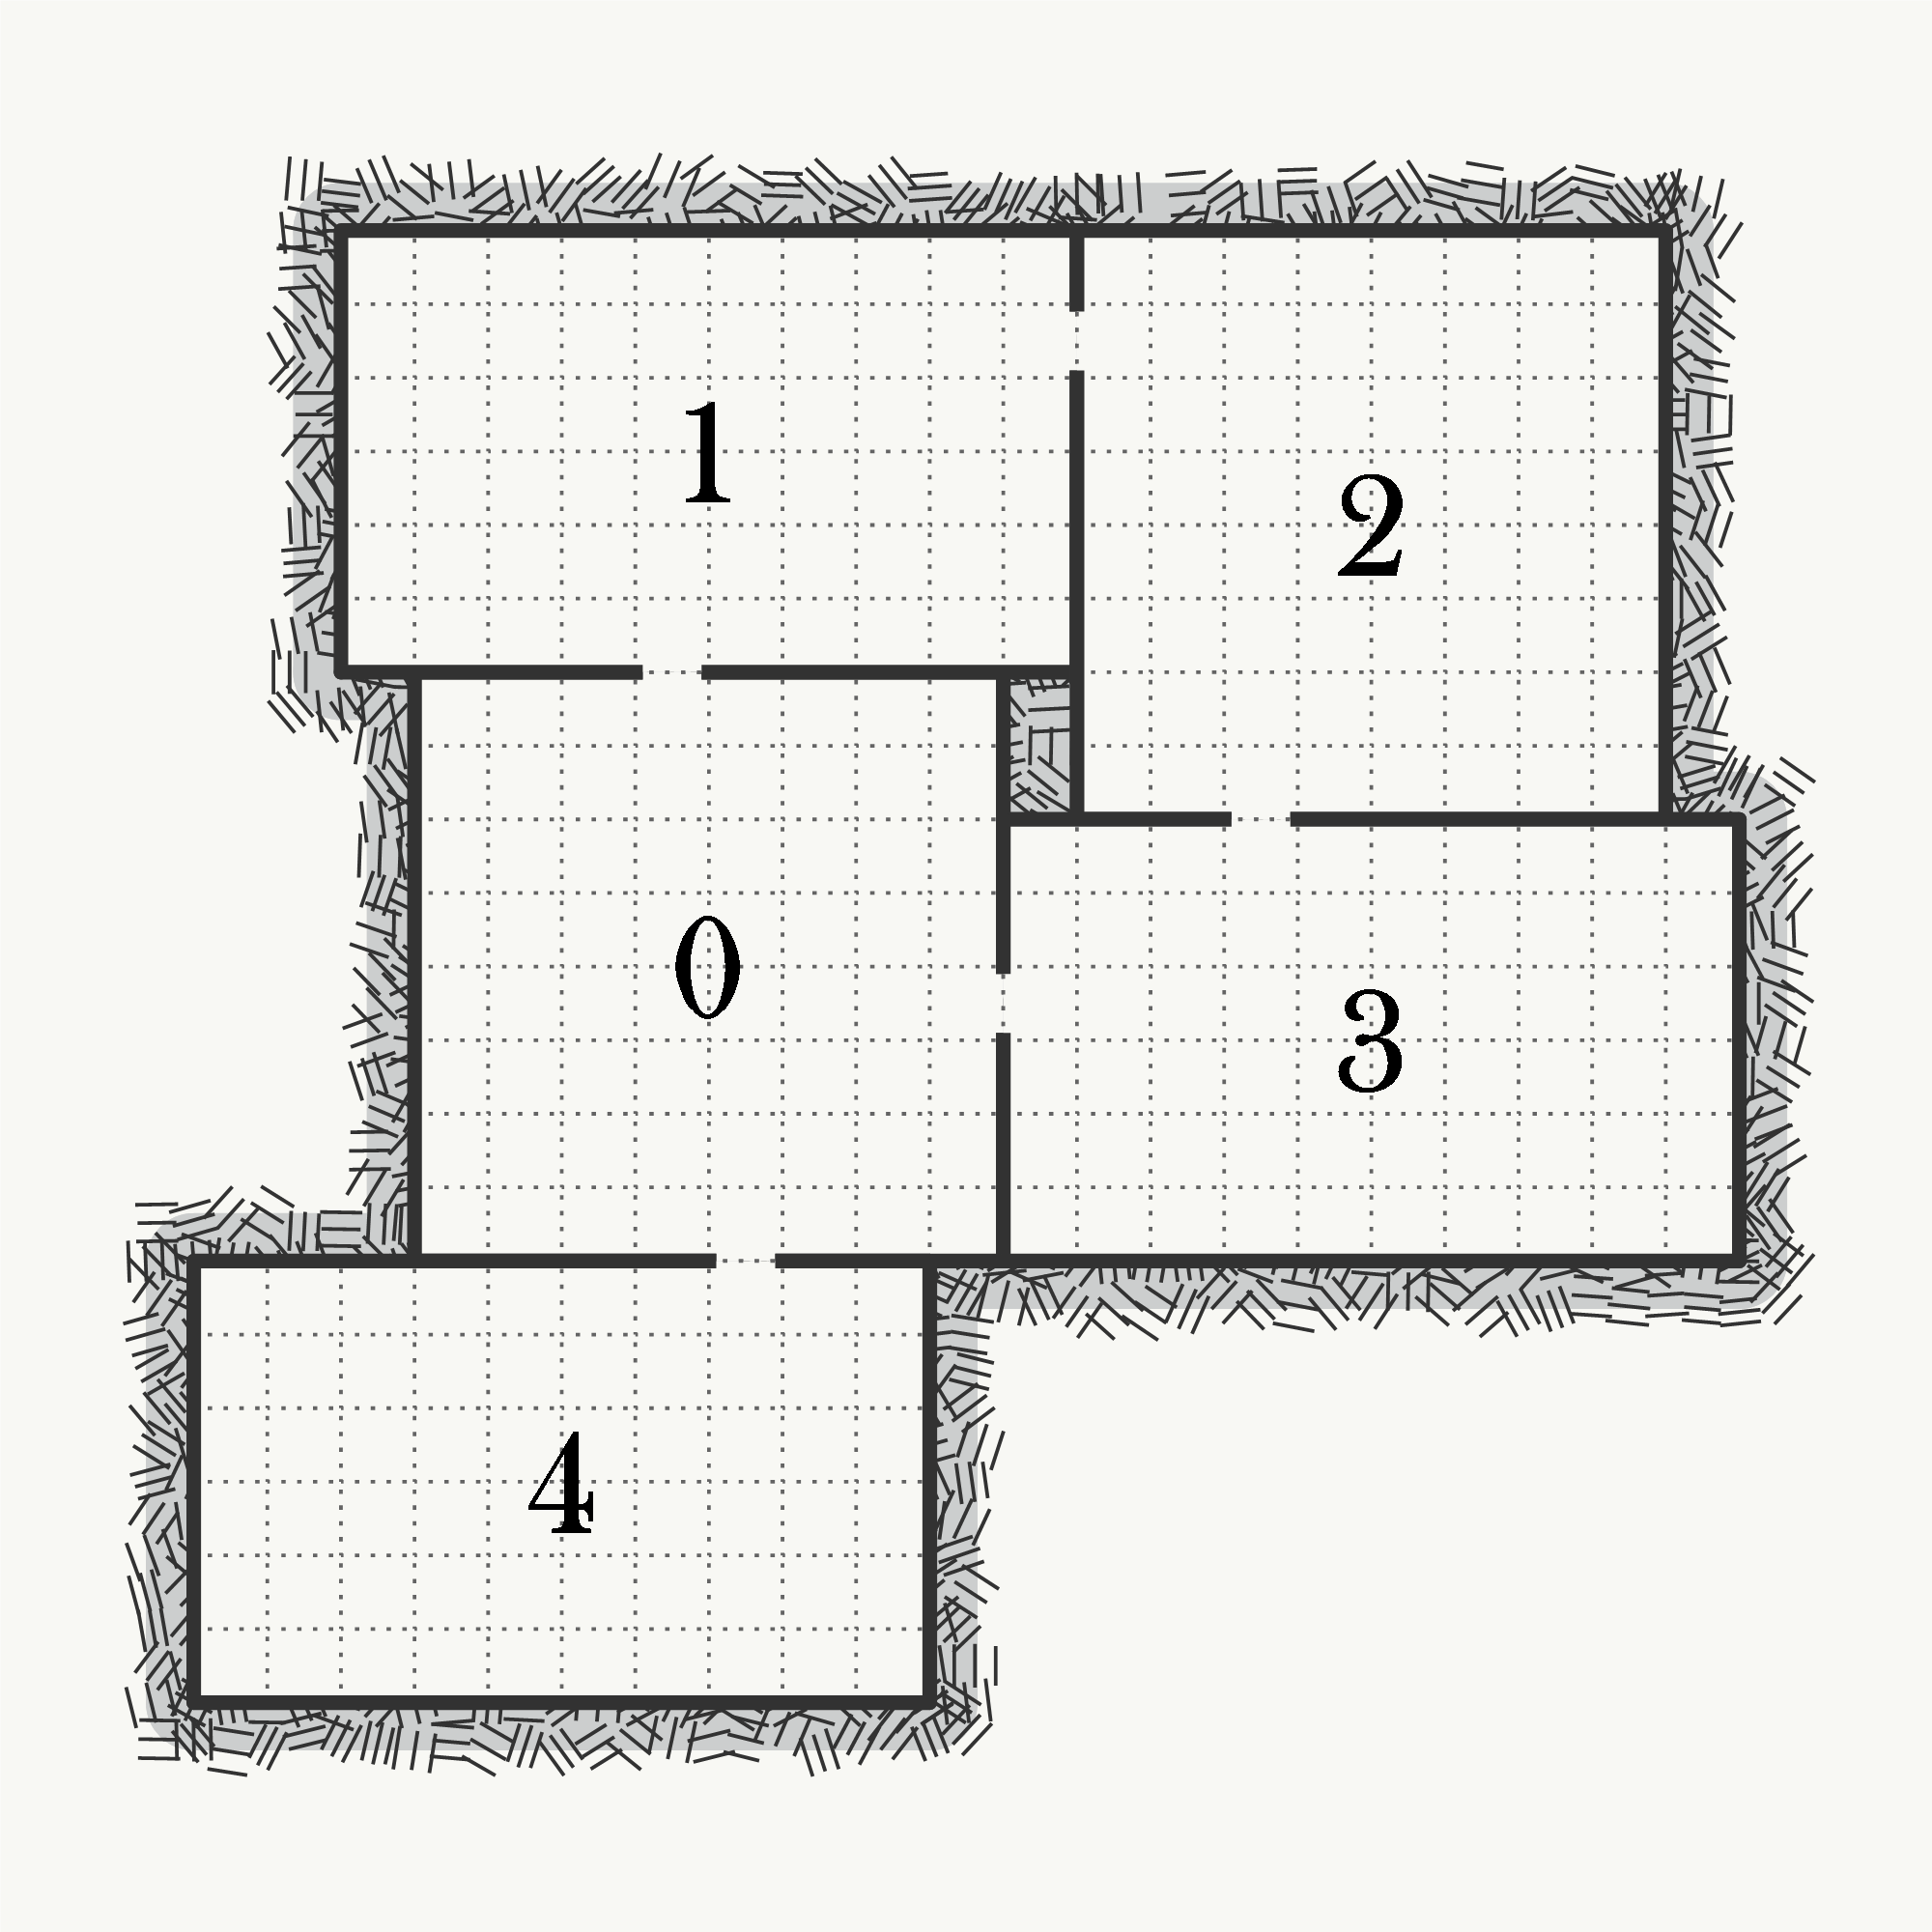


Average time to generate the level: 0.01s (0.00s init, 0.01s generation itself)
Source code
using System.Collections.Generic;using System.Linq;using Edgar.Geometry;using Edgar.GraphBasedGenerator.Grid2D;using Edgar.GraphBasedGenerator.Grid2D.Drawing;namespace Examples{public class BasicsExample{/// <summary>/// Prepare level description./// </summary>public LevelDescriptionGrid2D<int> GetLevelDescription(){var squareRoomOutline = new PolygonGrid2DBuilder().AddPoint(0, 0).AddPoint(0, 10).AddPoint(6, 10).AddPoint(6, 0).Build();var doors = new SimpleDoorModeGrid2D(doorLength: 1, cornerDistance: 1);var transformations = new List<TransformationGrid2D>(){TransformationGrid2D.Identity,TransformationGrid2D.Rotate90};var rectangleRoomTemplate = new RoomTemplateGrid2D(squareRoomOutline,doors,allowedTransformations: transformations,name: "Rectangle 6x10");var squareRoomTemplate = new RoomTemplateGrid2D(PolygonGrid2D.GetSquare(8),new SimpleDoorModeGrid2D(doorLength: 1, cornerDistance: 1),name: "Square 8x8");var roomDescription = new RoomDescriptionGrid2D(isCorridor: false,roomTemplates: new List<RoomTemplateGrid2D>() { rectangleRoomTemplate, squareRoomTemplate });var levelDescription = new LevelDescriptionGrid2D<int>();levelDescription.AddRoom(0, roomDescription);levelDescription.AddRoom(1, roomDescription);levelDescription.AddRoom(2, roomDescription);levelDescription.AddRoom(3, roomDescription);levelDescription.AddRoom(4, roomDescription);levelDescription.AddConnection(0, 1);levelDescription.AddConnection(0, 3);levelDescription.AddConnection(0, 4);levelDescription.AddConnection(1, 2);levelDescription.AddConnection(2, 3);return levelDescription;}/// <summary>/// Run the generator and export the result./// </summary>public void Run(){var levelDescription = GetLevelDescription();var generator = new GraphBasedGeneratorGrid2D<int>(levelDescription);var layout = generator.GenerateLayout();var drawer = new DungeonDrawer<int>();drawer.DrawLayoutAndSave(layout, "basics.png", new DungeonDrawerOptions(){Width = 2000,Height = 2000,});}}}