Example 2
In this tutorial, we will use this tileset by 0x72. Be sure to check their work out if you like the tileset. We will not care about room decorations - we will use just basic walls, floor and door tiles.

Note: I recommend reading Example 1 first as this is a little bit harder to setup and I will not repeat the basics here.
Note: All files from this example can be found at ProceduralLevelGenerator/Examples/Example2.
| Outline override | Outline override is used to properly handle corridors |
Simple example#
The goal is to create two basic rectangular room templates of different sizes and a room template for both horizontal and vertical corridors.
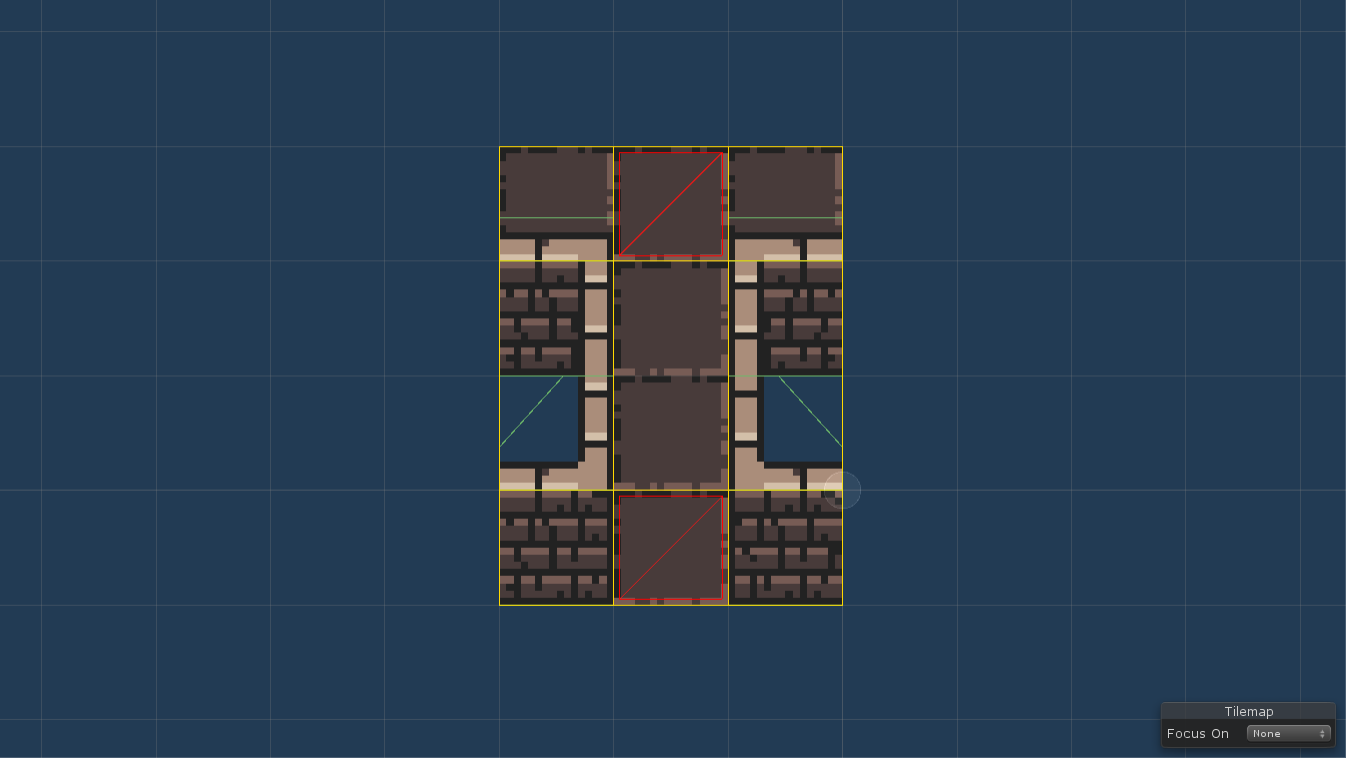
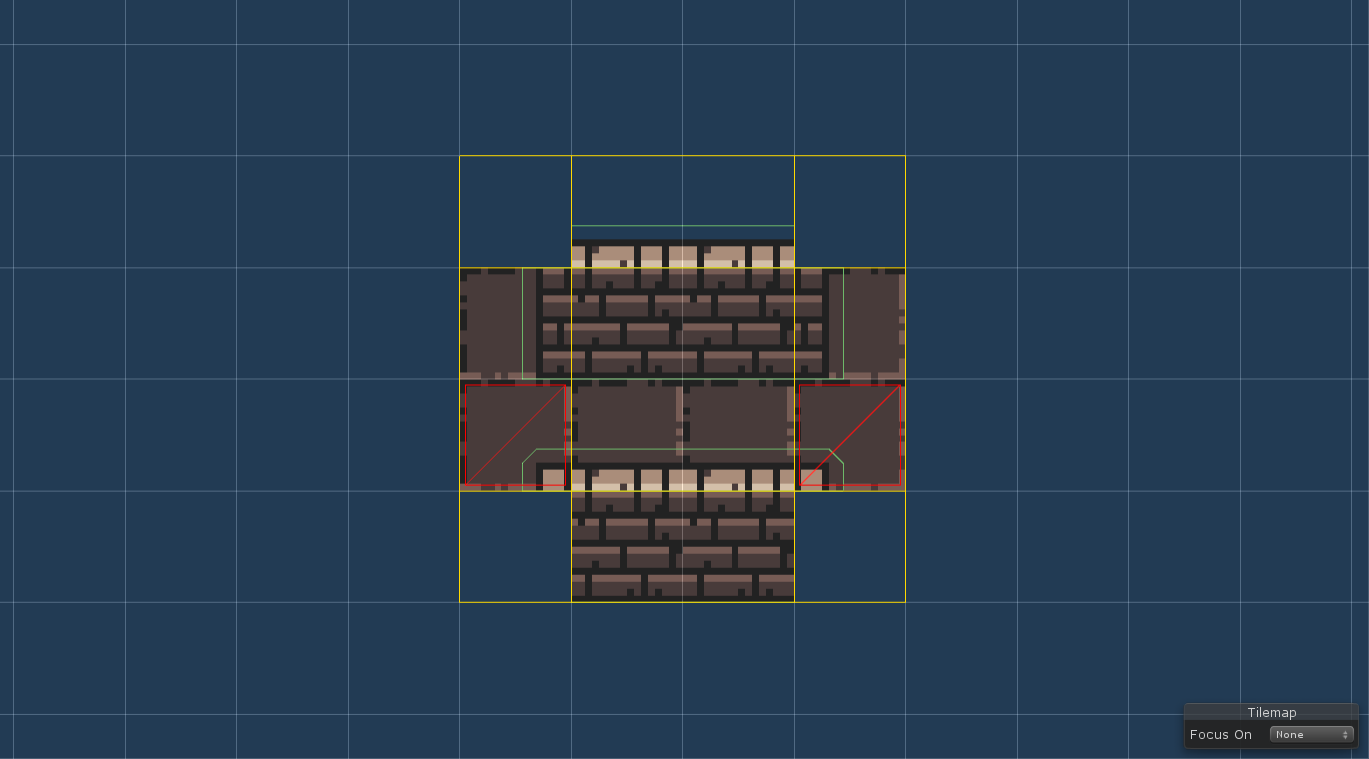
Note: This tileset is trickier than the one used in Example 1 because there is an additional row of lighter tiles above all horizontal wall tiles. It will cause us problems when working with corridors.
Basic rooms templates#
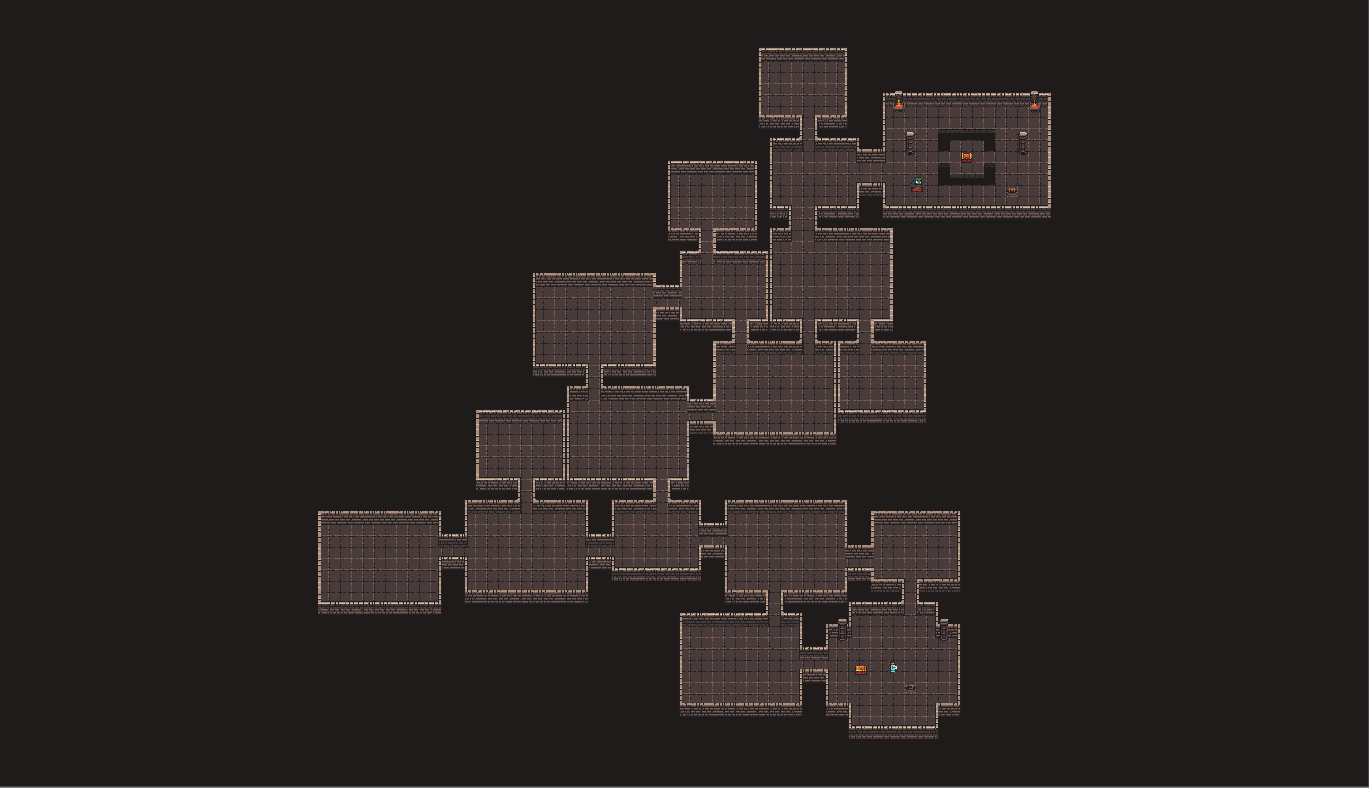
For this example, I am using doors with two different lengths (1 and 2). That means that we have to use the Specific positions mode mode because the Simple mode can only handle doors with the same length. As you can see below, the door positions look quite messy because they overlap. However, this is only to showcase that it is possible and you can use doors with the same length.

Vertical corridors#
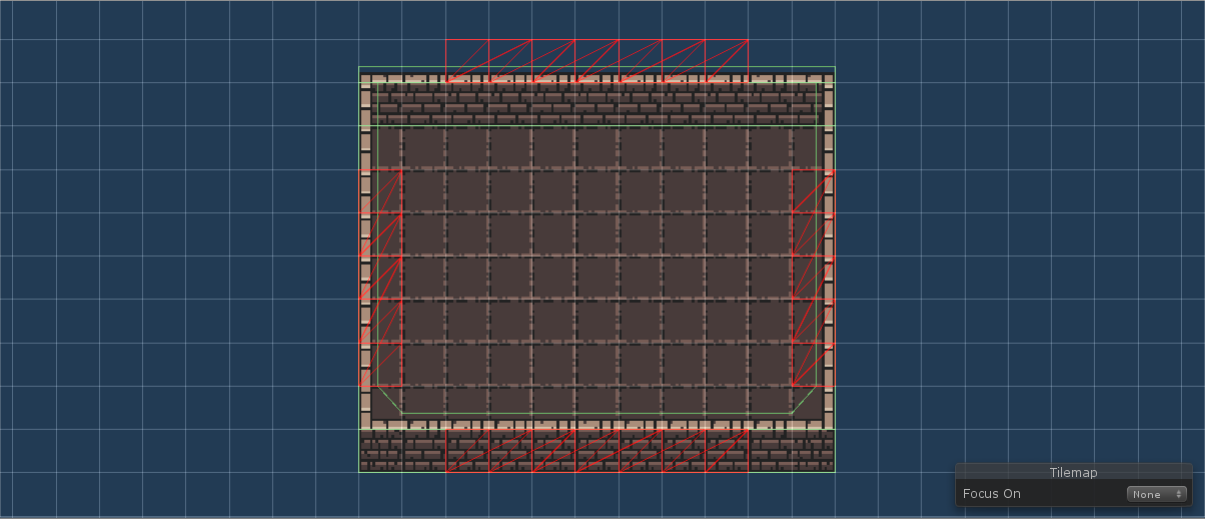
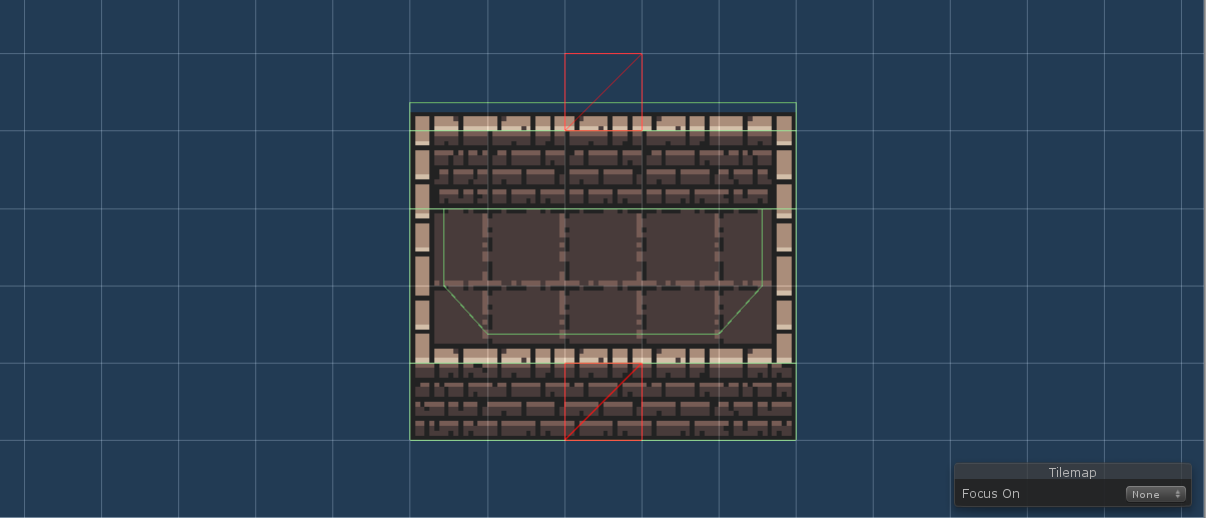
As I said before, there is a problem with corridors when working with this tileset. To be more precise, there is a problem with vertical corridors because of the additional row of tiles above wall tiles. If we were to design our vertical corridors as in Example 1, we would end up with something like this:
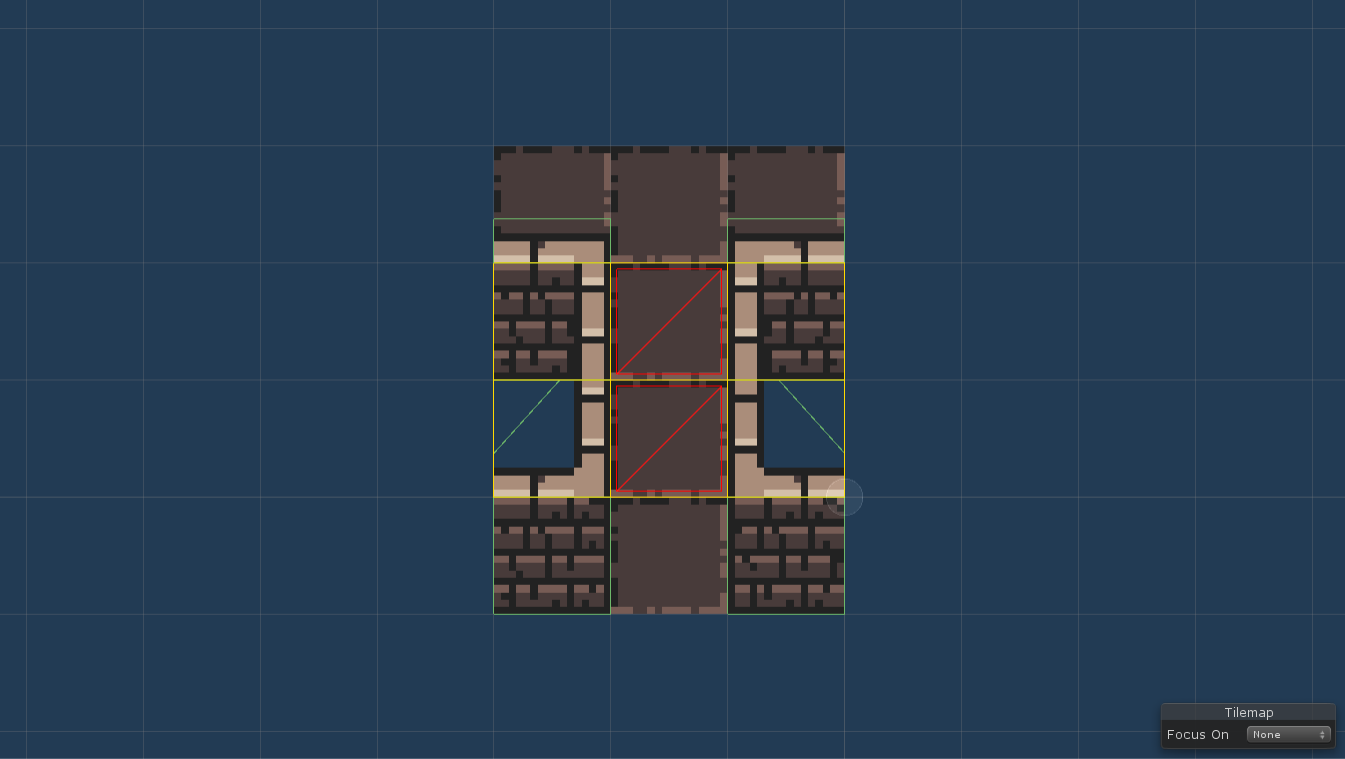
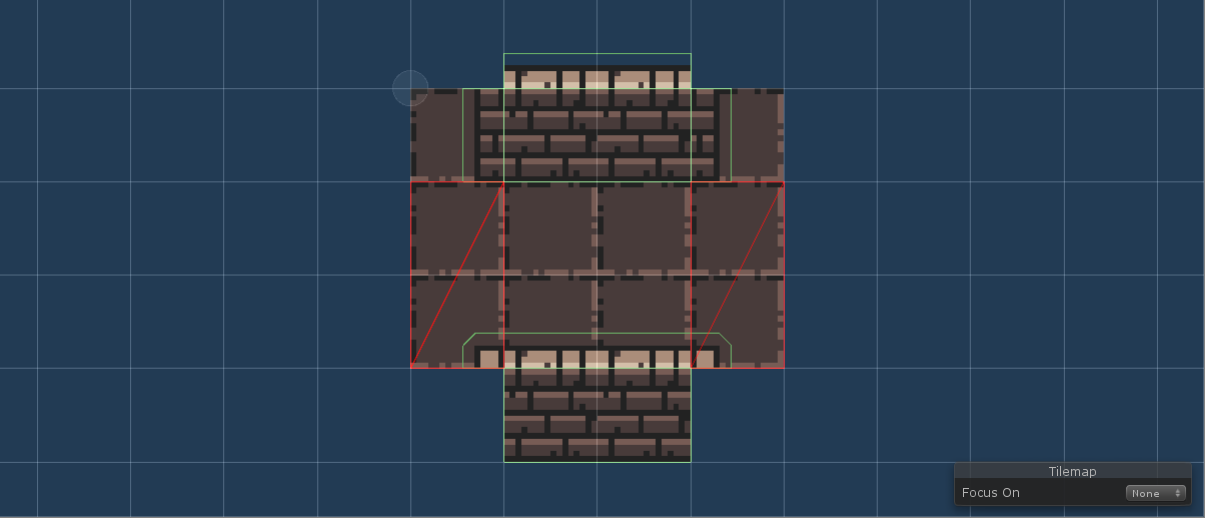
We can solve this by using the Outline override feature. It allows us to tell the algorithm that instead of automatically computing the outline of the room template, we want to draw it manually. You can see the result below. By doing so, we easily fix the problem with walls being one tile taller and the level is drawn correctly.
To enable the Outline override, we have to click the Add outline override button. This button adds another tilemap layer called Outline Override.
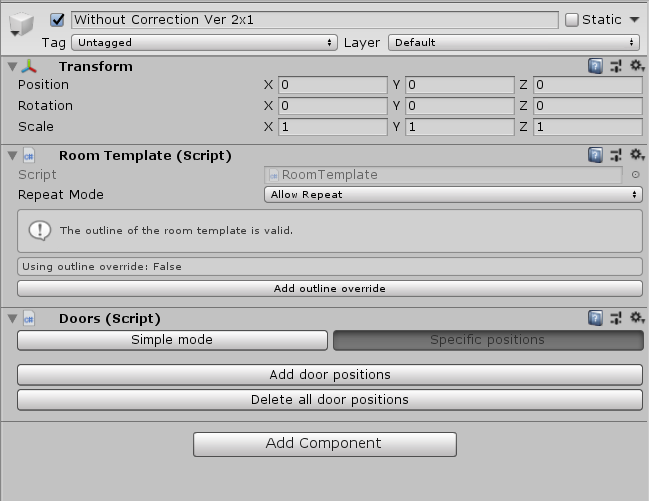
When computing the outline of this room template, the generator will now ignore all the other layers and use only the Outline Override layer. Moreover, the generator will ignore this layer while copying individual tiles to the shared tilemap so we can use any tiles to draw on this layer. And where we are done with drawing the outline, we can make that tilemap layer inactive so we can see how the room template normally looks.
Note: We must not forget to make sure that all our doors are contained on the new outline.

Note: In the previous version of the algorithm, we had to manually implement some additional logic to fix these situations. The goal of the current version is to make it possible without writing any code.
Horizontal corridors#
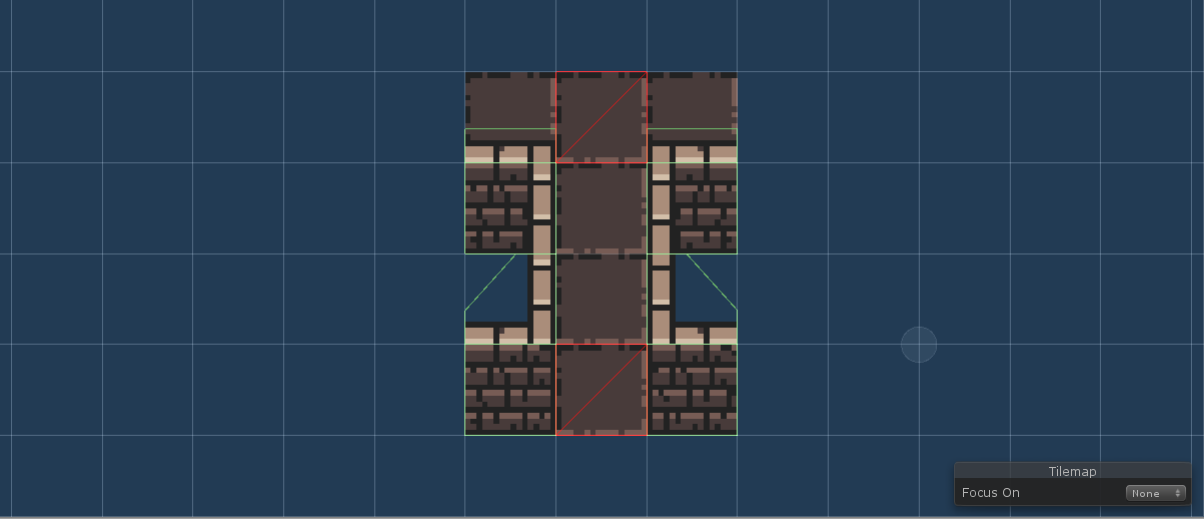
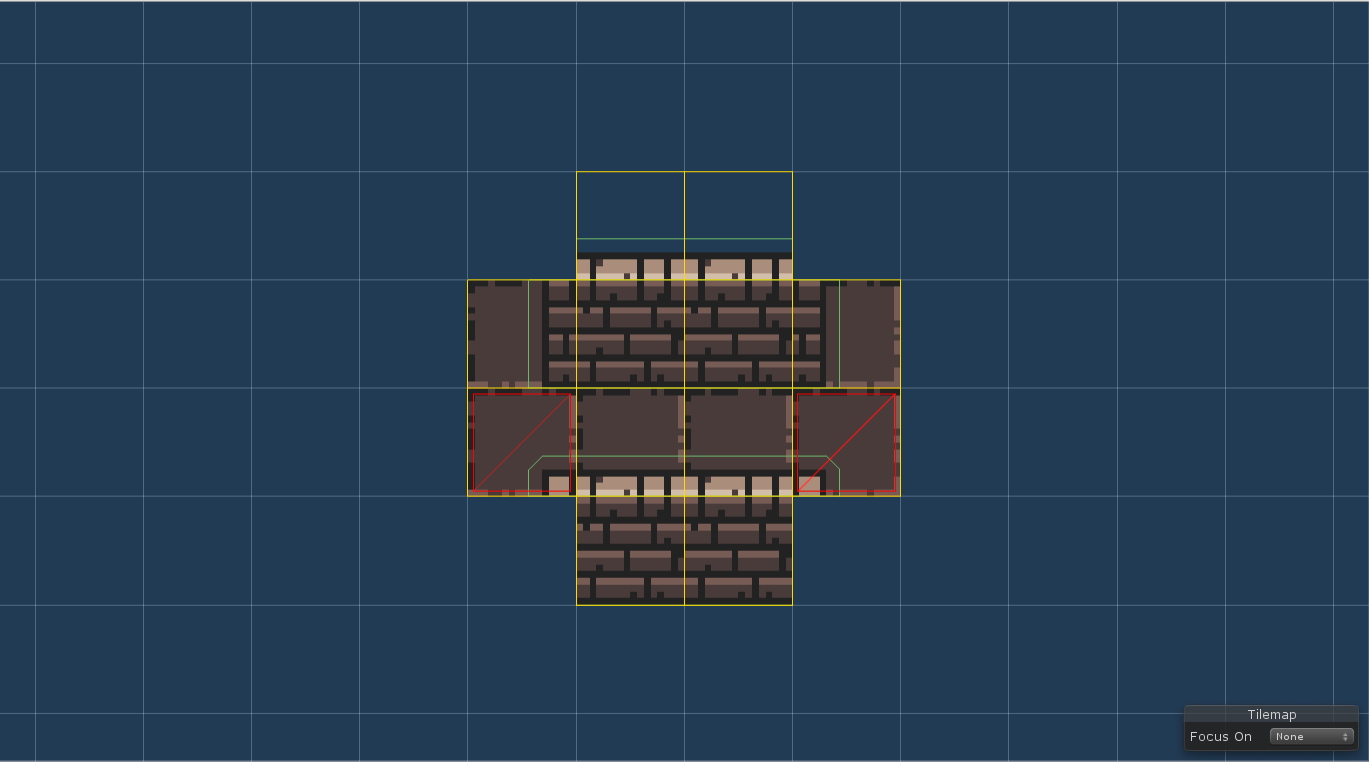
There is also a slight problem with horizontal corridors. It is currently not possible to have doors with length 1 to be at the corners of the room template outline. We fix this by adding Outline override and using a rectangular outline where the doors are not at the corners.
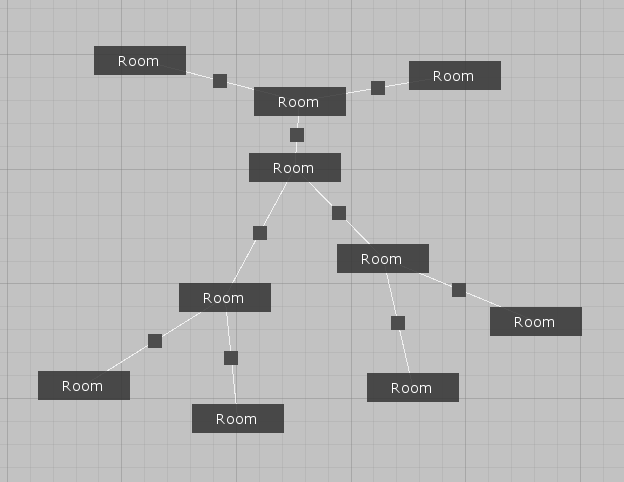
Level graph#
Results#
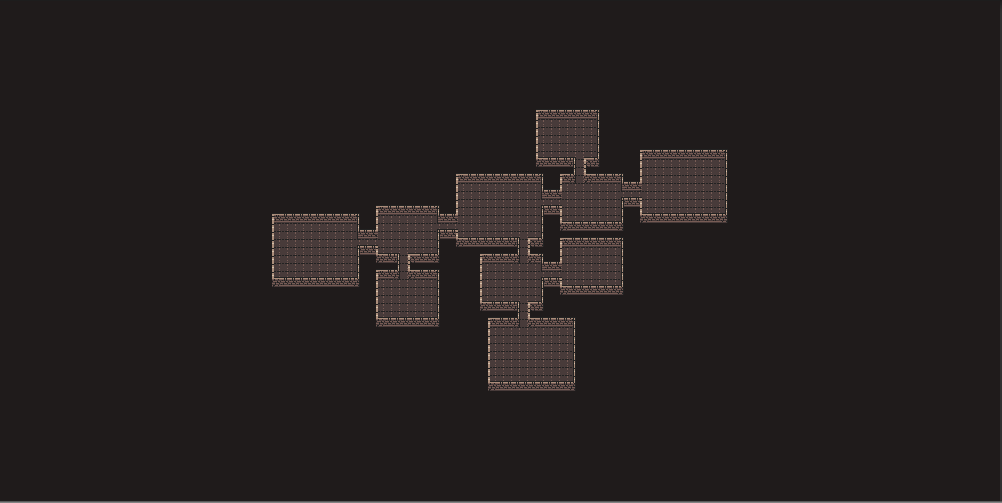
Real-life example#
To create something that is closer to a real-life example, we will add more rooms to the level graph, add special room templates for spawn and boss rooms and also two more corridor room templates.
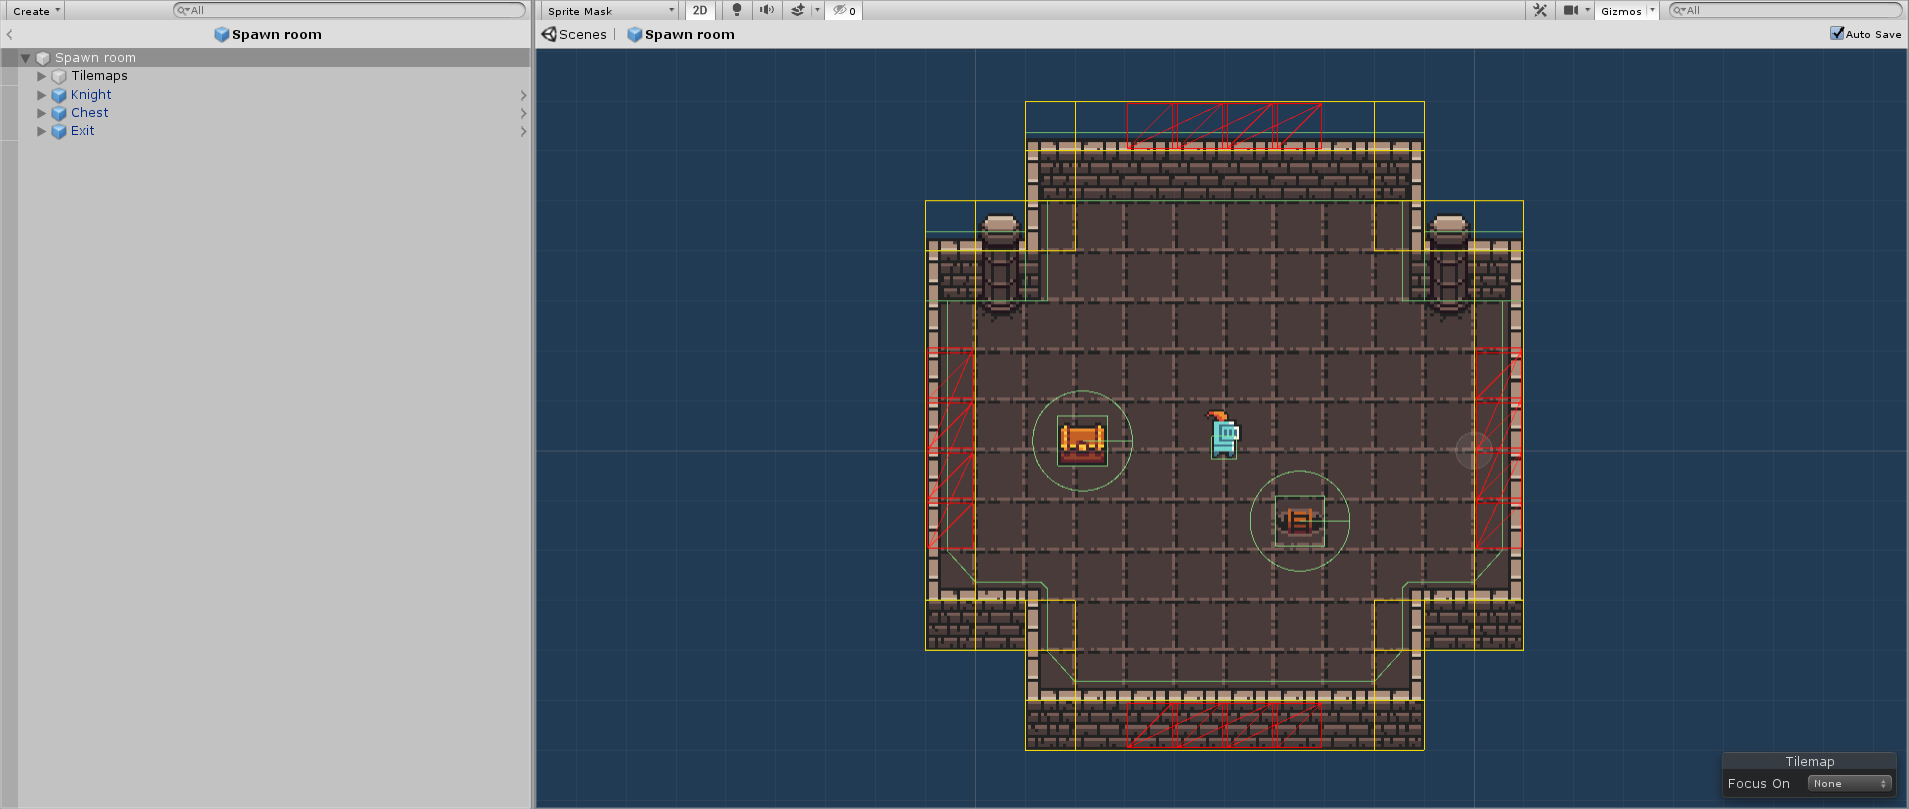
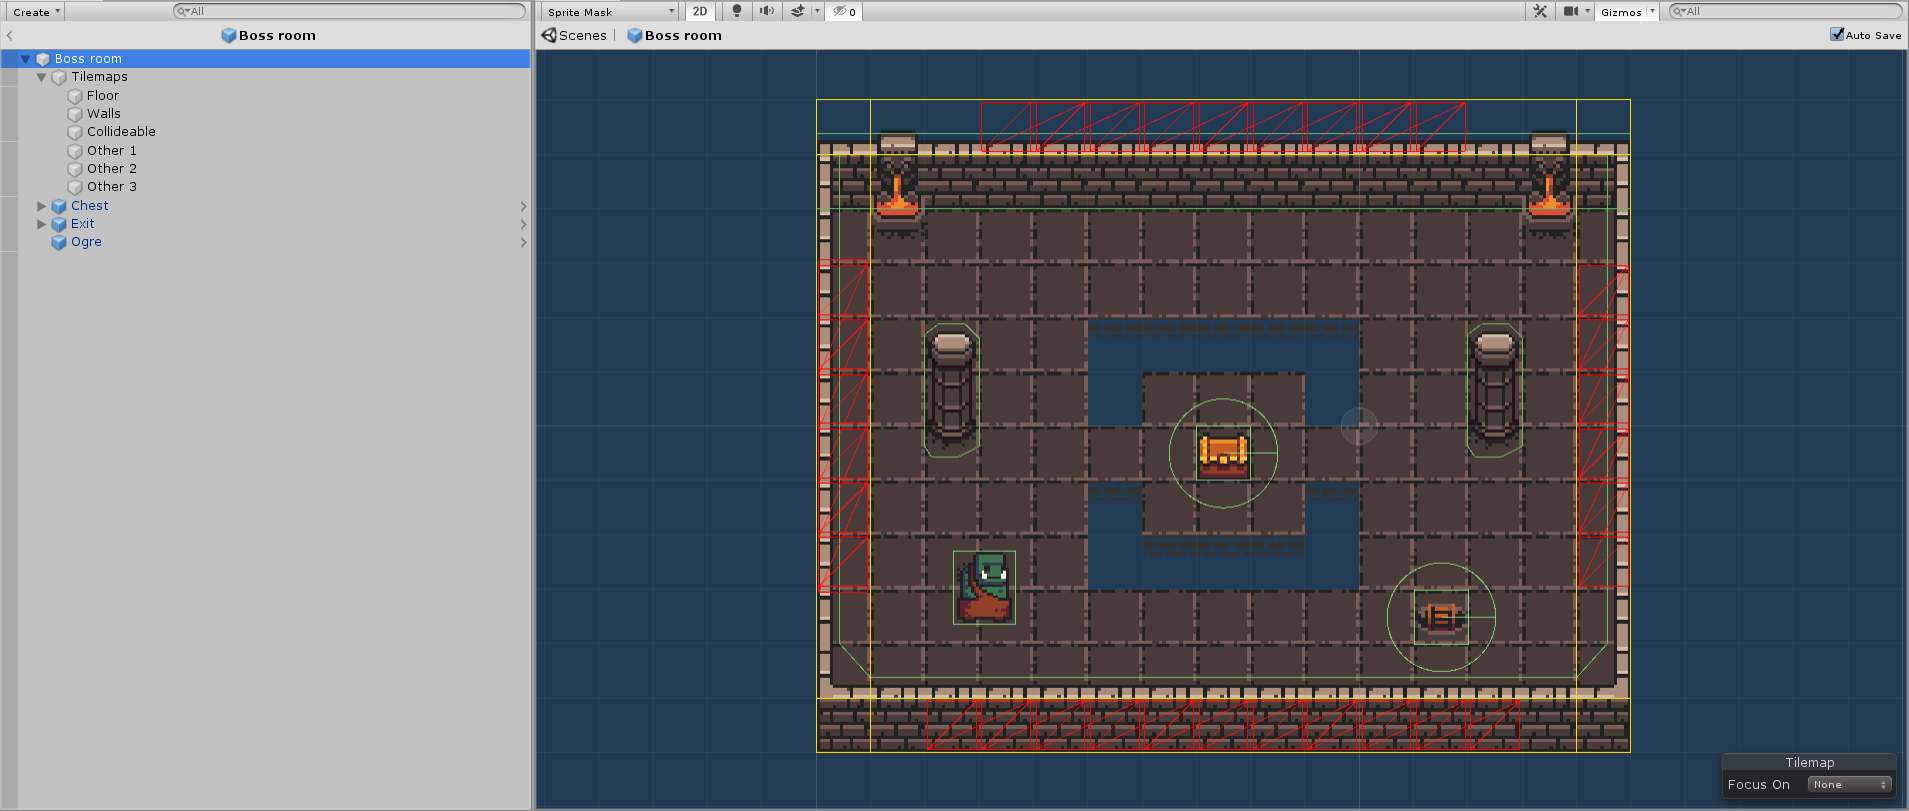
Spawn and boss rooms#
These rooms will contain:
- our player prefab with basic movement
- interactable chest that changes appearance after an interaction (no loot is implemented)
- ladder that causes the game manager to generated a new level after interaction
- an ogre in the boss room (no AI implemented)
Additional room template#
We can make generated dungeons more interesting by adding smaller room templates to our dead-end rooms.
Wider corridors#

Level graph#
So the goal is to have more rooms than in the simple example and also a spawn room and a boss room. You can see one such level graph below.

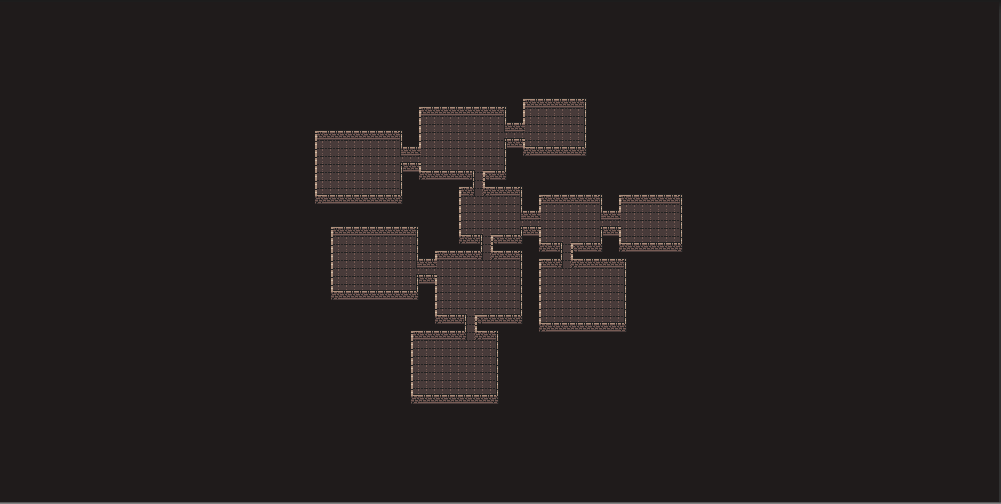
Results#

