(PRO) Fog of war
In this guide, we will learn how to enable a simple fog of war functionality.
Limitations
- Performance on large levels - Not suitable for very large levels (e.g. area larger than 500x500 tiles) - see Implementation and performance
- Isometric not supported - Does not support isometric games/levels
- Does not work in levels where the camera is not perpendicular to the level (e.g. if the camera is positioned at an angle)
Prerequisites
- Built-in Render Pipeline - works in Unity 2018.4+
- Lightweight Render Pipeline (LWRP) - version >= 6.5 of LWRP is needed (and therefore Unity 2019.2+)
- Universal Render Pipeline (URP) - version >= 7.0 of URP is needed (and therefore Unity 2019.3+)
- IMPORTANT! - this feature now works with the 2D Renderer (Experimental) since Unity 2021.3+
- High Definition Render Pipeline (HDRP) - currently not supported
Note: Additional setup steps are needed for LWRP and URP, see below.
Example scene
An example scene can be found at Examples/Grid2D/FogOfWarExample.
Note: Please see the Add custom renderer feature setup step below to make the example scene work in URP/LWRP.
Setup
There are several steps that need to be done to enable the Fog of War feature. I tried to make the setup as simple as possible, but it still requires some manual work.
Add Fog of War component
The first step is to add the Fog of War component to the game object that holds the main camera of your game. The component has several settings, see the Configuration section.
Include shader in build
This feature uses a custom shader that you have to manually include in the build of your game. Navigate to Edit → Project Settings → Graphics and add the Edgar/FogOfWar (and Edgar/FogOfWarURP) shader to the Always Included Shaders list. If you do not do that, the game will work in the editor, but it won't work in a standalone build.
Add custom renderer feature
(URP and LWRP only) - This step is only required if you use URP or LWRP as they do not support the OnRenderImage() hook. To work around that, you have to manually add a custom renderer feature.
LWRP: The first step is to create a custom Forward Renderer asset if you do not have one already. This can be done in Create → Rendering → LWRP → Forward Renderer. You have to make sure that this renderer is used in the render pipeline instead of the default one.
URP: With URP, there should already exist a Forward Renderer asset that was created with the render pipeline asset. Locate the renderer.
The next step is to open the Forward Renderer asset. Click the Add Renderer Feature and choose the Fog Of War Feature. Based on the render pipeline that you are using, the feature should be called Fog Of War LWRP Feature or Fog Of War URP Feature.
Note: If you do not see the Fog Of War Feature, make sure you meet the requirements as described above. The feature is conditionally compiled only if there are all the required packages installed.
Add custom post-processing logic
After a level is generated, we have to set up the Fog of War component. The best place to do that is in a custom post-processing task. Sample code with comments can be seen below:
[CreateAssetMenu(menuName = "Edgar/Examples/Fog of War/Post-processing", fileName = "FogOfWarPostProcessing")]
public class FogOfWarExamplePostProcessing : DungeonGeneratorPostProcessingGrid2D
{
    public override void Run(DungeonGeneratorLevelGrid2D level)
    {
        // Make sure that we are in the Play mode
        if (!Application.isPlaying)
        {
            Debug.LogWarning("Skipping Fog of War setup as it only works in Play mode.");
            return;
        }

        // Make sure that the FogOfWarGrid2D component exists in the scene
        if (FogOfWarGrid2D.Instance == null)
        {
            throw new InvalidOperationException("It looks like the FogOfWarGrid2D component does not exist in the scene. Make sure that it is attached to your camera.");
        }

        // To setup the FogOfWar component, we need to get the root game object that holds the level.
        var generatedLevelRoot = level.RootGameObject;

        // If we use the Wave mode, we must specify the point from which the wave spreads as we reveal a room.
        // The easiest way to do so is to get the player game object and use its transform as the wave origin.
        // Change this line if your player game object does not have the "Player" tag.
        var playerTag = "Player";
        var player = GameObject.FindGameObjectWithTag(playerTag);
        if (player == null)
        {
            throw new InvalidOperationException($"GameObject with tag '{playerTag}' was not found. Make sure that your object exists in the scene and has the correct tag.");
        }

        // Now we can setup the FogOfWar component.
        // To make it easier to work with the component, the class is a singleton and provides the Instance property.
        FogOfWarGrid2D.Instance.Setup(generatedLevelRoot, player.transform);

        // After the level is generated, we usually want to reveal the spawn room.
        // To do that, we have to find the room instance that corresponds to the Spawn room.
        // In this example, the spawn room is called "Spawn" so we find it by its name.
        var spawnRoom = level
            .RoomInstances
            .SingleOrDefault(x => x.Room.GetDisplayName() == "Spawn");

        if (spawnRoom == null)
        {
            throw new InvalidOperationException("There must be exactly one room with the name 'Spawn' for this example to work.");
        }

        // When we have the spawn room instance, we can reveal the room from the fog.
        // We use revealImmediately: true so that the first room is revealed instantly,
        // but it is optional.
        FogOfWarGrid2D.Instance.RevealRoom(spawnRoom, revealImmediately: true);
    }
}
Note: More information about the API of the FogOfWar component can be found in the API section.
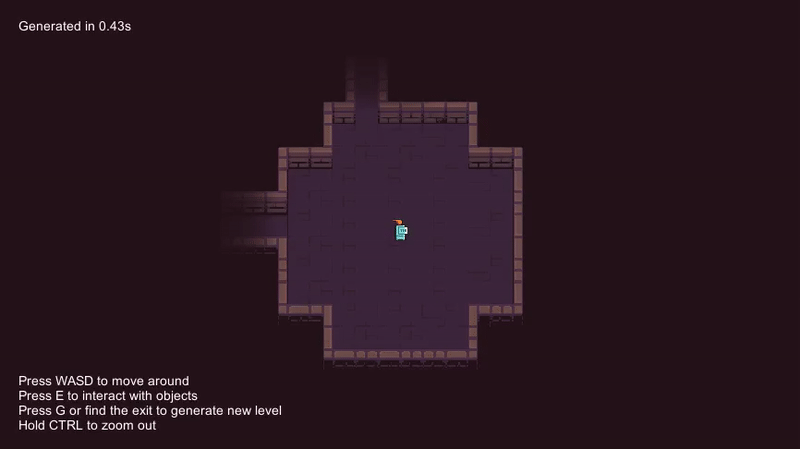
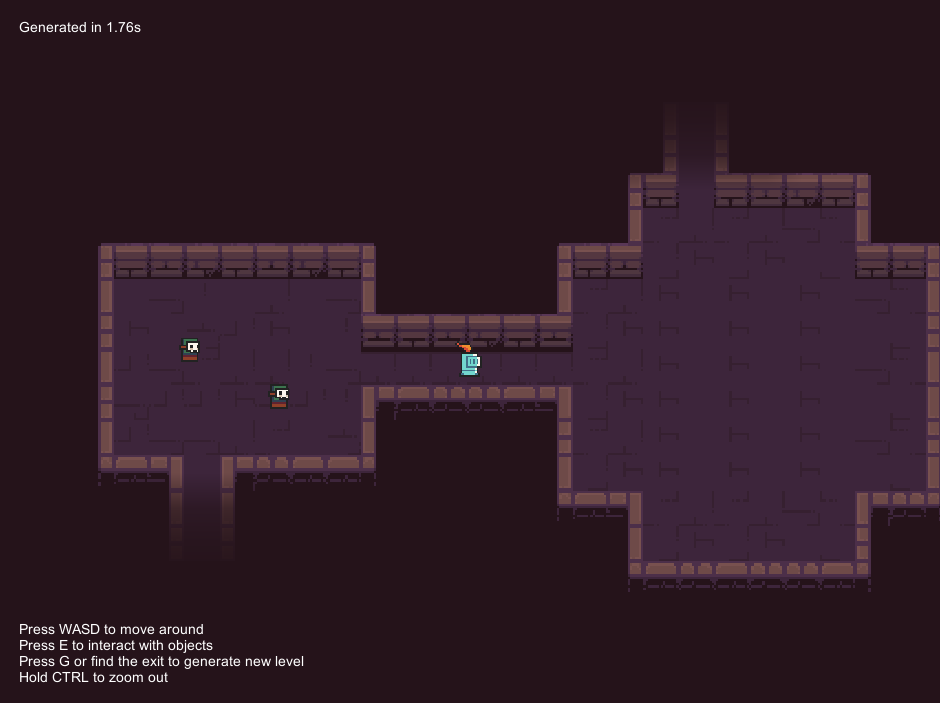
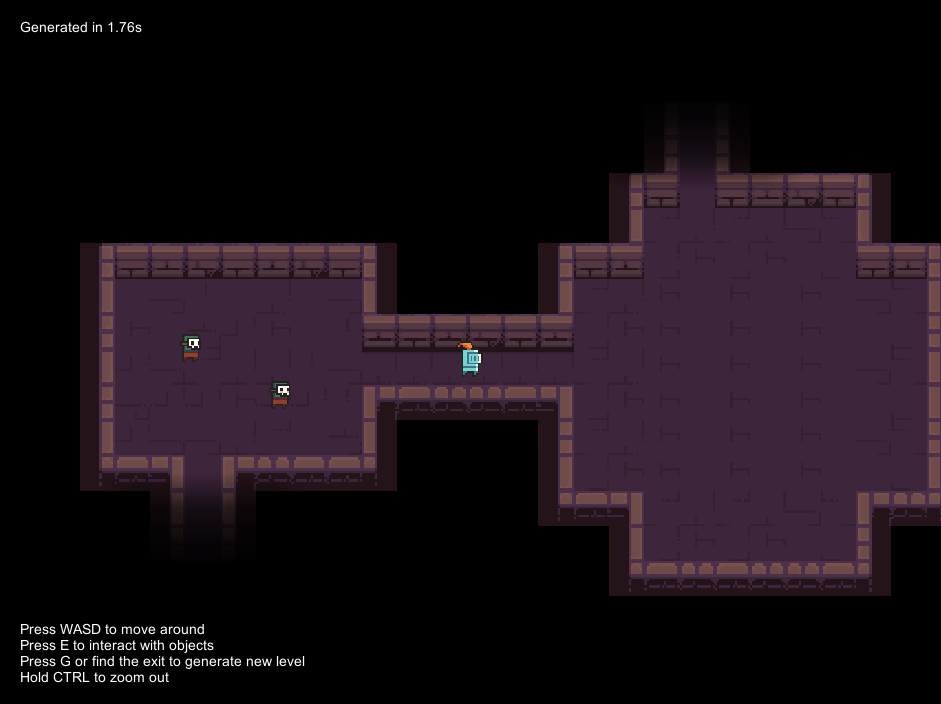
After enabling this post-processing task and starting the game, we should see that all but the spawn room are hidden in the fog. The last thing that we have to handle is to reveal rooms when we enter them.
Add trigger colliders
The last step is to add trigger colliders that will reveal a room when the player enters that room. There are at least two possible ways of doing that:
- Add colliders to all room templates and always reveal only the room for which the collider was triggered
- Add colliders only to corridor room templates and when you trigger the collider reveal both the collider and its neighbours
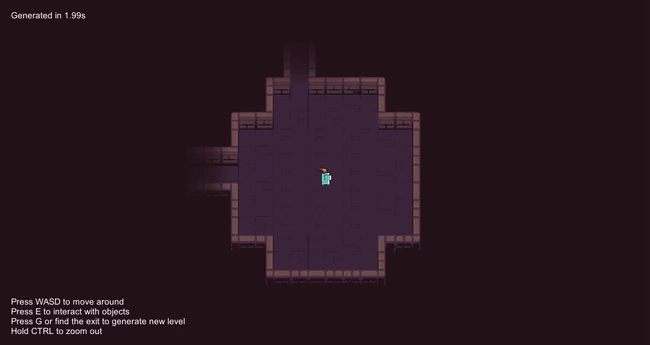
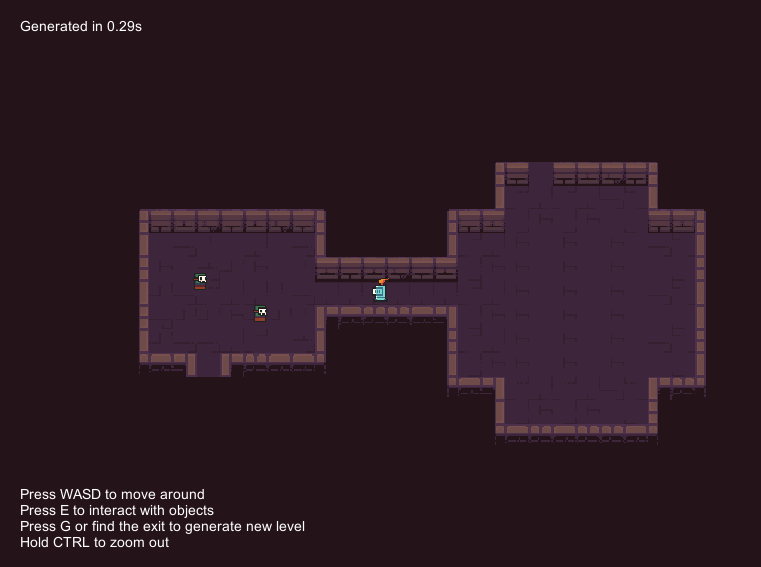
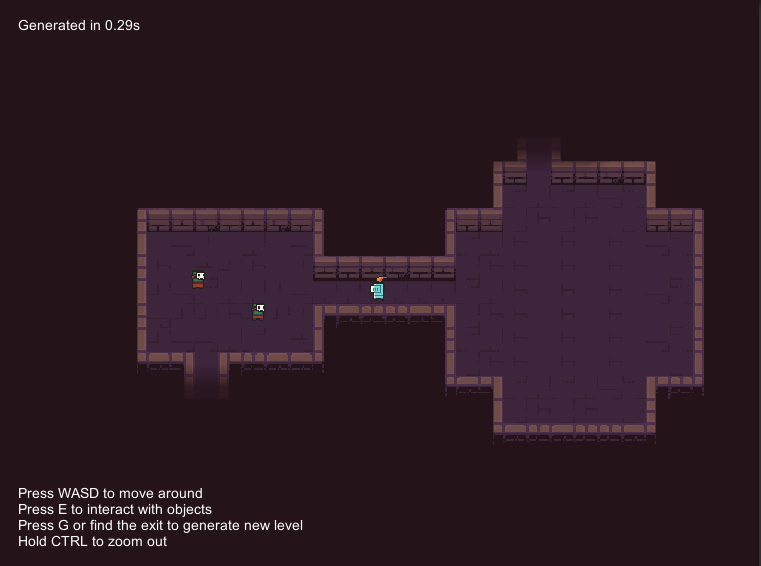
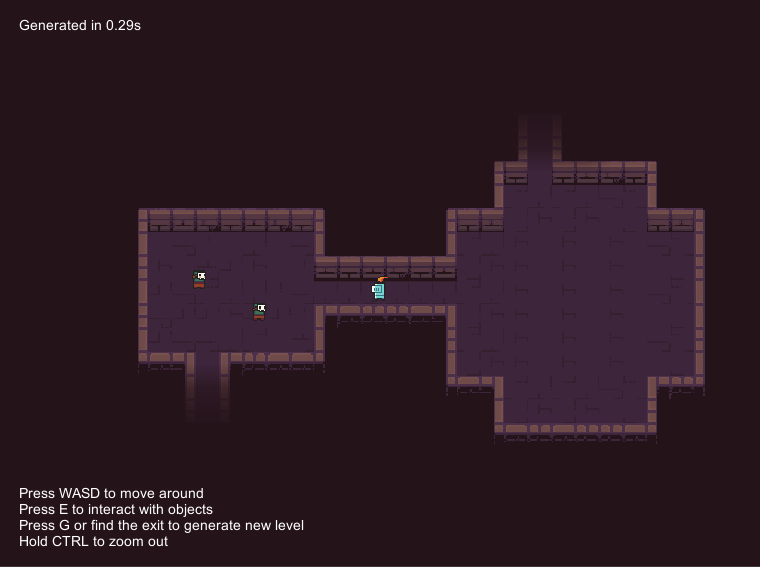
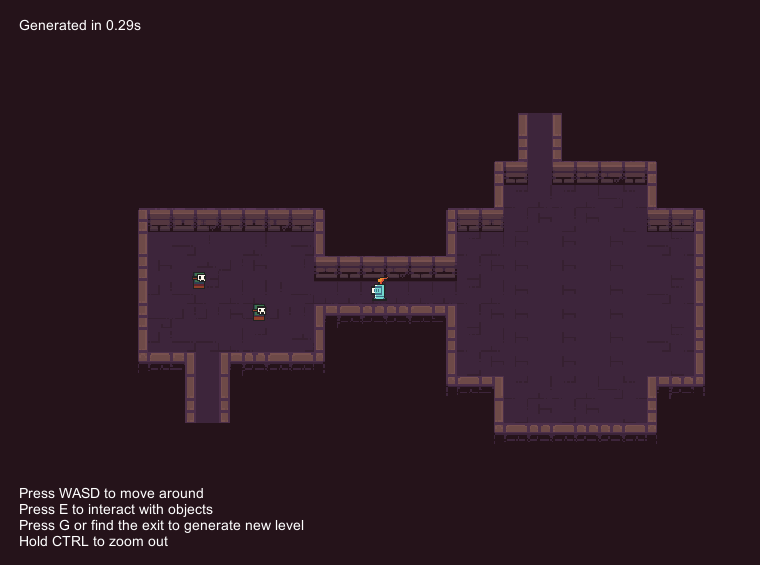
In this tutorial, I decided to use the second option as it, in my opinion, looks better. This is the final result that we want to achieve:
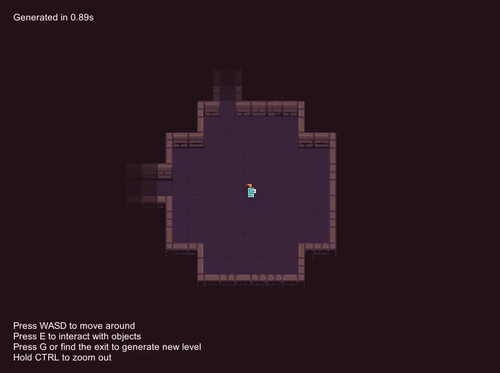
To achieve this, we have to slightly modify our corridor room templates. In each corridor room template, we create a child game object with a collider that has Is Trigger set to true. The collider should mark the area where the player has to stand to trigger the fog of war script. The easiest thing to do is to add a collider that covers the whole floor of the corridor. However, it is also possible to make the collider slightly smaller and trigger the script only when the player is closer to the centre of the corridor. Our example setup can be seen below:
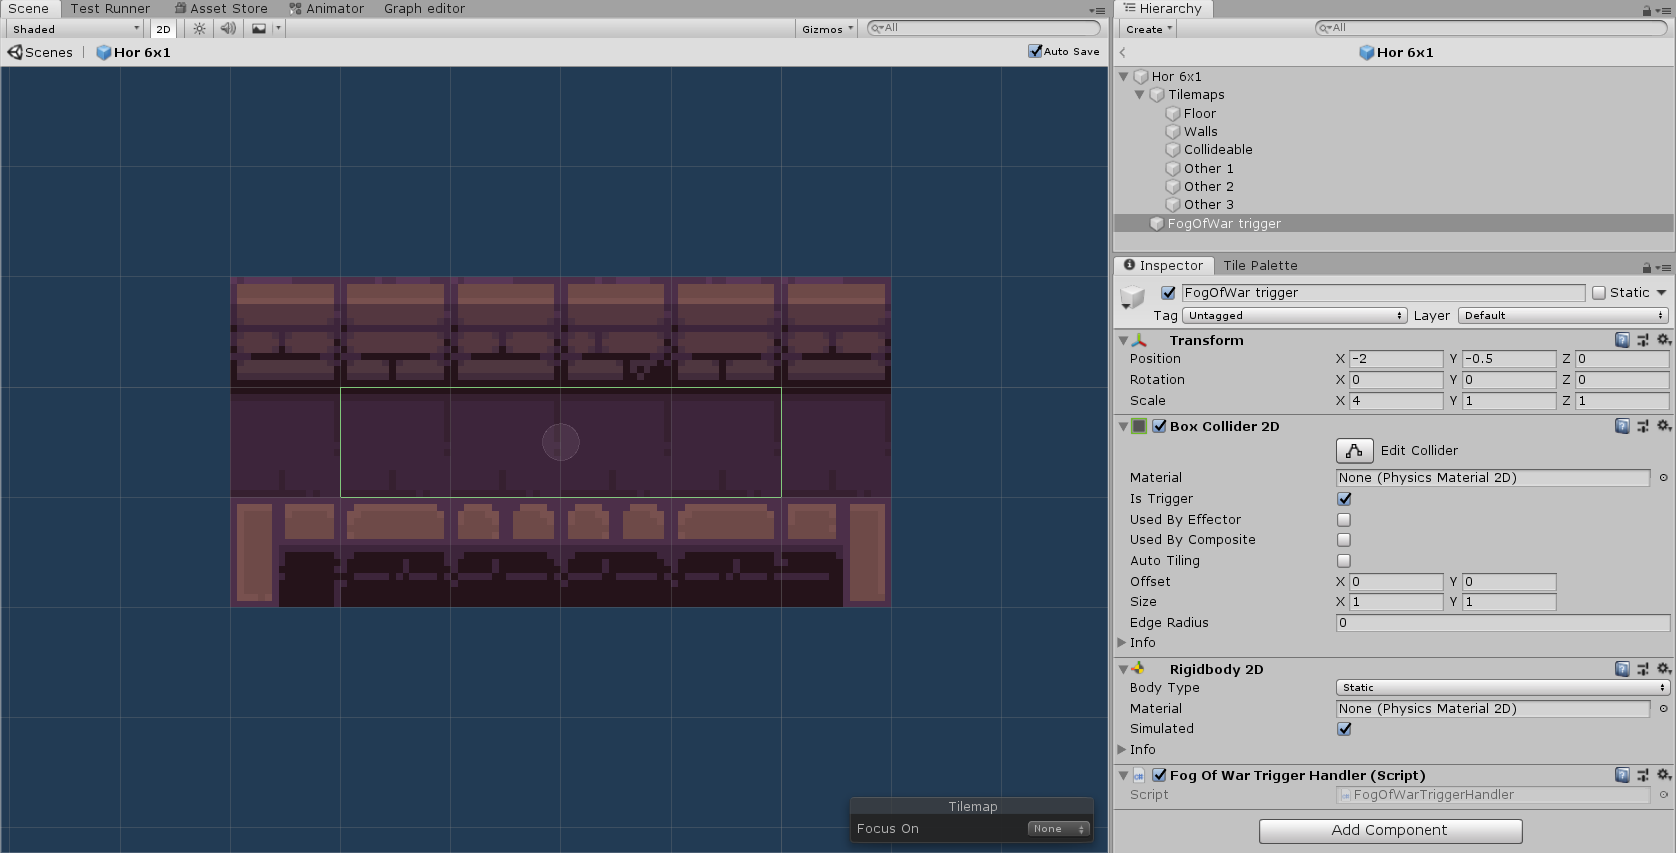
The last step is to add a simple component (to the game object with the collider) that will call the Fog of War script when the collider is triggered:
public class FogOfWarExampleTriggerHandler : MonoBehaviour
{
    private RoomInstanceGrid2D roomInstance;

    private void Start()
    {
        roomInstance = GetRoomInstance();
    }

    private RoomInstanceGrid2D GetRoomInstance()
    {
        // The goal of this method is to get the RoomInstance of the corresponding room template
        // so that we can pass it to the FogOfWar script.

        // Get the root game object of the room template
        var roomTemplate = transform.parent.gameObject;

        // Each room template has a RoomInfo component attached
        var roomInfo = roomTemplate.GetComponent<RoomInfoGrid2D>();

        // The RoomInfo component has a RoomInstance property containing information about the room
        return roomInfo.RoomInstance;
    }

    private void OnTriggerEnter2D(Collider2D otherCollider)
    {
        // Make sure that the player game object has the "Player" tag
        // or remove/modify this line.
        if (otherCollider.gameObject.CompareTag("Player"))
        {
            FogOfWarGrid2D.Instance.RevealRoomAndNeighbors(roomInstance);
        }
    }
}
After you modify all your corridor room templates, the Fog of War should work as expected.
API
Up-to-date API documentation can be found [here][FogOfWar].
Configuration and examples
Fog colour
The FogColor property specifies the colour of tiles that are hidden in the fog. It defaults to black but in our example scene we use purple as that is the colour which works best with the tileset.
Transition mode
The Transition mode property specifies what to do when there are two neighbouring tiles with different fog values (i.e. one tile is less revealed than the other tile). If we use the Smooth mode, the colours of pixels on the two tiles will smoothly interpolate from one fog value to the other. On the other hand, if we use the Tile Based mode, no interpolation will be used and there will be a strict division between the fog values of the two tiles. There is also a third mode now - the Custom mode that is somewhere between the two previous modes and adds two additional parameters - Tile granularity and Fog smoothness.

Fog value
Before we dive into the next two parameters, it is good to know what is the fog (transparency) value of a pixel. When we want to show that a pixel is affected by the fog of war effect, we interpolate between the colour of that pixel and the fog colour. The value that controls the interpolation is called the fog value. This fog value is always in the [0,1] range. To completely hide a pixel in the fog, we set its fog value to 0. To completely show a pixel, we set its fog value to 1. If we want to animate the transition between pixels being hidden and then revealed, we can gradually increase the fog value, starting with the initial fog value and going all the way up to 1.
TileGranularity
This parameter controls into how many pixel chunks is each tile divided. The actual relation between the value of this parameter and the number of chunks is that if the value is equal to X, each tile is divided into X*X same-sized chunks. That means that if we set the value to 2, we will get 2x2=4 chunks in total - each tile is divided into quarters.
The main property of individual chunks is that each pixel in a chunk has the same fog value as all the other pixels in the chunk. Both the Tile-based and Smooth transition modes are special cases of this division to chunks. The Tile-based mode equals to setting TileGranularity to 1 - each tile is a single chunk. The Smooth mode equals to setting TileGranularity to infinity - each pixel is independent of other pixels.
FogSmoothness
This parameter controls how many possible fog values there are for every pixel. In other words, the parameter controls how many possible steps there are between the fog values 0 and 1. The exact formula is stepSize = 1 / fogSmoothness. For example, by setting the FogSmoothness to 2, the step size is equal to 1/4 = 0.25 and there are 5 possible fog values - 0, 0.25, 0.5, 0.75 and 1.
If you want to emphasize the transitions between individual fog values set the parameter to a lower value, for example 10. If you want to have a very smooth transition between individual fog values, use a high value, for example 100.
Wave mode
The first available mode is the Wave mode. With the Wave mode, the fog reveals based on the distance of individual tiles from the player. The tiles that are close to the player are revealed sooner than tiles that are far from the player. There are two properties that alter the behaviour when in the Wave mode:
WaveSpeed
The WaveSpeed property specifies how fast the wave moves and its unit is tiles per second. If we have a tile that is 15 tiles away from the player and the wave speed is set to 5, then the tile will be fully revealed 15/5 = 3 seconds after triggering the fog of war script.
WaveRevealThreshold
The WaveRevealThreshold property specifies for how long is a tile completely hidden before it starts to be revealed. If we set the value to 0, all tiles to be revealed will immediately have non-zero opacity. The tiles that are close to the player will quickly have their full opacity while it will take longer for tiles that are far away. If we set the value to 0.5 and have a tile that should be fully revealed after 3 seconds, it will make the tile completely hidden for 0.5 * 3 = 1.5 seconds and only after that the opacity will be increased, and the tile will be fully revealed after additional 1.5 seconds. As a result, it will look like the wave actually moves.
Note: It is not recommended to use values higher than 0.5 in the combination with the Smooth transition mode.
Fade In mode
The second available mode is the Fade In mode. With the Fade In mode, all the tiles are revealed at the same time no matter the distance from the player. There is a single property that alters the behaviour of this mode:
FadeInDuration
The FadeInDuration property specifies after how many seconds should the tiles be completely revealed. Value 0 means that all the tiles will be revealed immediately after triggering the fog of war script.
Reveal Corridors
The RevealCorridors checkbox specifies whether you want to reveal some tiles from neighbouring corridor rooms even though the rooms themselves are not yet fully revealed. The main purpose of this feature is aesthetics - in my opinion, the game looks better when the corridor tiles gradually fade away. There are two properties that alter the behaviour of this feature:

RevealCorridorsTiles
The RevealCorridorsTiles property specifies how many tiles of each corridor should be revealed. To be more precise, it specifies the maximum distance of tiles (counted from the doors of the corridor) that should be revealed.

RevealCorridorsGradually
The RevealCorridorsGradually property specifies whether corridor tiles should gradually fade out until they are barely visible.
Initial fog transparency
The InitialFogTransparency property controls the initial transparency of the fog. The valid range for this parameter is [0,1]. By default, this value is set to 0, which means that tiles that are covered in fog are completely hidden.
Implementation and performance
The Fog of War is implemented as an Image Effect (built-in render pipeline) or a Render Feature (URP). The script keeps track of which tiles should be revealed and passes this information to a shader via a texture where each pixel represents a single tile in the level. Based on the colour of individual pixels, the shader lerps between the actual tile graphics and the fog colour. All transitions are done on a CPU - when the fog changes, an updated texture is sent to the GPU.
The main performance bottleneck is when some revealed tiles do not fit in the fog texture. The script starts with a 1x1 texture and when the first room is revealed, it creates a new texture that is large enough to fit all the revealed tiles (plus a bit extra to make sure that we do not have to do this too often). This process repeats every time the texture is too small. The problem is that as the texture gets larger, more CPU time is needed to create the texture and upload it to the GPU. I did a simple benchmark, and it looks like the performance is good enough for levels with up to 250k tiles (i.e. the bounding box of the level is approx. 500x500 tiles). For larger levels, the game freezes for a while when the texture is recreated. However, the average level generated by the plugin should be much smaller than that, so the performance of the game should not be affected by the Fog of War script.
Note: If you have problems with the performance of the Fog of War script, please create a Github issue.
If you want to have the minimum possible performance footprint, do not use any animated transitions. Use the Fade In mode and set the Fade In Duration to 0 seconds. With this configuration, the script will compute something only in the frame when a room is revealed.
Advanced
Serialization
TBD.