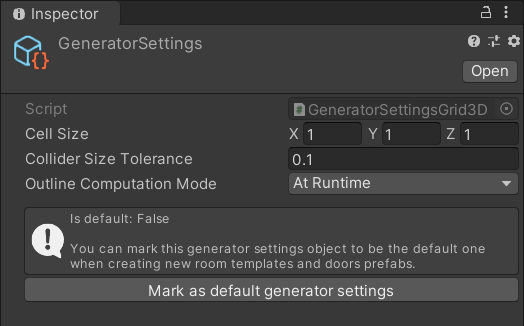
Generator settings
Before you create your first room template, you need an instance of the GeneratorSettings scriptable object. This object is mainly used to control the grid size of generated levels and individual room templates.
Note: If this is your first time working with the 3D version of Edgar, I recommend starting with the Basics tutorial. You can come back to this page later if you need some more information.
Create GeneratorSettings instance
To create an instance of the GeneratorSettings scriptable object, go to Create → Edgar (Grid3D) → Generator settings. If you open the object, it should look like in the image below:
Minimal setup
The minimal setup of the GeneratorSettings object consists of configuring the Cell Size. The cell size controls the size of the grid to which all the room templates must be aligned.
You should pick the cell size based on your base tiles/3D models like walls and floors.
Note: Some 3D models might be unsuitable for this grid-based approach. For example, if your walls are 2 meters wide and your doors are 3 meters wide, there is no way to pick a suitable grid size. You would either have to prepare walls that are 1 meter wide or change the doors to be 2 or 4 meters wide.
Configuration
- Cell Size - Size of the grid
- Collider Size Tolerance - Controls the tolerance for the algorithm that computes room template outlines from colliders
- If set to 0.1 meters, that means that your grid alignment may not be 100% precise and imprecisions up to 0.1 meters will be ignored
- Outline Computation Mode - Controls when are room template outlines computed
- At Runtime (Recommended) - Outlines are computed before each level is generated. This is the default and easiest setup. The only downside is that in order to compute outlines from colliders, each room template must be instantiated and then immediately destroyed. That can cause some problems because constructors and
OnEnable()methods from any components will be called at that time. - Inside Editor - Outlines are computed only when a room template is saved in the Prefab Mode editor. This mode also adds a button to the
GeneratorSettingsobject that can recompute outlines of all room templates that have these generator settings. You must make sure that you do not accidentally desync the saved outline of a room template with the actual outline.
- At Runtime (Recommended) - Outlines are computed before each level is generated. This is the default and easiest setup. The only downside is that in order to compute outlines from colliders, each room template must be instantiated and then immediately destroyed. That can cause some problems because constructors and
Examples: Grid alignment
Both the 2D and 3D versions of Edgar are tile-based in their core. That means that some things must be aligned to the grid while others can be positioned freely.
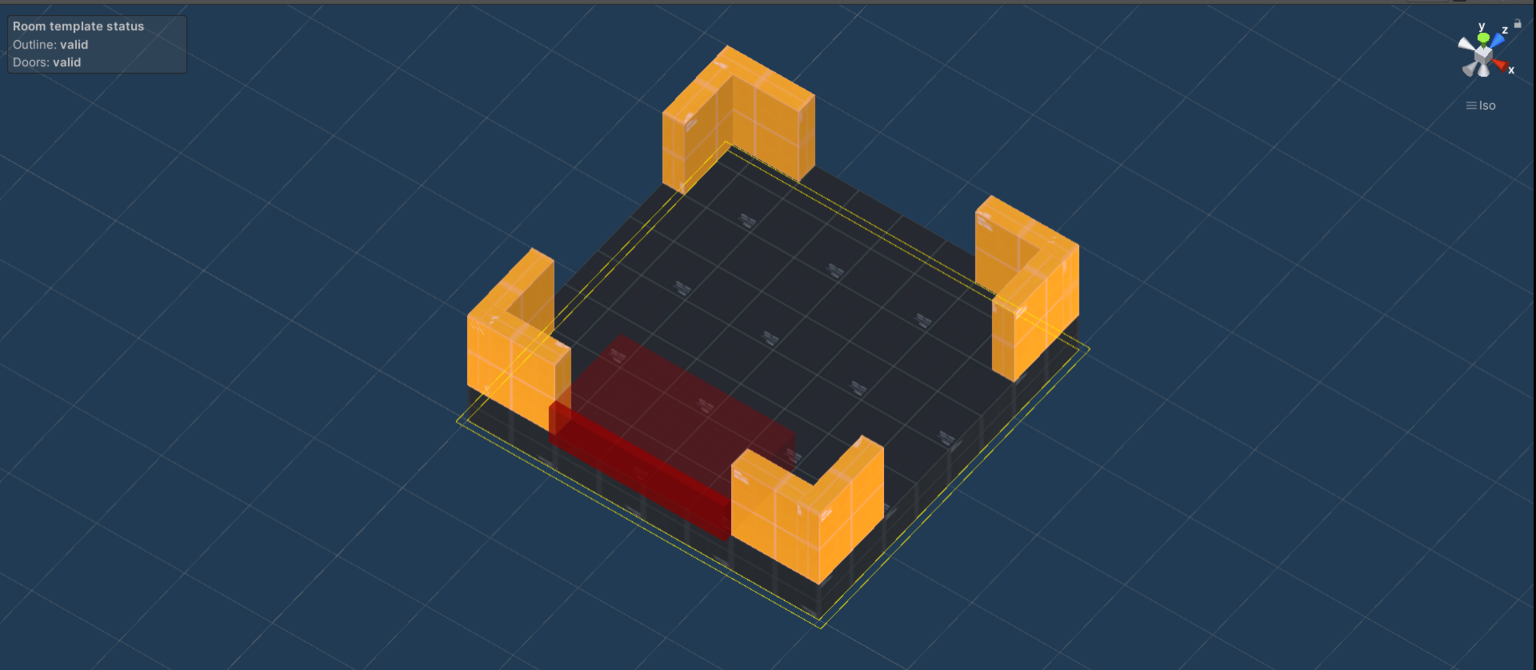
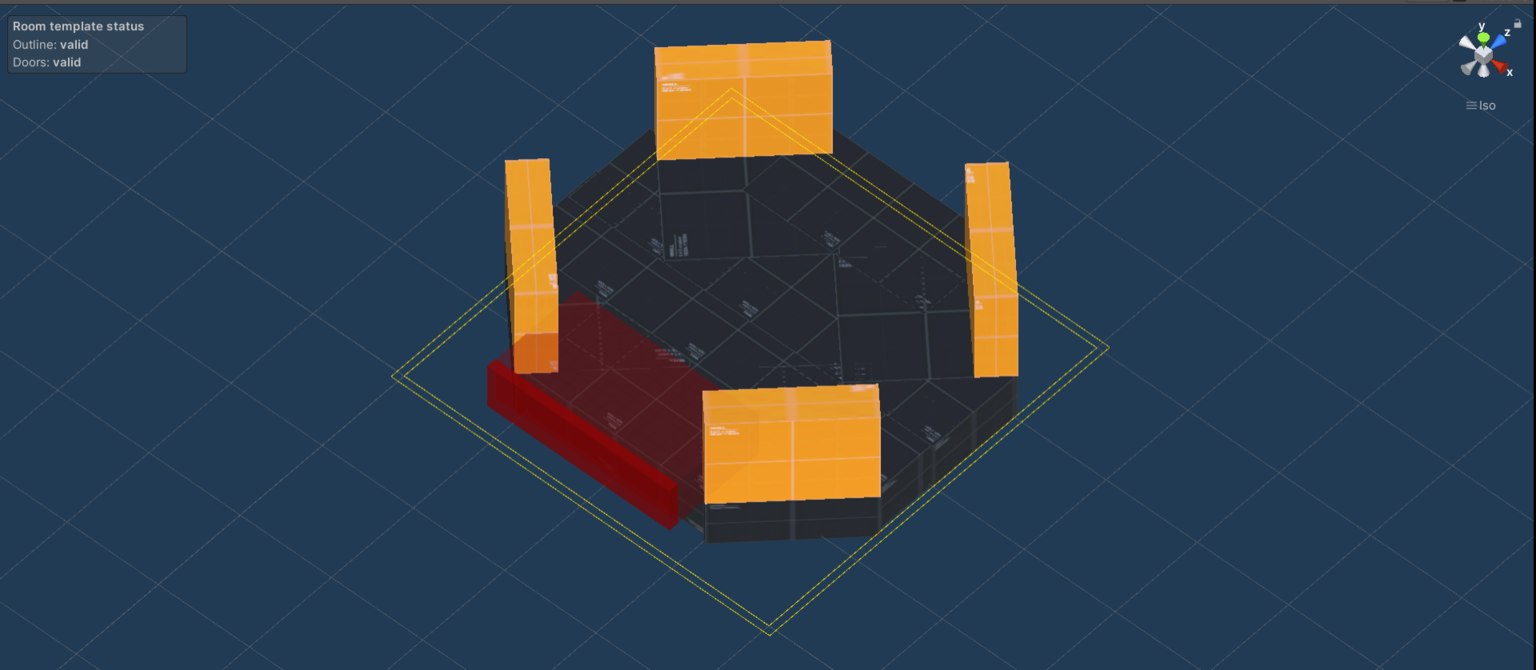
Doors - Must be aligned
All doors must be aligned to the grid precisely. Also, the length of each door also has to be a multiple of the grid size.

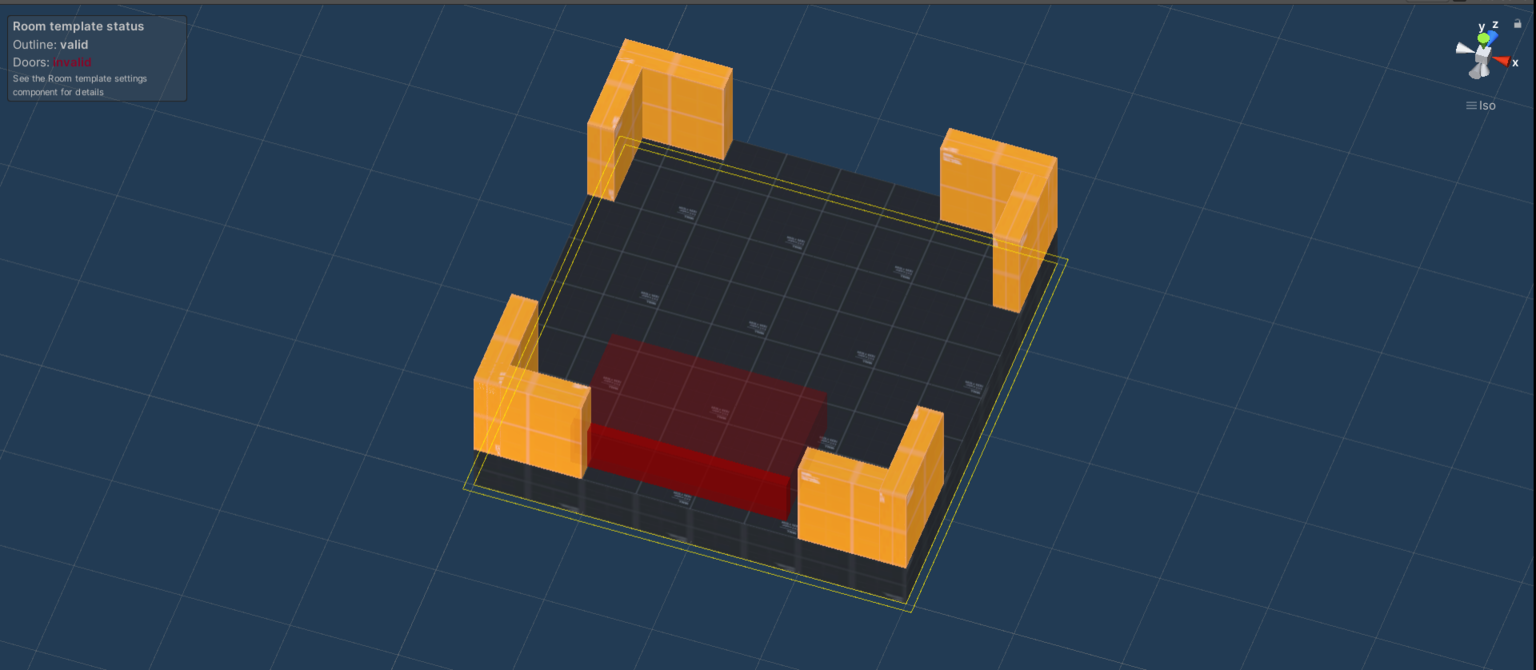
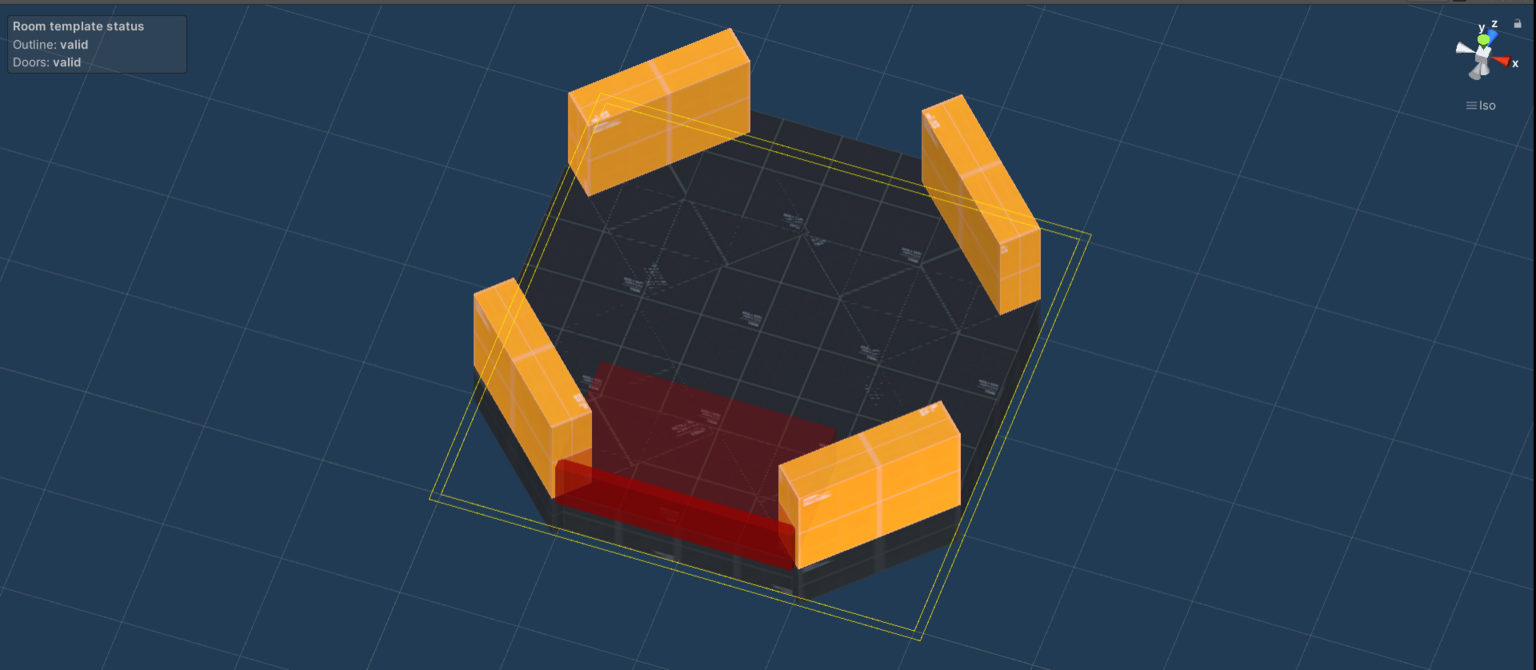
Outline tiles/objects - Should be aligned
Objects on the outline of a room template (e.g. walls) should be aligned to the grid, but it is not as strict as with doors. For example, you can have skewed corner tiles and the generator will snap the outline to the closest full tile. See the examples below.
Objects inside room templates - Can be positioned freely
The generator is mostly just concerned with what happens on the outline of each room template because that is important when computing how one room template can interact with others. That means that objects that do not form the outline of a room template can be positioned/rotated freely.