Basics (step-by-step tutorial)
The goal of this tutorial is to show you how to generate your very first level using the 3D version of Edgar. I am going to use the great Prototype Textures asset pack by Kenney.
Note: All files from this example can be found at Examples/Grid3D/Basics.
Simple example
The goal of the simple example is to set up the bare minimum that is needed to generate a level.
Blocks
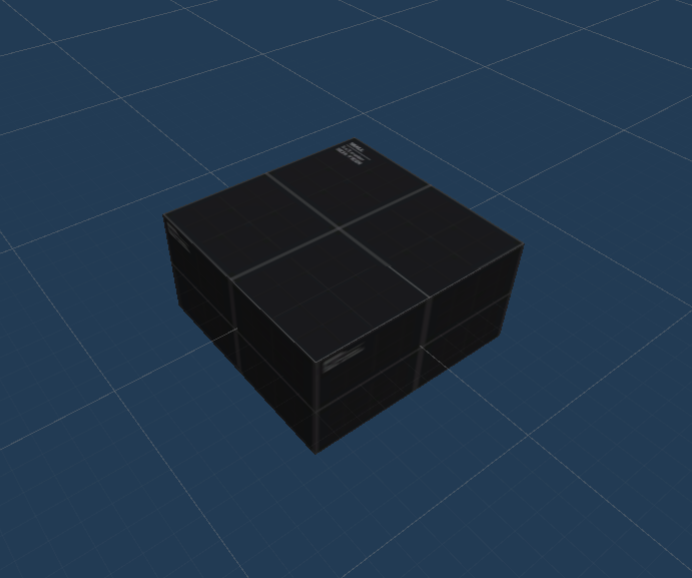
The first step is to create some blocks that we will later use to create our room templates. We will use an orange block for walls and a black block for floors.
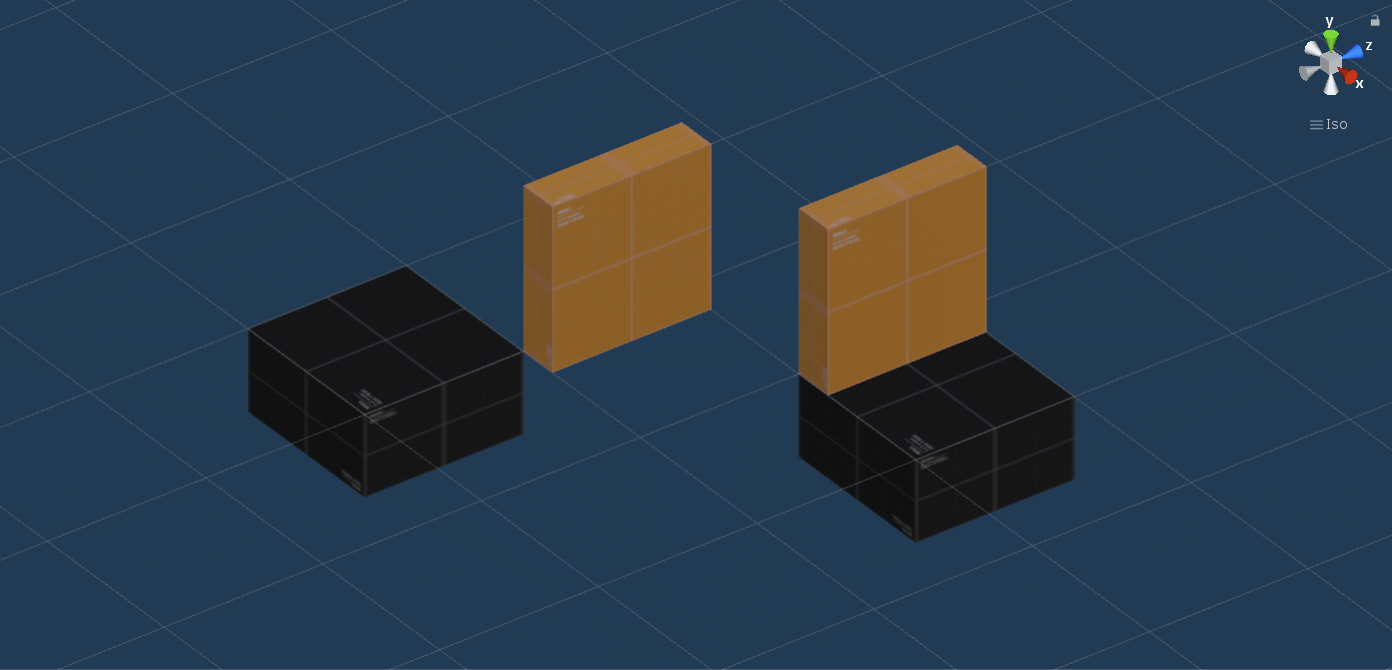
Create an empty prefab game object. Then add a cube as a child object (3D Object → Cube). Assign the corresponding material to the cube together with a Box Collider.
Note: Even if you have your own 3D models, it is a good idea to create prefabs for your main building blocks like floors or walls. With this approach, you can later decide to change the models or make other changes without needing to recreate all your room templates.

The last step is to set the position of the cube so that it is aligned to the grid cells. As you can see in the image (left) above, the block is not aligned to the grid in the background, but we want it to be. In this case, I had to set the position to (0.5, -0.25, 0.5) (right image).
Generator settings
The next step is to create an instance of the GeneratorSettings scriptable object (SO) (Create → Edgar (Grid3D) → Generator settings). This SO is used to configure the size of the grid that we will be using for this tutorial. Open the settings and set the cell size to (1, 0.5, 1) like in the image bellow. The 0.5 value comes from the floor tile being only 0.5 units high.
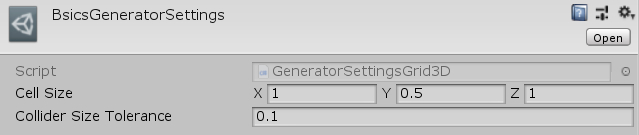
Note: The height (y axis) of the cell size is not important in this case. The walls are 1 unit high while the floors are only 0.5 units high. Therefore, we could use both heights of 1 and 0.5, and it would work, just some gizmos would be shown in a slightly different way.
Room template
Create your first room template (Create → Edgar (Grid3D) → Dungeon room template). Open the prefab and assign the GeneratorSettings object created in the previous step to the GeneratorSettings field of the RoomTemplateSettings component.
Tip: When creating room templates and doors, you are required to assign the generator settings object to them. If you want to automate this step, open your
GeneratorSettingsobject and click the Mark as default generator settings button. When you create a new room template, the chosen default generator settings will be automatically assigned.
Next, use the floor and wall blocks to design the room template. Make sure to add these blocks as children of the Blocks game object so that they can be recognized by the outline computing algorithm. The room template I created looks like this:
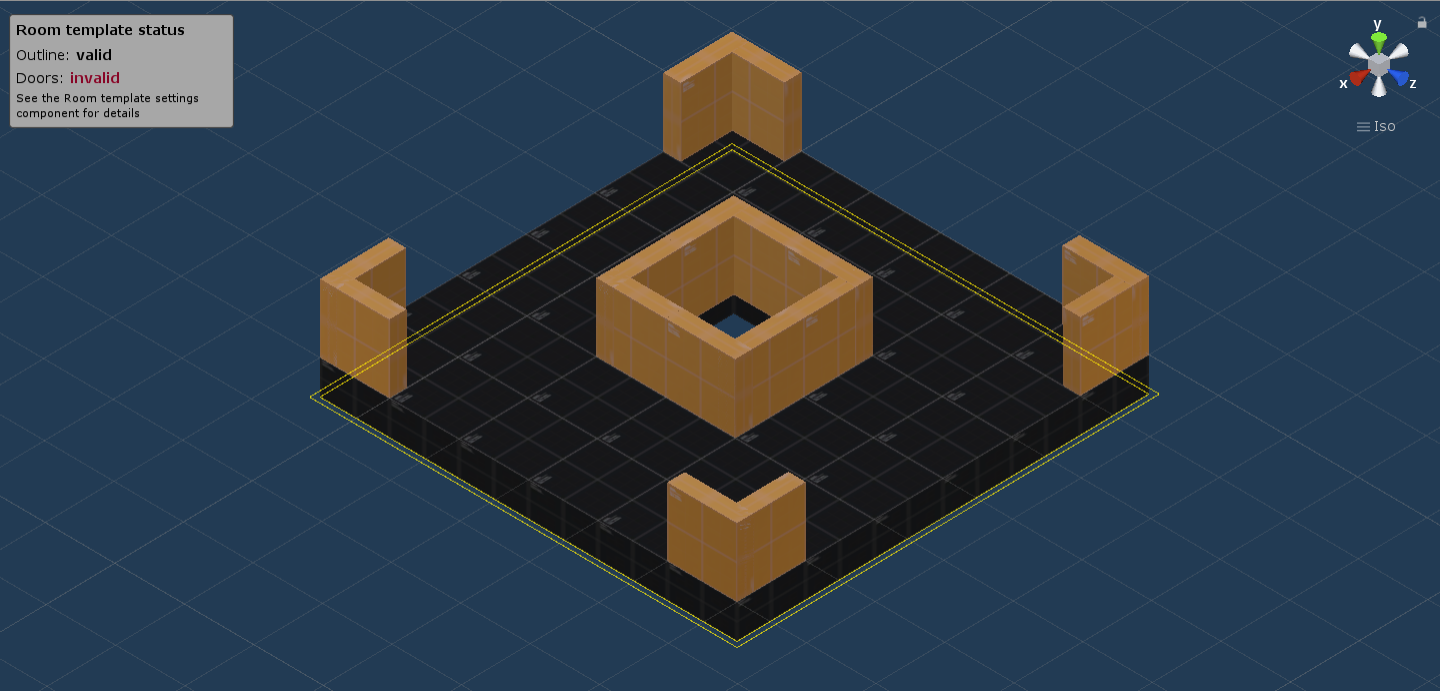
Make sure that the outline of the room template is aligned to the underlying grid. In the image above, you can see that yellow outline gizmo precisely follows the intended outline of the room template.
You might be wondering why there is so much empty space on the outline of the room template where walls should be. The reason is that we will use this space to mark potential door positions in the next section.
WARNING: It is not possible to decrease the cell size in order to hide the fact that a room template is not aligned to the grid. See the two images below. The outline of the room template in the images should be a square, and changing the cell size of the grid does not fix the fact that one of the floor tiles is incorrectly positioned.
The correct solutions are:
- Move the floor tile so that it does not cover the neighbouring grid cell
- Increase the
ColliderSizeTolerancefield in theGeneratorSettingsobject


Door prefab
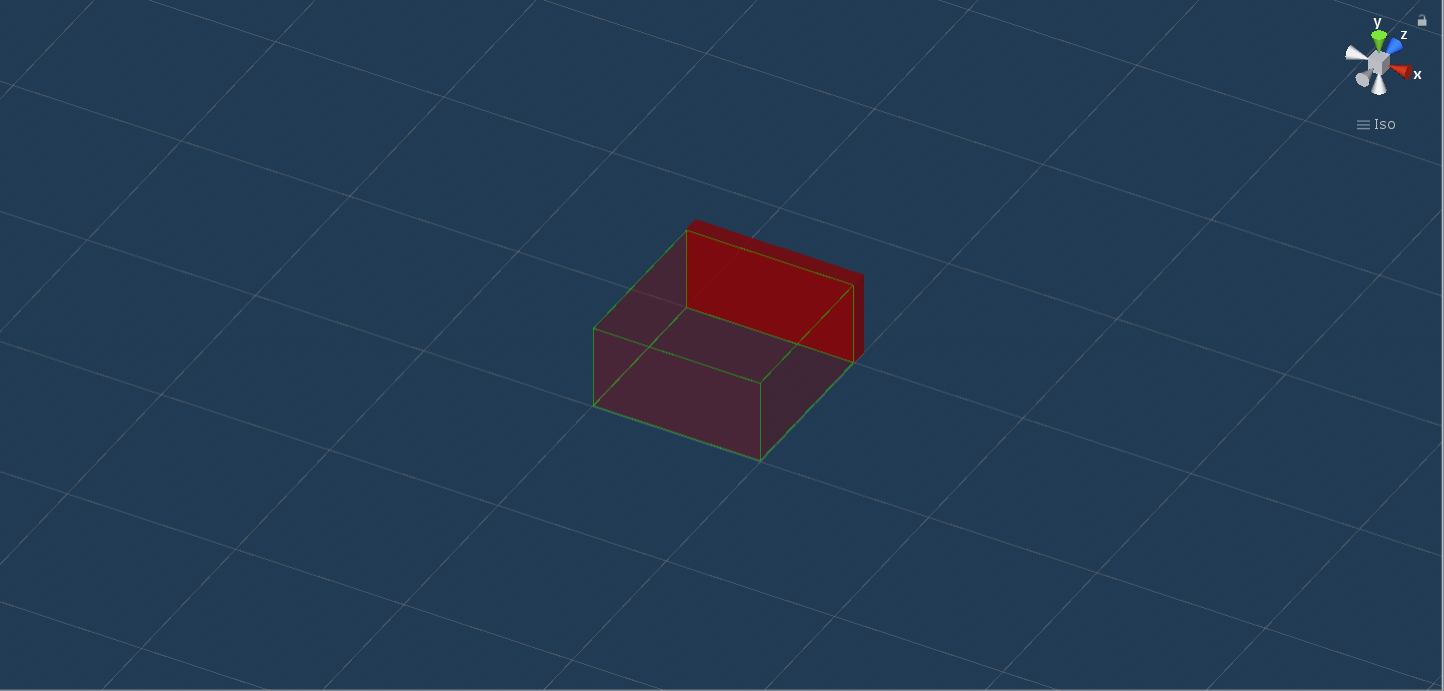
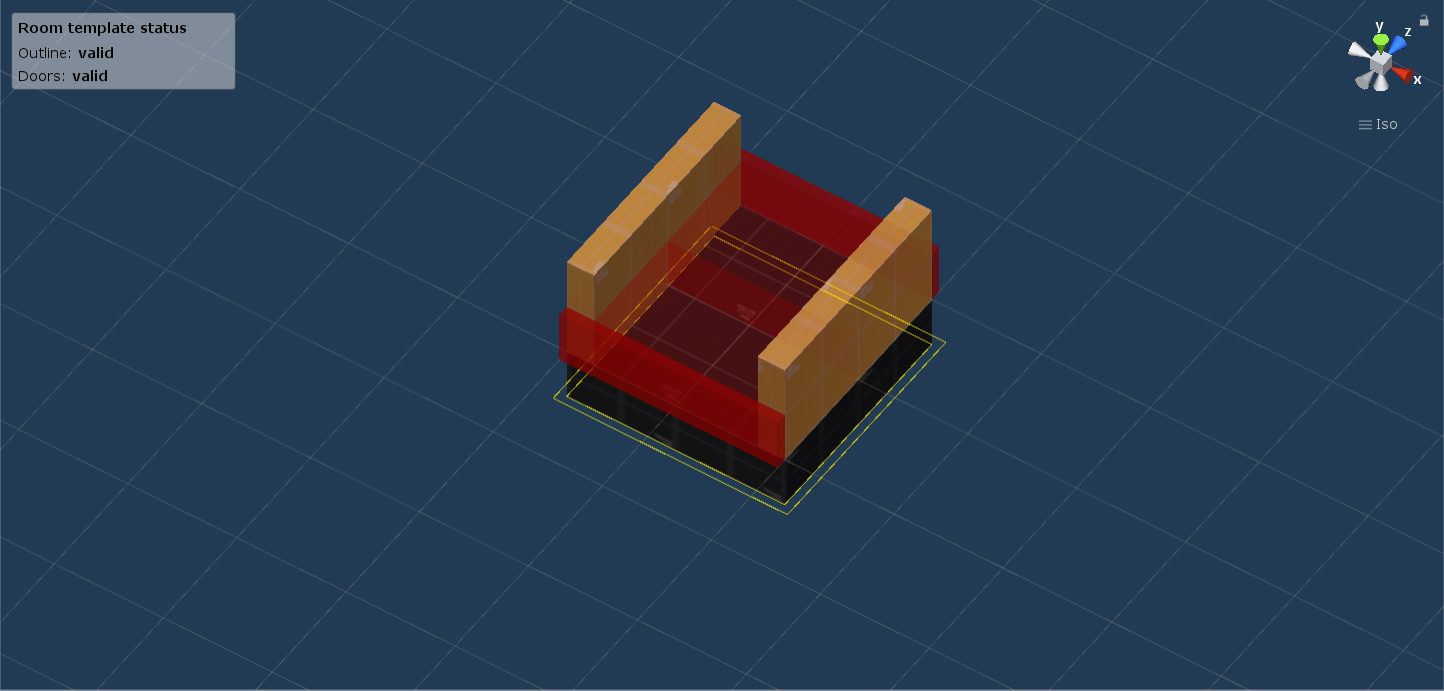
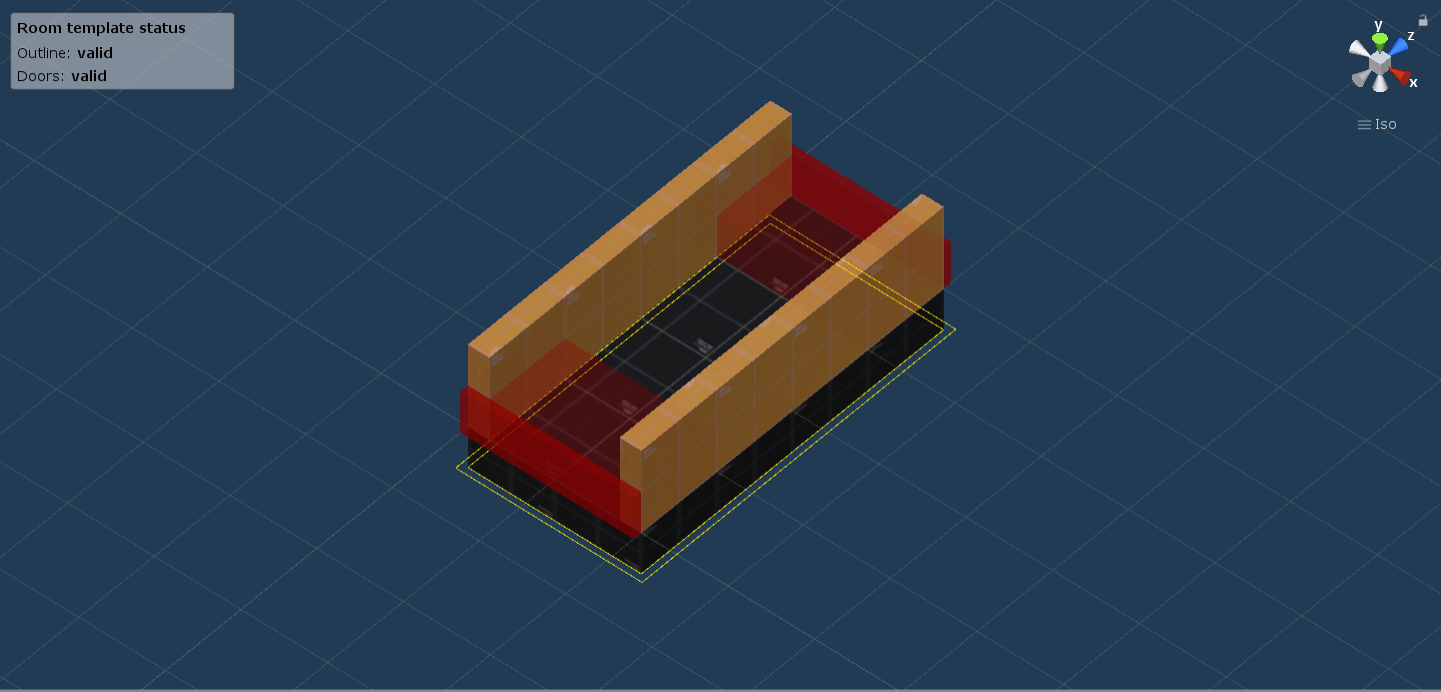
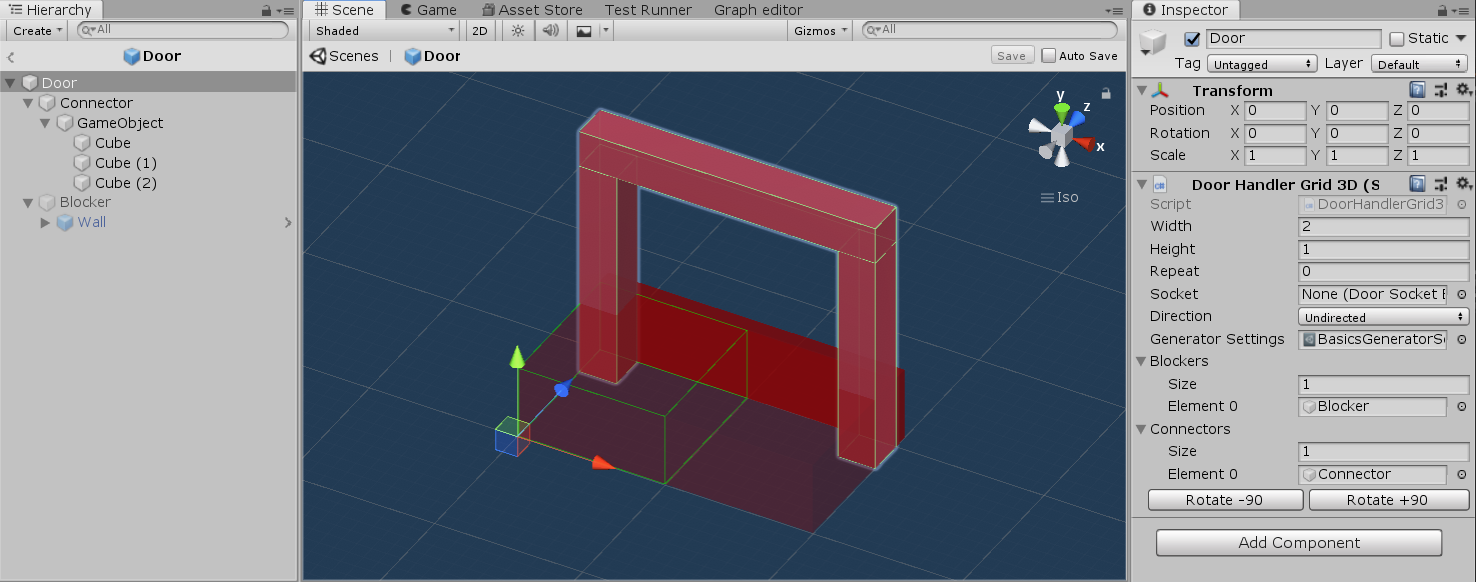
The room template is now ready for doors to be added. Create a door prefab by going to Create → Edgar (Grid3D) → Door. Open the prefab and, again, assign the GeneratorSettings field. Now, you should see something like in the image bellow on the left.
The darker red gizmos show the orientation of the door - the dark part is directed outwards from the room. The more transparent red gizmo shows the total volume of the door. By default, each door is 1 block long in all dimensions. That means that with the cell size in the generator settings, the volume is (1, 0.5, 1) units.
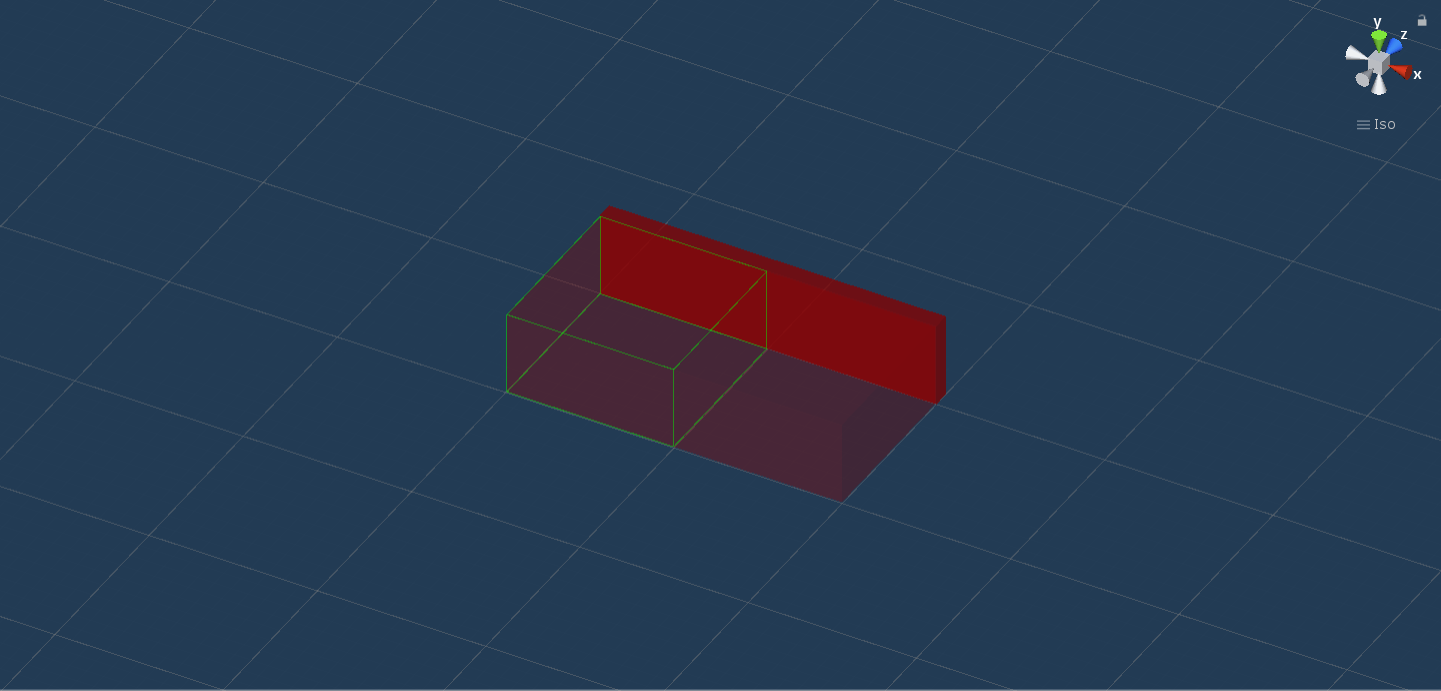
For this tutorial, I decided that the doors will be 2 blocks wide, so change the Width field in the DoorsHandler component to 2. You should now see something like in the image bellow on the right.
Doors placement
Now we are ready to use our door prefab and place it inside the room template. You can now open the room template prefab and put the door prefab inside the Doors game object. Then, move the prefab to the outline of the room template, but make sure that the door is properly aligned to the grid. Also, make sure that the dark red gizmo points out of the room. If you need to rotate the door, use the Rotate -90 and Rotate +90 buttons in the inspector. The result should look like something like this:
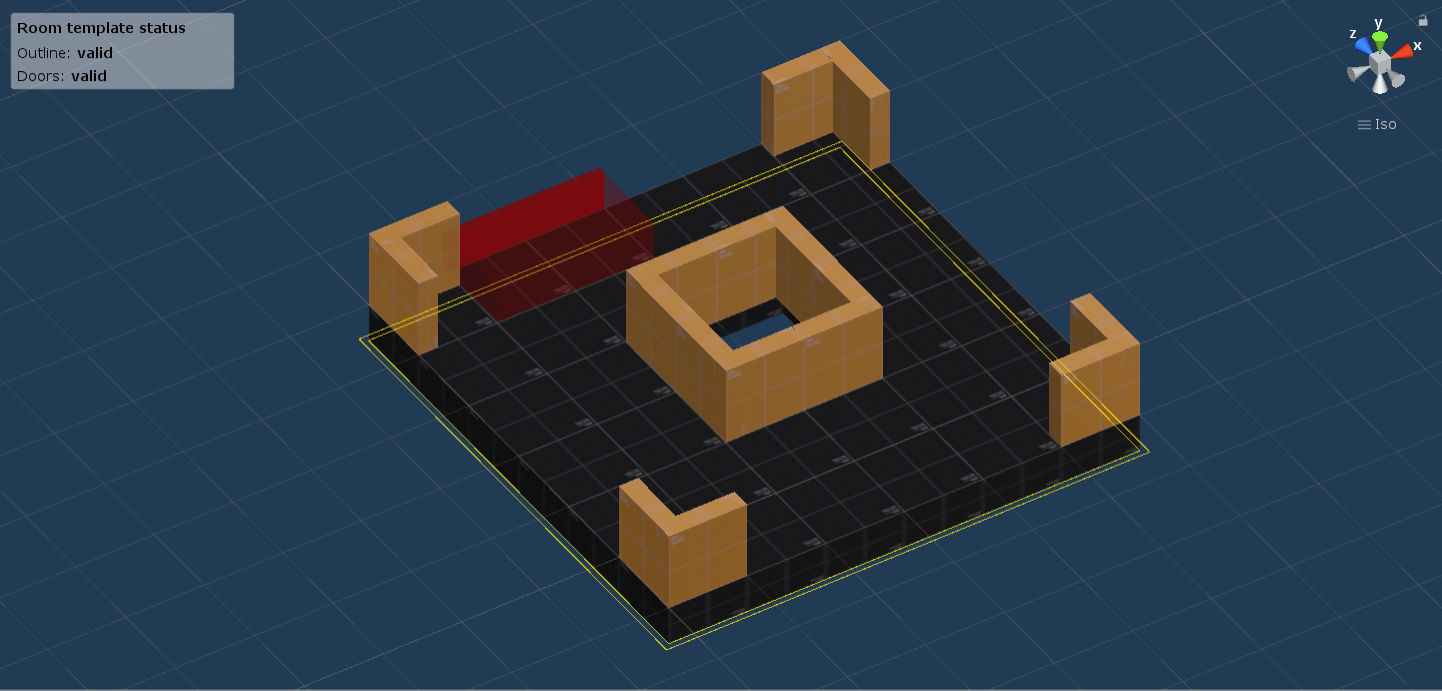
The next step is VERY IMPORTANT. Instead of filling all the holes with individual door prefabs, you should select the current door and change its Repeat property to 2 because there are two additional blocks next to the door that should be covered. The result should look like this:

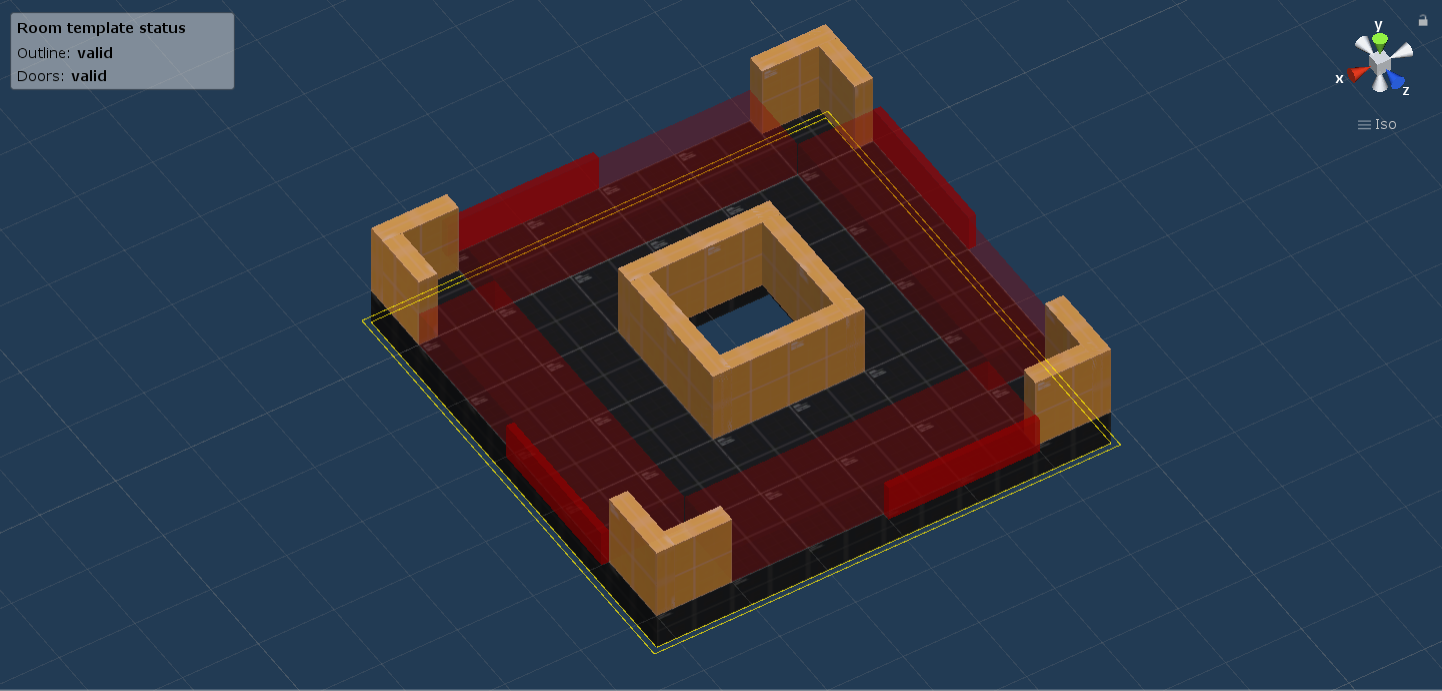
Next, repeat the process for the 3 remaining sides of the room template, each time changing the value of the Repeat property. You should end up with 4 instance of the Door prefab under the Doors object. Also, make sure to use the correct orientation for each door.
Level graph
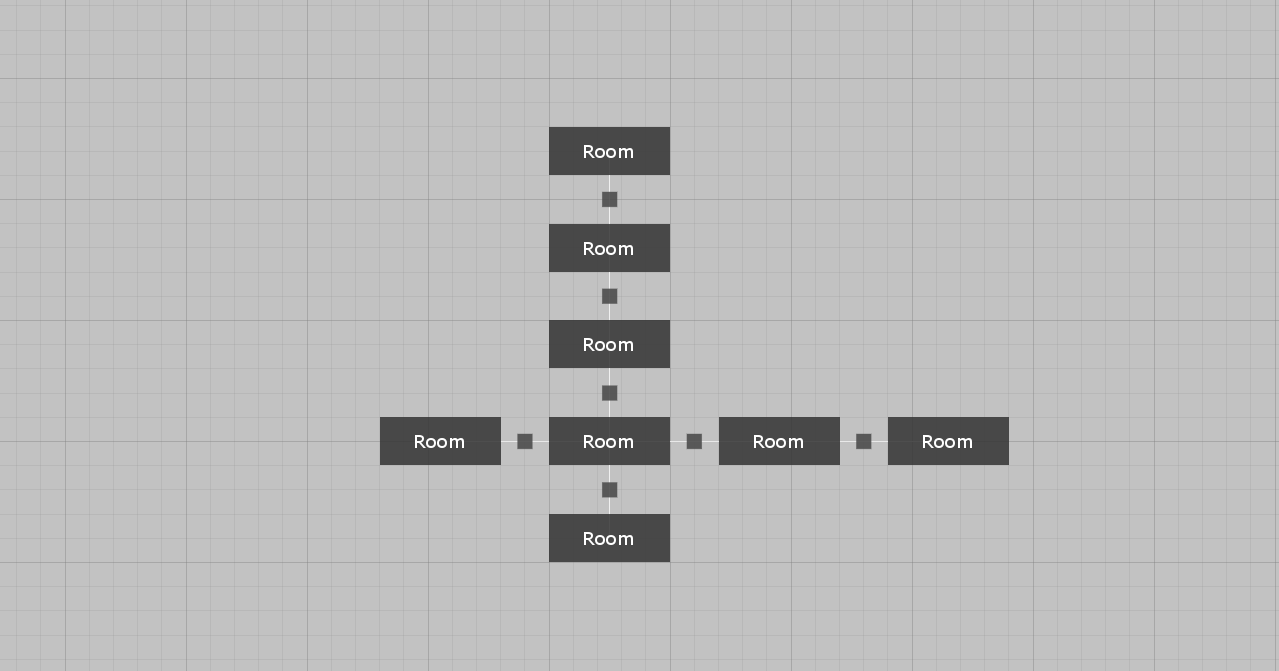
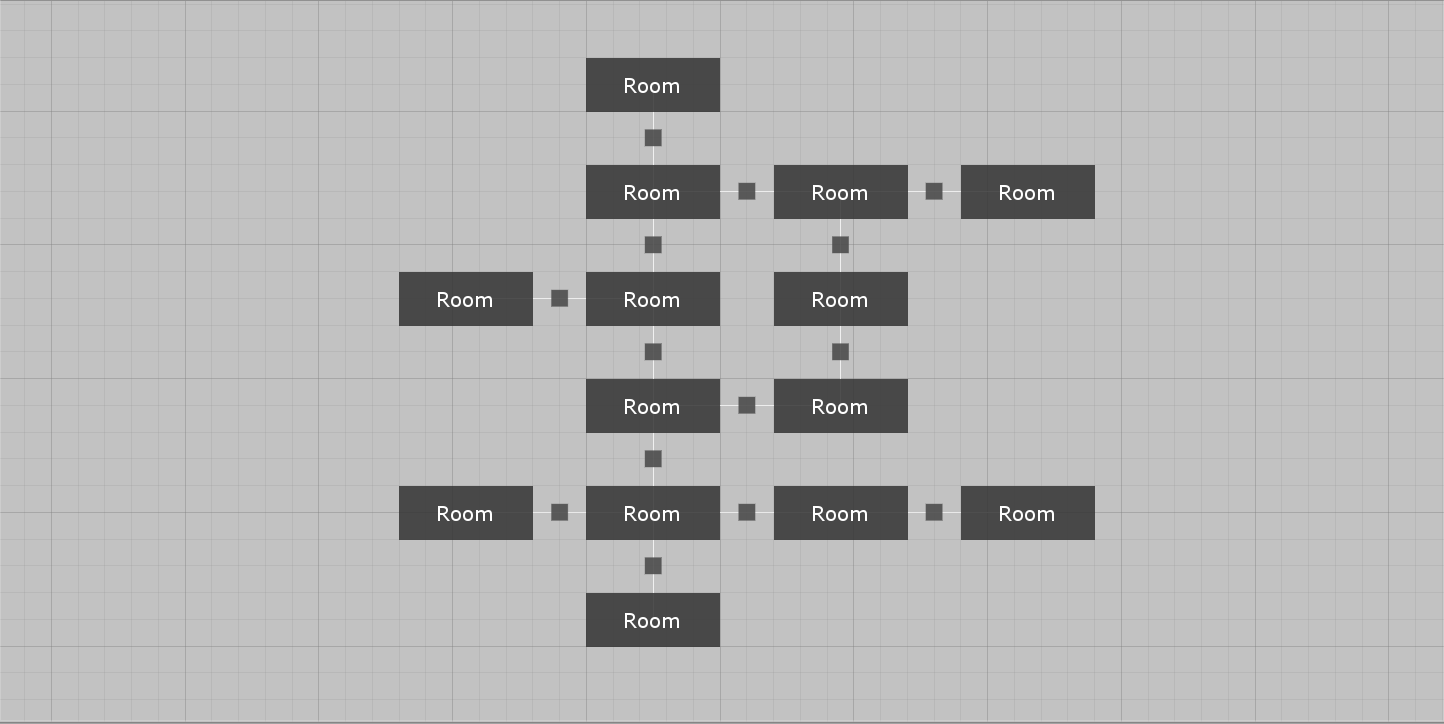
For the simple variant of this example, we will use a very simple acyclic level graph that will guarantee quick generation times. If this is your first time creating a level graph, plase consult the Level graph page.
Note: If you want to generate some levels at this stage of the tutorial, you have to uncheck the
Use Corridorsfield on the dungeon generator component.
Door blockers
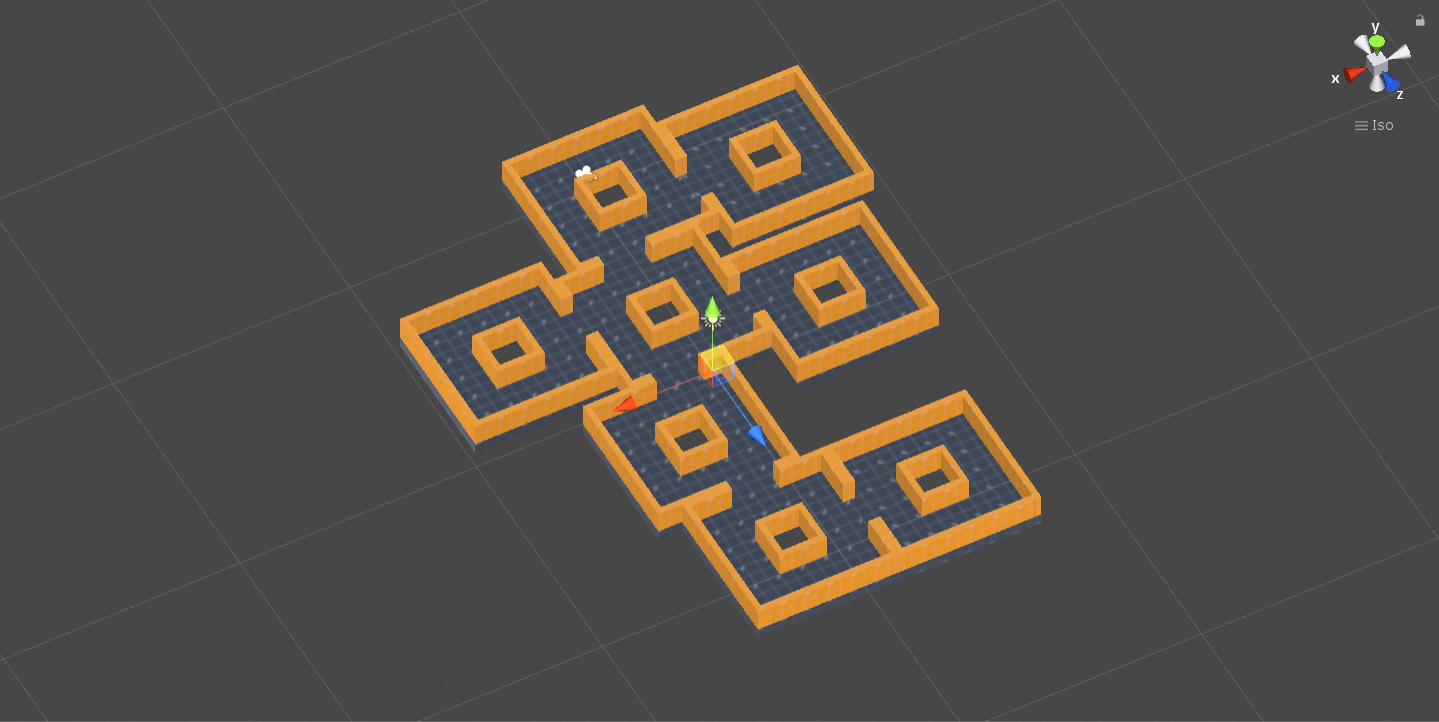
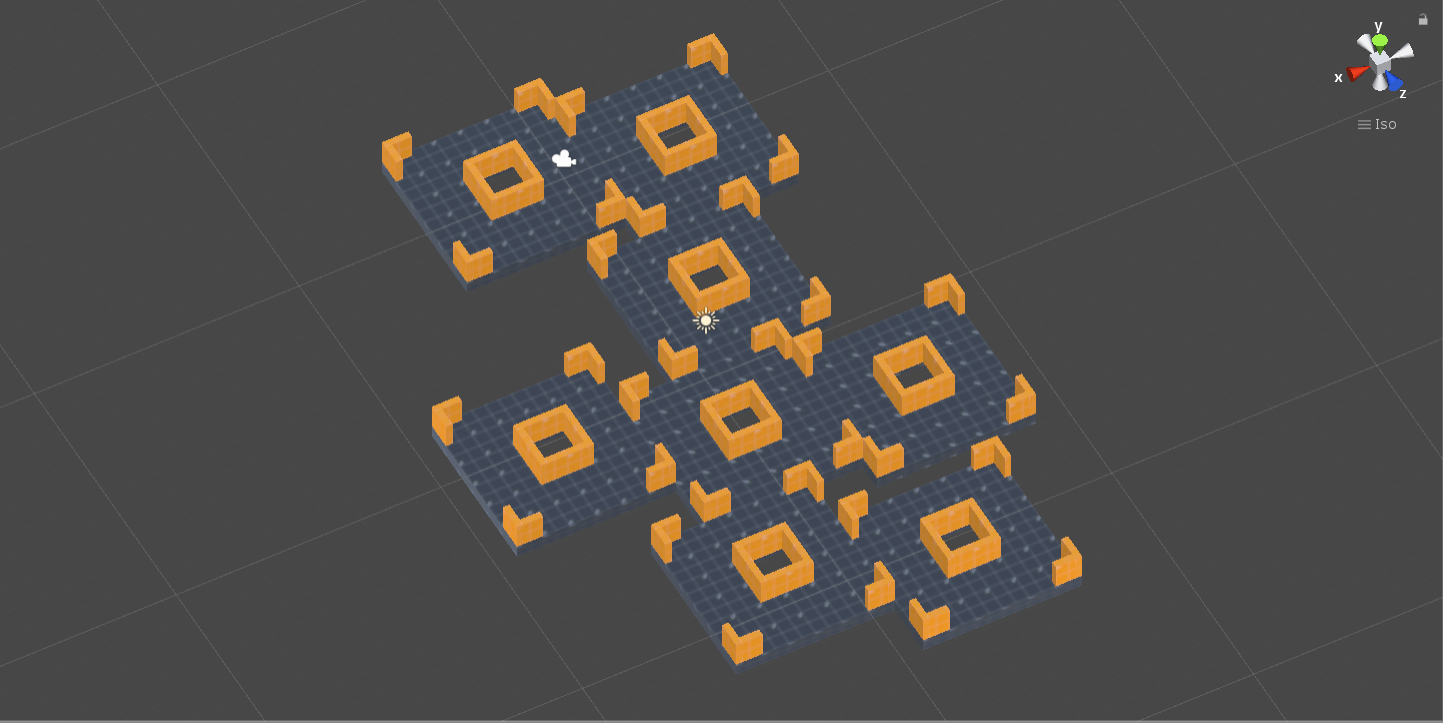
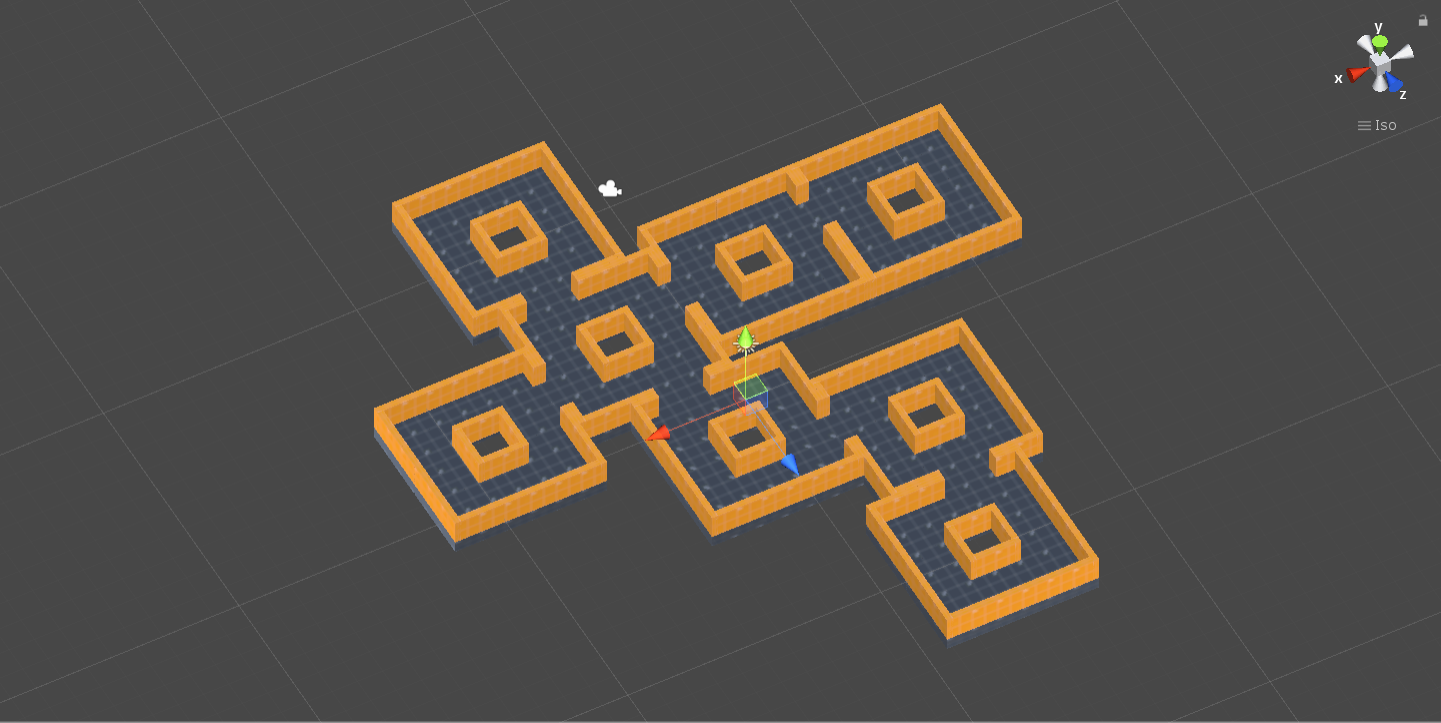
If we now generate a level, we will get something similar to the image below. The rooms are somehow correctly positioned but there are no walls at all the places that we marked as potential doors but which were not used by the generator.
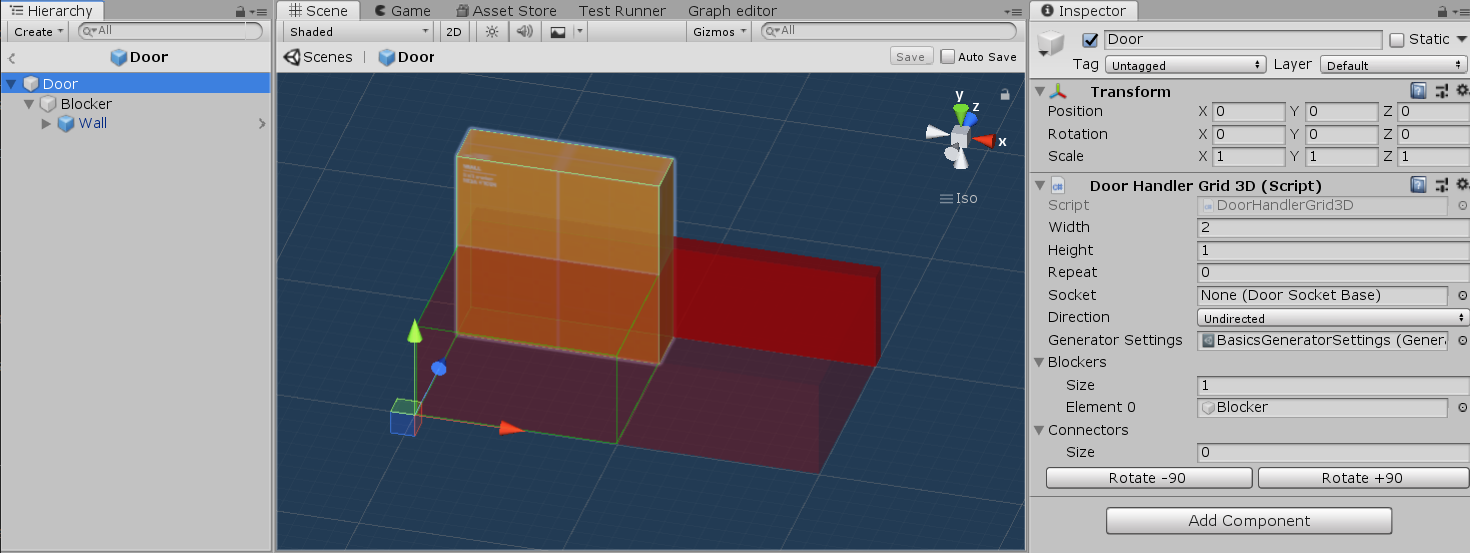
To fix this problem, we have to use a so-called door blocker, which is an object that will block doors that were not used by the generator. Open the door prefab again and you should see a think green gizmo which shows where to put the door blocker. Create an empty game object inside the door prefab, call it Blocker and add your wall tile inside of it. Make sure that the wall is correctly positioned inside the green gizmo. Lastly, drag and drop the Blocker game object inside the Blockers field of the DoorHandler component. The result should look like this:
Note: After you are done with the door blocker, it is a good idea to make the root game object of the blocker inactive so that it does not get in the way.
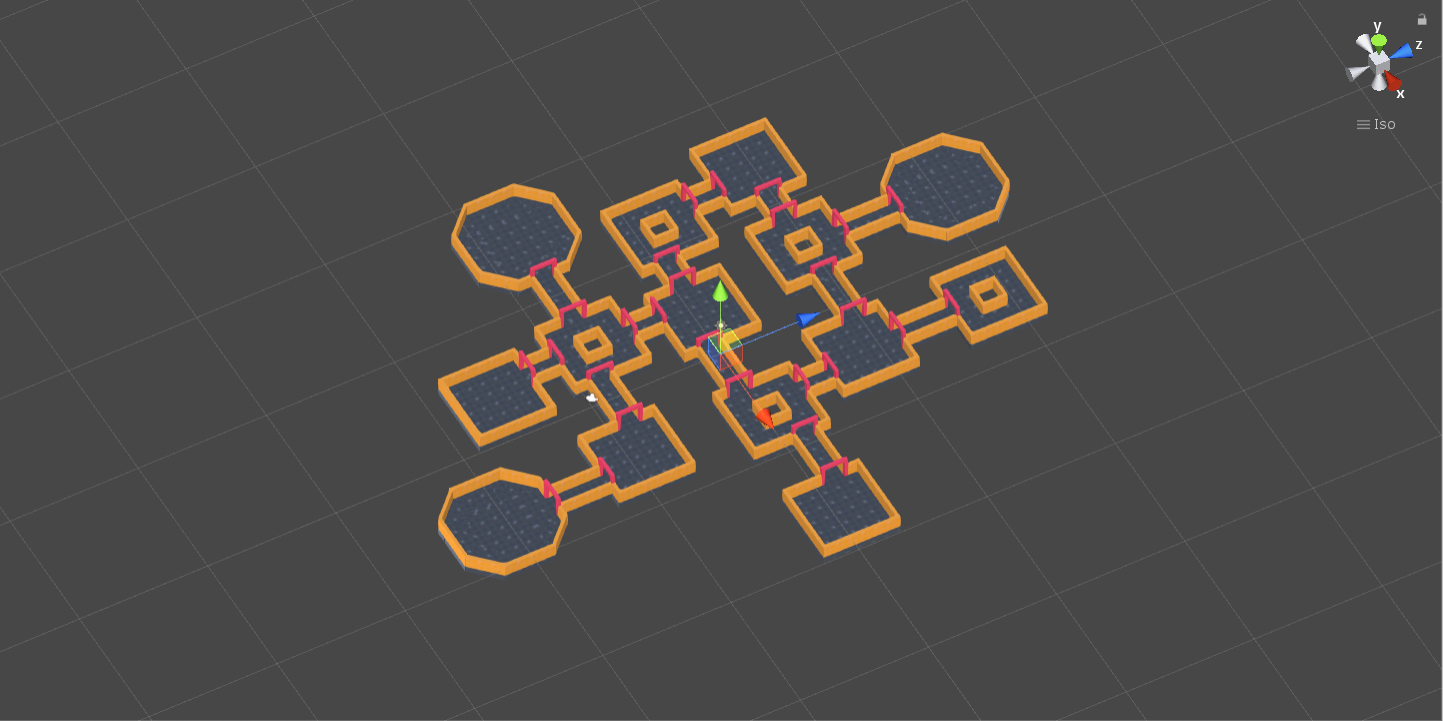
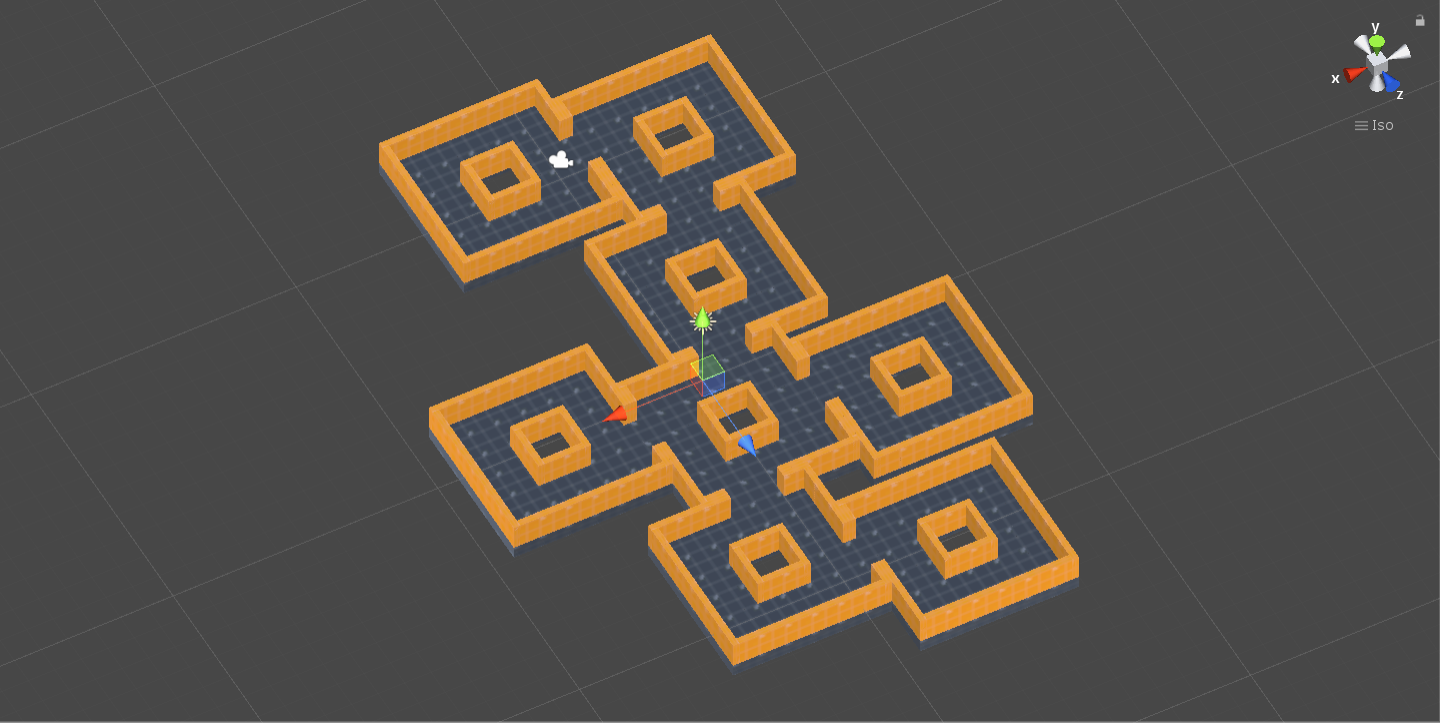
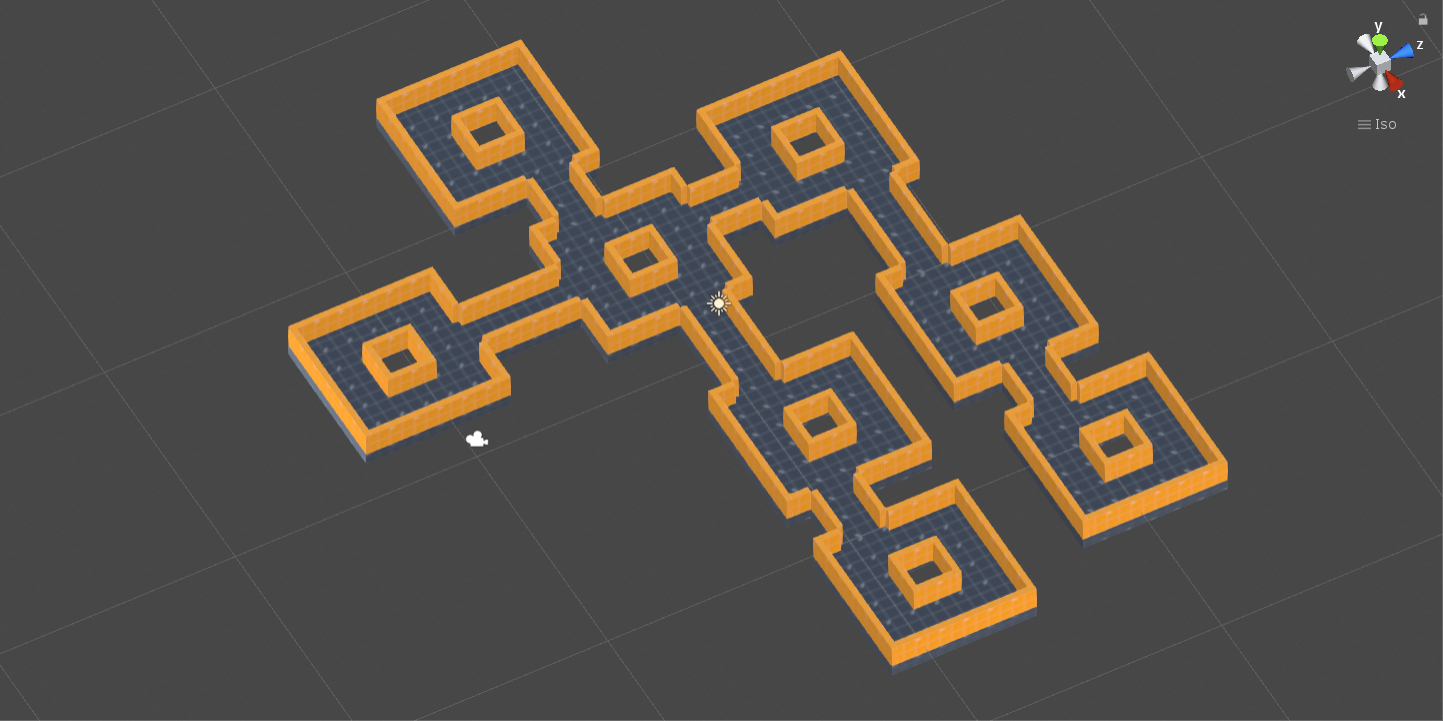
If we now generate a level, it should have all the unused doors filled with walls.
Results

Real-life example
The goal of the real-life example is to add some extra stuff to the simple version.
Corridors
It is quite common for procedural dungeons to have short corridors between rooms. In Edgar, it can also improve the performance of the generator as there are more ways of connecting different rooms. Bellow, you can see two corridor room templates that I created.
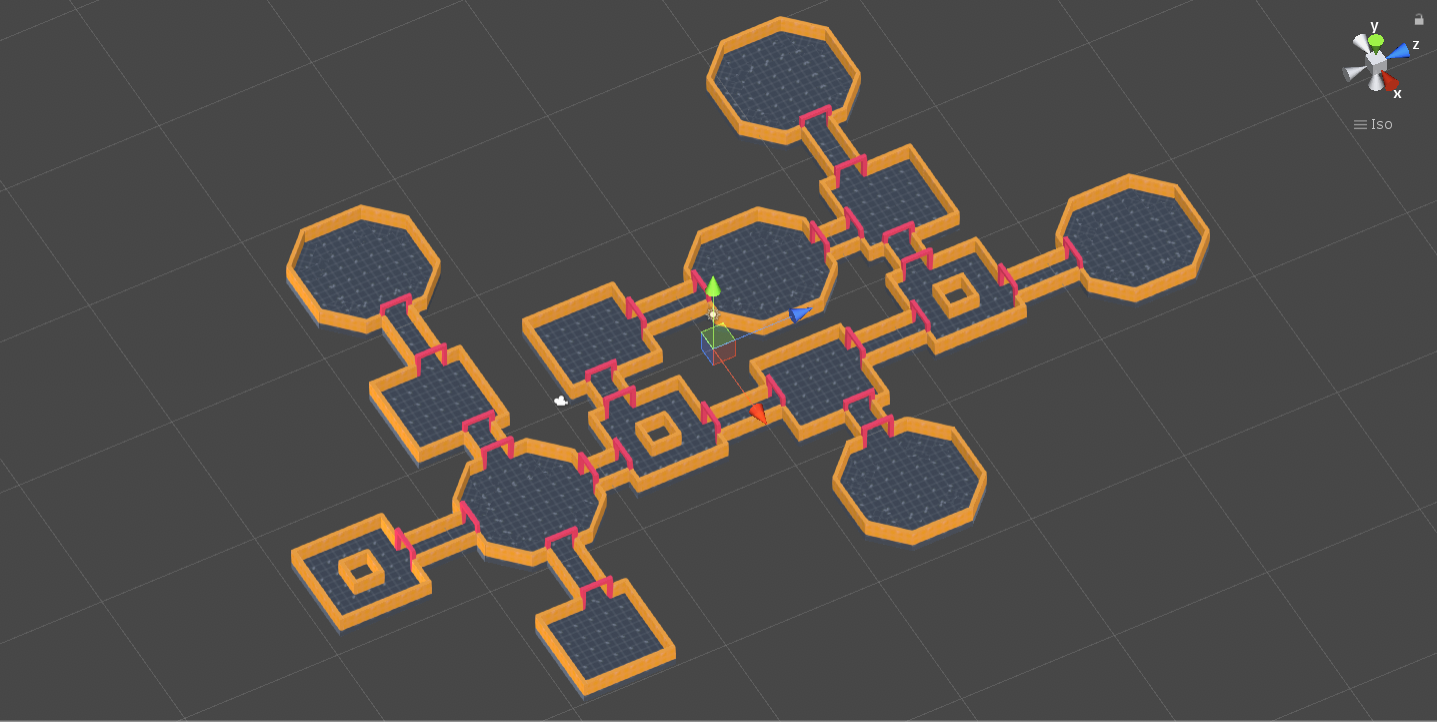
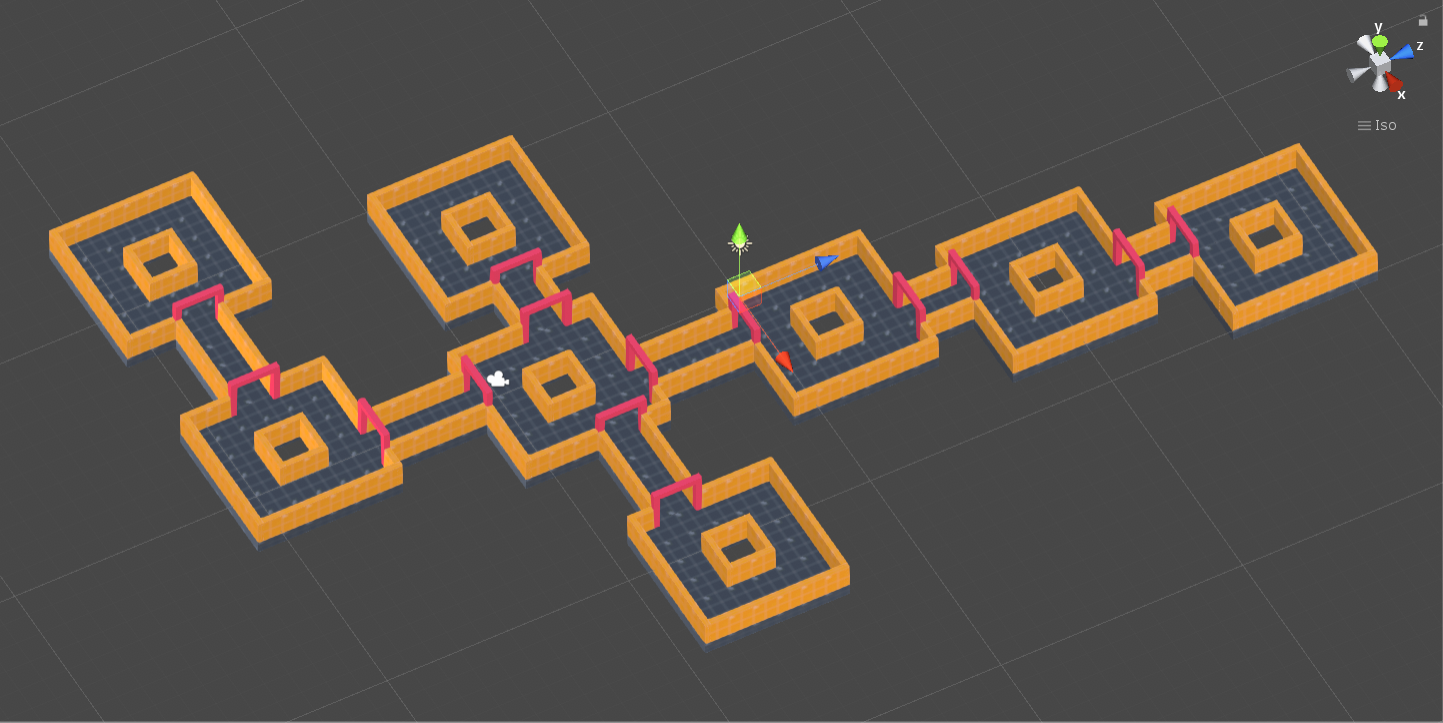
The generated levels should now look like this:
Door connectors
In the previous sections, I showcased the use of door blockers to block potential door blocks that were not used. Another useful feature are so-called door connectors. There are game objects that are placed at locations that are actually used for doors. Open the door prefab and this time, create a game object called Connector. I created a simple red door frame to be placed when the door is used (image bellow). Do not forget to drag and drop the connector to the Connectors array in the DoorHandler component.
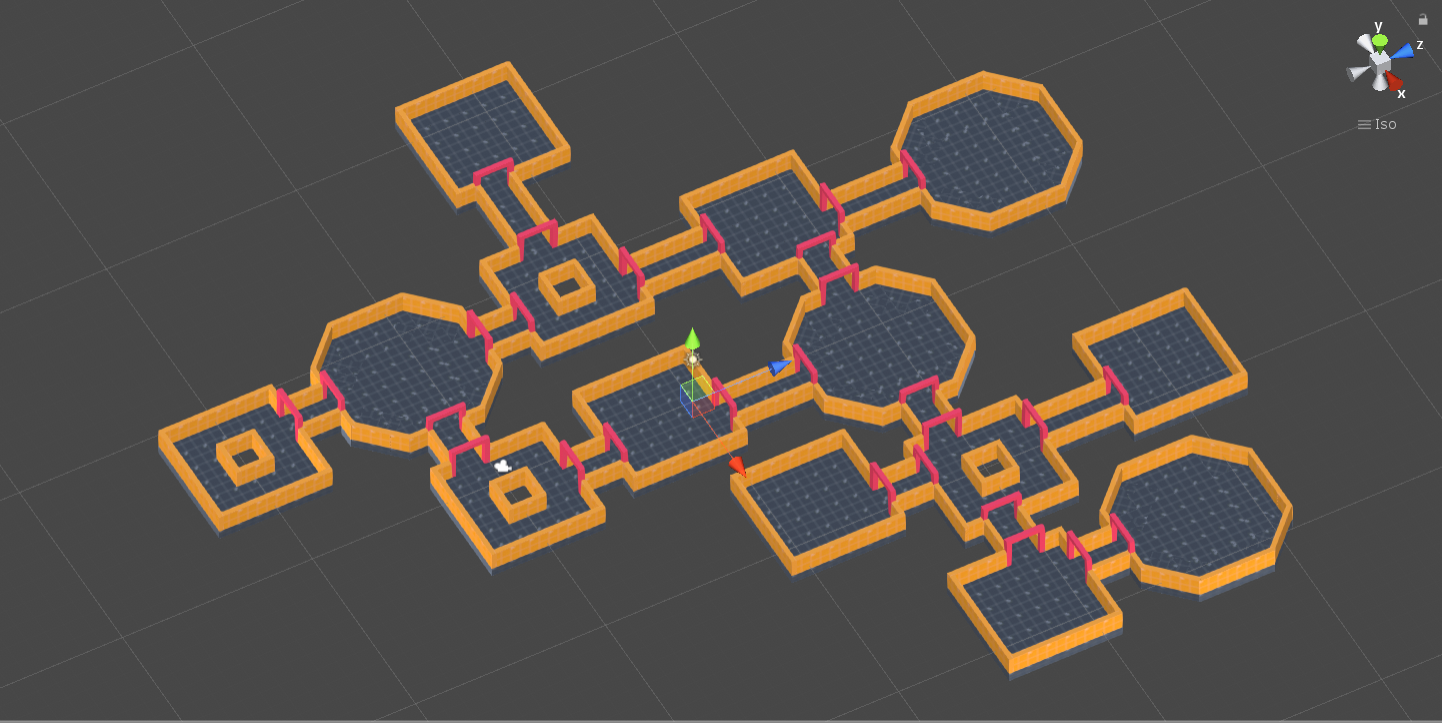
The generated levels should now look like this:
Additional room templates
I also created some additional room templates (shown in the images bellow). In the room template on the left, you can see that there might be walls that are not aligned to the grid. But the resulting outline (yellow lines) will always be aligned to the grid. Also, you have to make sure that all the doors are aligned to the grid. In the room template on the right, you can see that you do not have to add doors to all the sides of the room template.


Level graph
Results