Different room/door elevations
While it is not possible to have a level where one room is on top of another room (multi-story generation), it is possible to have rooms at different elevation levels (y axis). The goal of this guide is to show you how to control the elevation of rooms and what needs to be done if there are cycles/loops in a level graph.
Note: All files from this example can be found at Examples/Grid3D/DifferentElevations.
Basics
The core idea of having rooms at different elevation levels is relatively simple. You just have to place doors that are positioned at different y coordinates and the generator will try to figure out the correct elevation of each room. The end goal is that if two rooms are connected by doors, the doors must align correctly in all three dimensions. If that means that one room needs to be higher than another one, the generator will position the room for you.

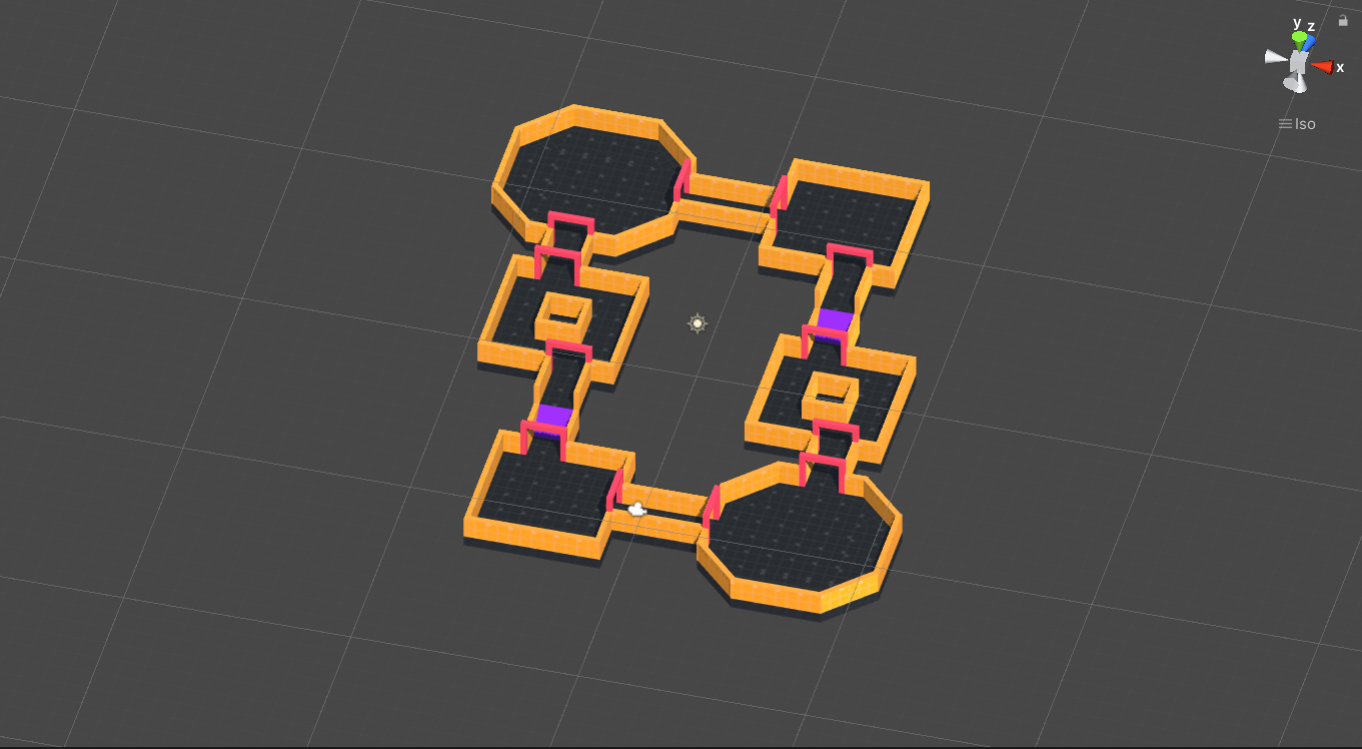
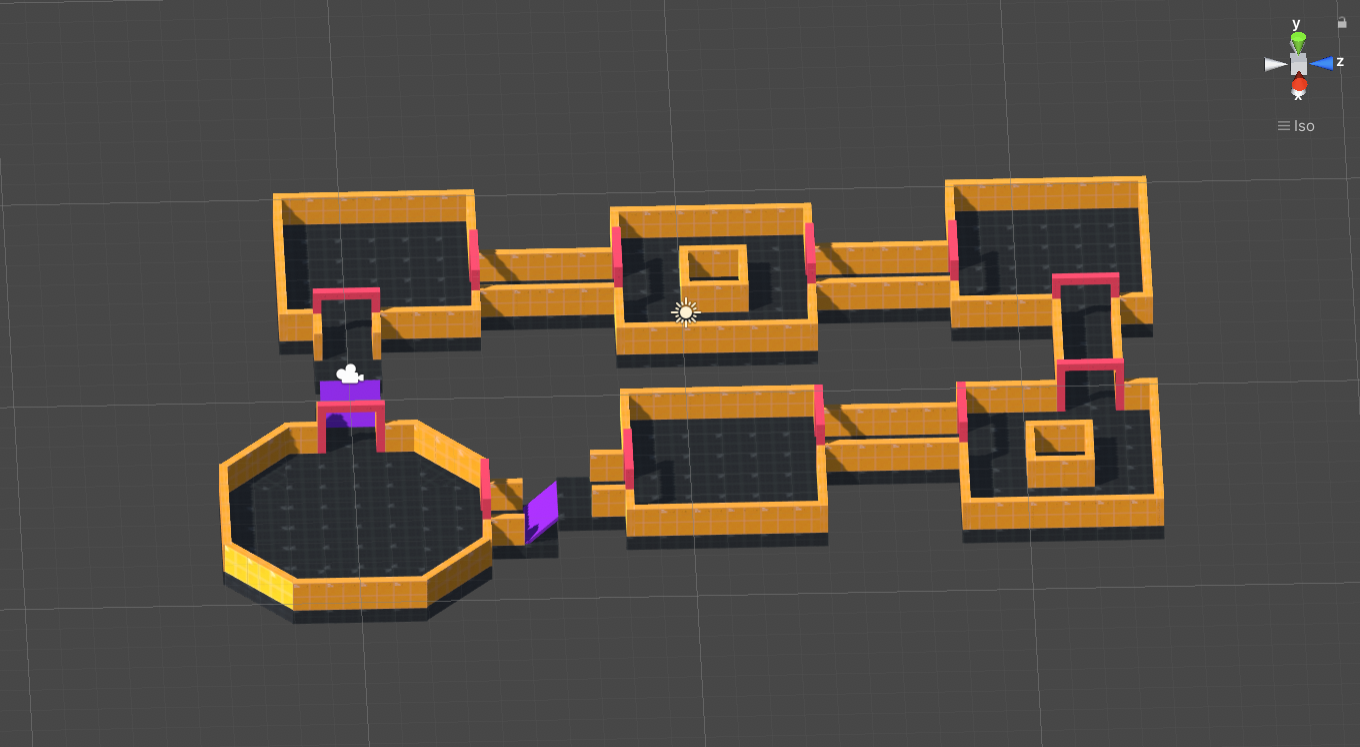
If you use the two room templates above to generate a level, you will get something similar to what you can see in the image below. You can see that all the doors are properly aligned to the doors of the neighbouring rooms/corridors.
Cycles in level graphs (and their challenges)
The above example worked out-of-the-box because there were no cycles (loops) in the corresponding level graph. The problem is that the underlying generator algorithm works completely in 2D, which means that it does not know/care about elevations of individual loops. When there are no loops, the problem is quite simple. We can go through the rooms in a clever order and just fix their elevations one by one.
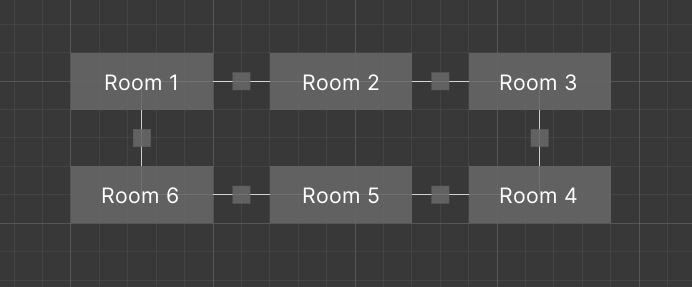
But imagine that you have a cycle in your level graph - I will use the level graph below as an example. There is a cycle with 6 rooms. If you are unlucky, the generator can randomly choose that the next room is always 1 meter higher than the previous room. That means that Room 1 would be positioned at y = 0 and Room 6 at y = 5. If that happens, the generator cannot connect rooms 1 and 6 and will throw an exception. Moreover, the generator can sometimes succeed and sometimes fail, depending on which combination of room templates it randomly chooses.

The rest of this guide is dedicated to various strategies of having different elevations while using level graphs with cycles.
Option 1: Avoid elevation changes inside cycles
The simplest (and also the most restrictive) solution is to completely avoid all elevation changes for rooms and corridors that are inside level graph cycles. This can be done automatically by ticking the FixElevationsInsideCycles checkbox inside the Input Config section of the dungeon generation, or by manually calling levelDescription.FixElevationsInsideCycles(); if using custom input setup. What this is feature does is that it finds all the room templates with potential elevation changes and bans them for rooms and corridors that are inside cycles.
The obvious downside of this solution is that you will end up with no elevation changes insides cycles, which may or may not be desirable based on your level design.
Note: With this approach, you have to make sure that you provide enough room templates without any elevation changes for both rooms and corridors.
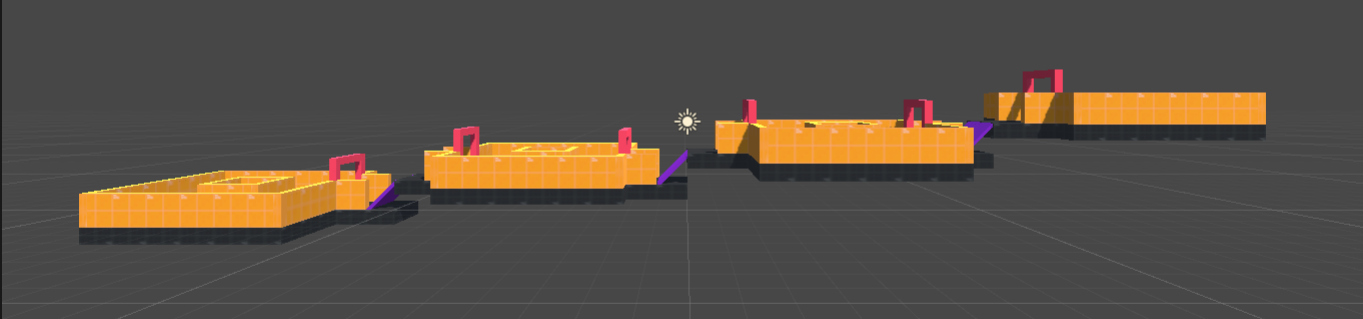
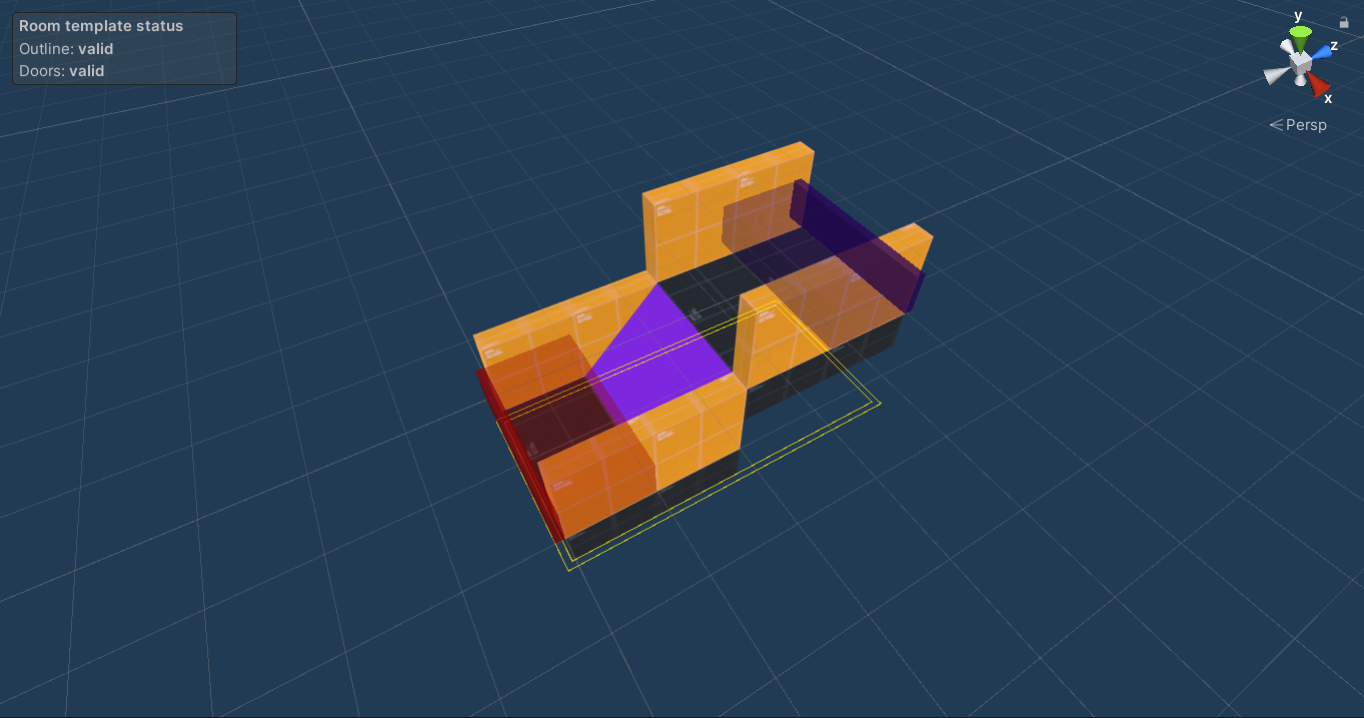
Option 2: Door sockets for different elevations
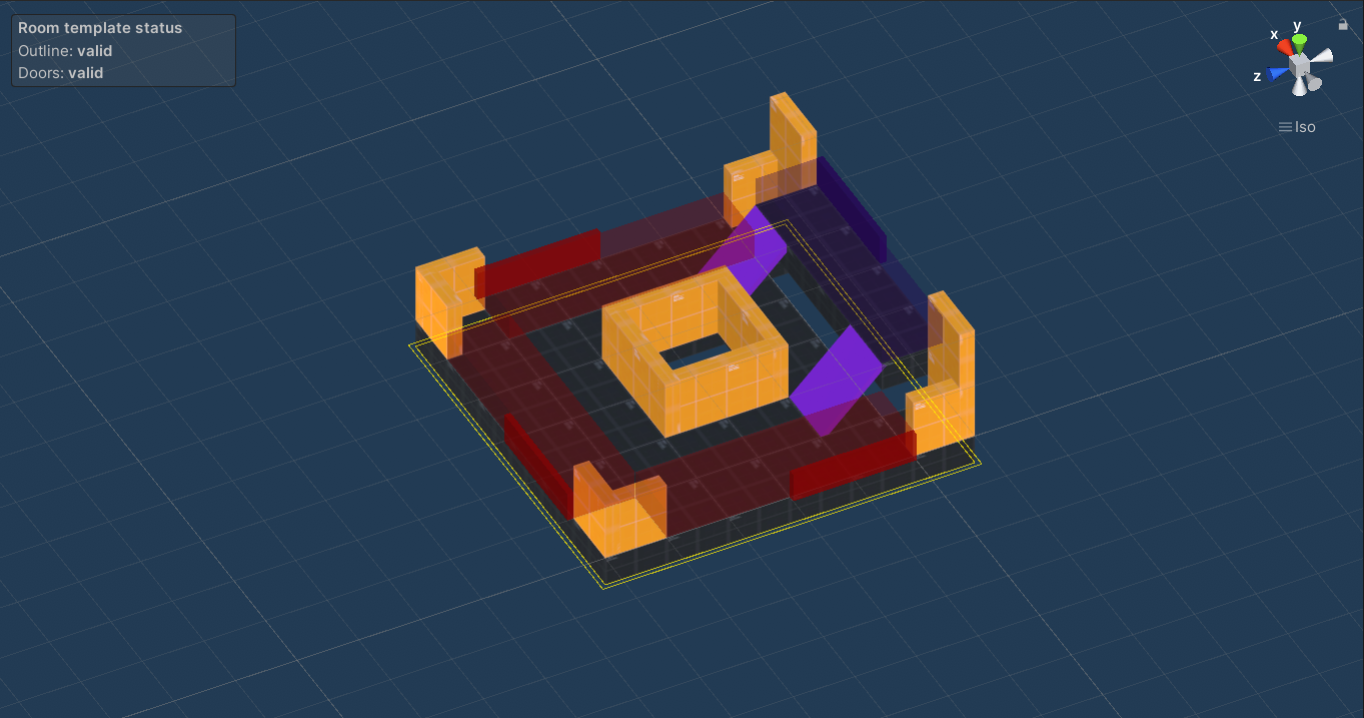
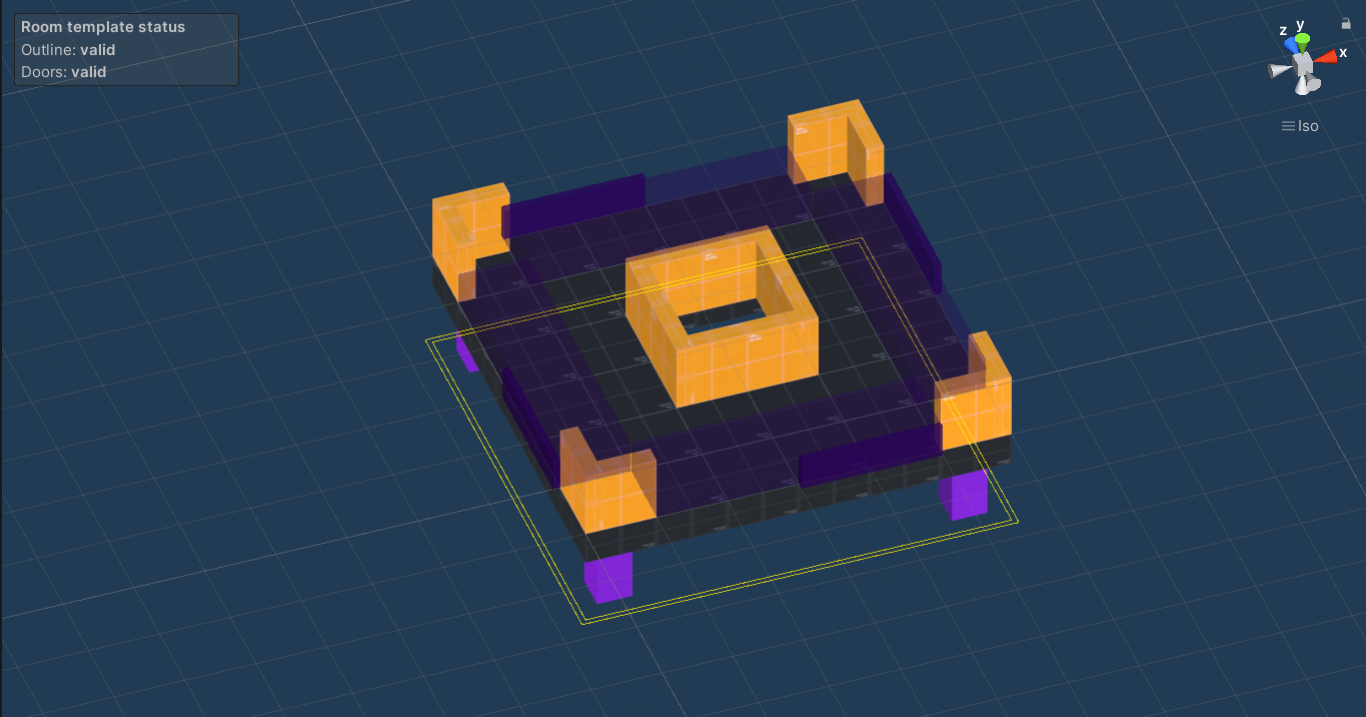
Another possible approach is to use door sockets to mark doors at different elevations. The main idea is that the number of different elevation levels is limited. For example, you might have Elevation 0 (ground level) and Elevation 1 (1 meter above ground). Next, create a door socket for each elevation level and assign these sockets to doors based on their elevations. Below is an example of a few room templates using this approach.

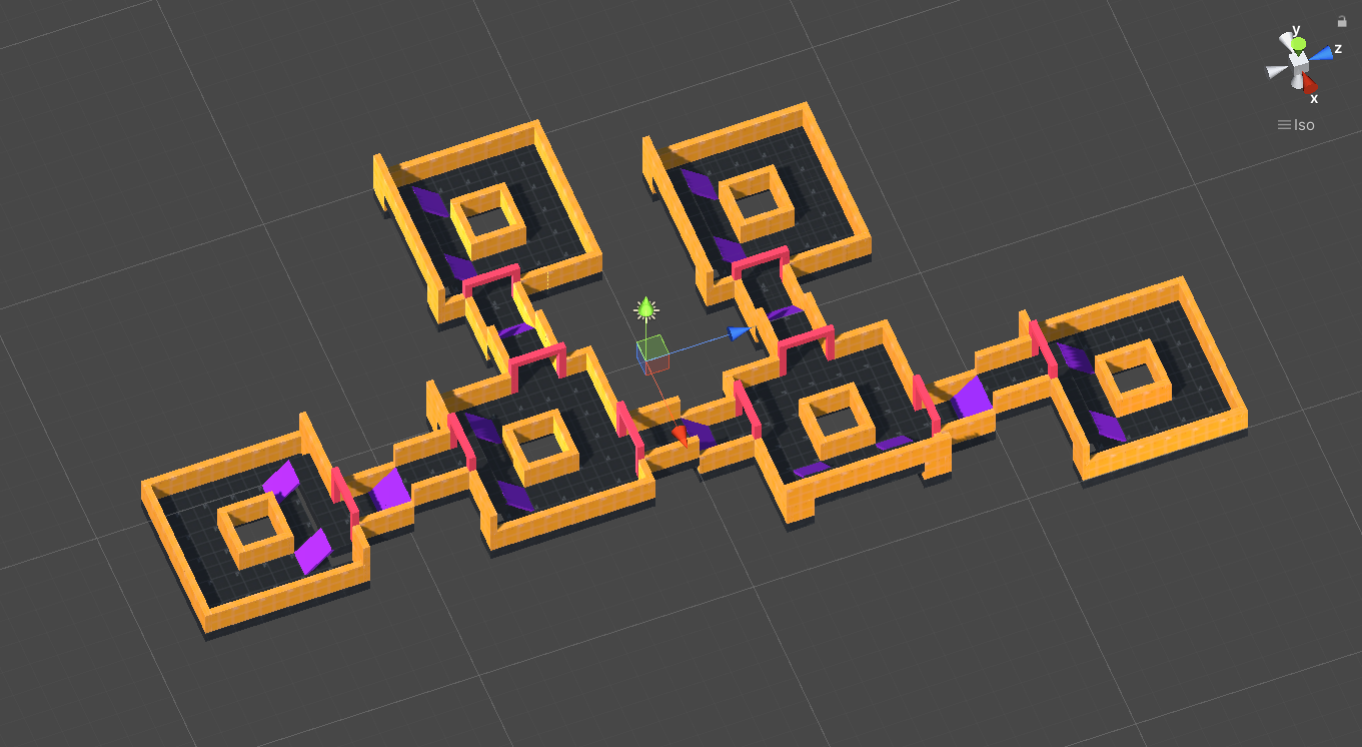
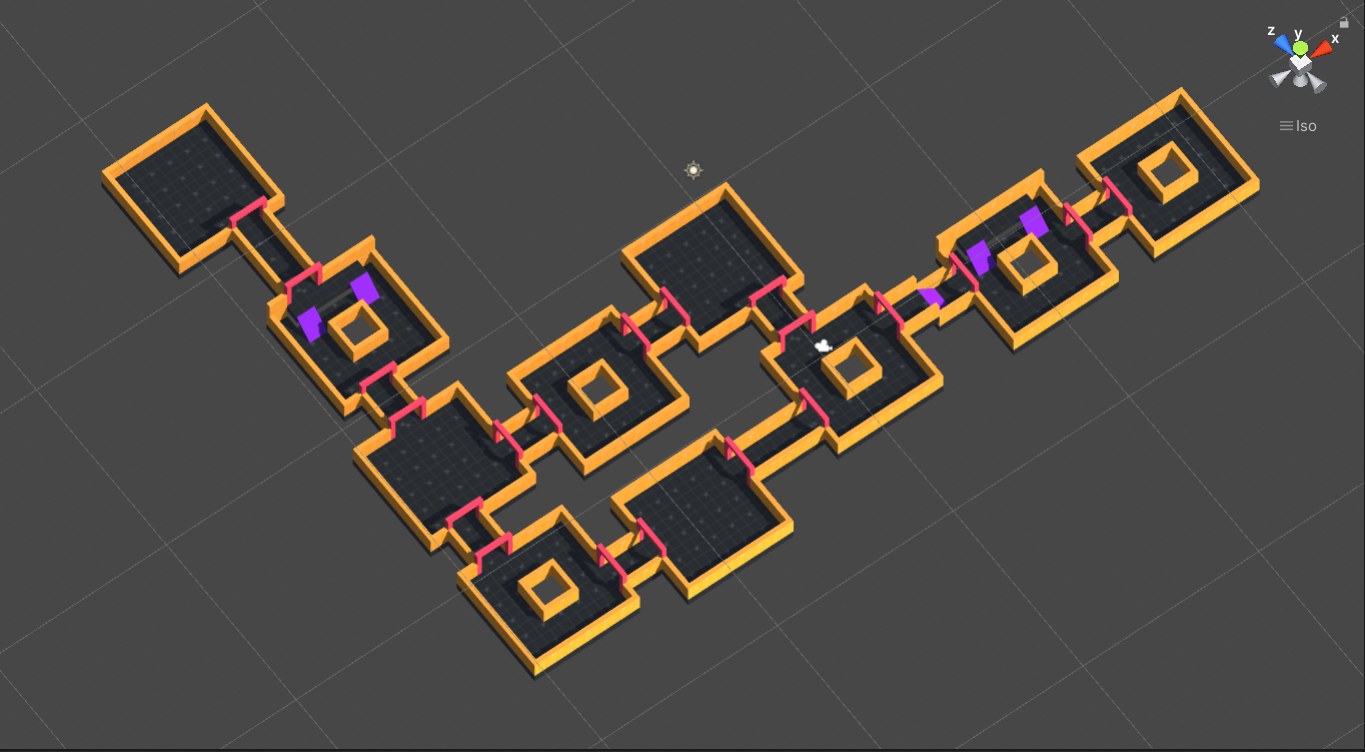
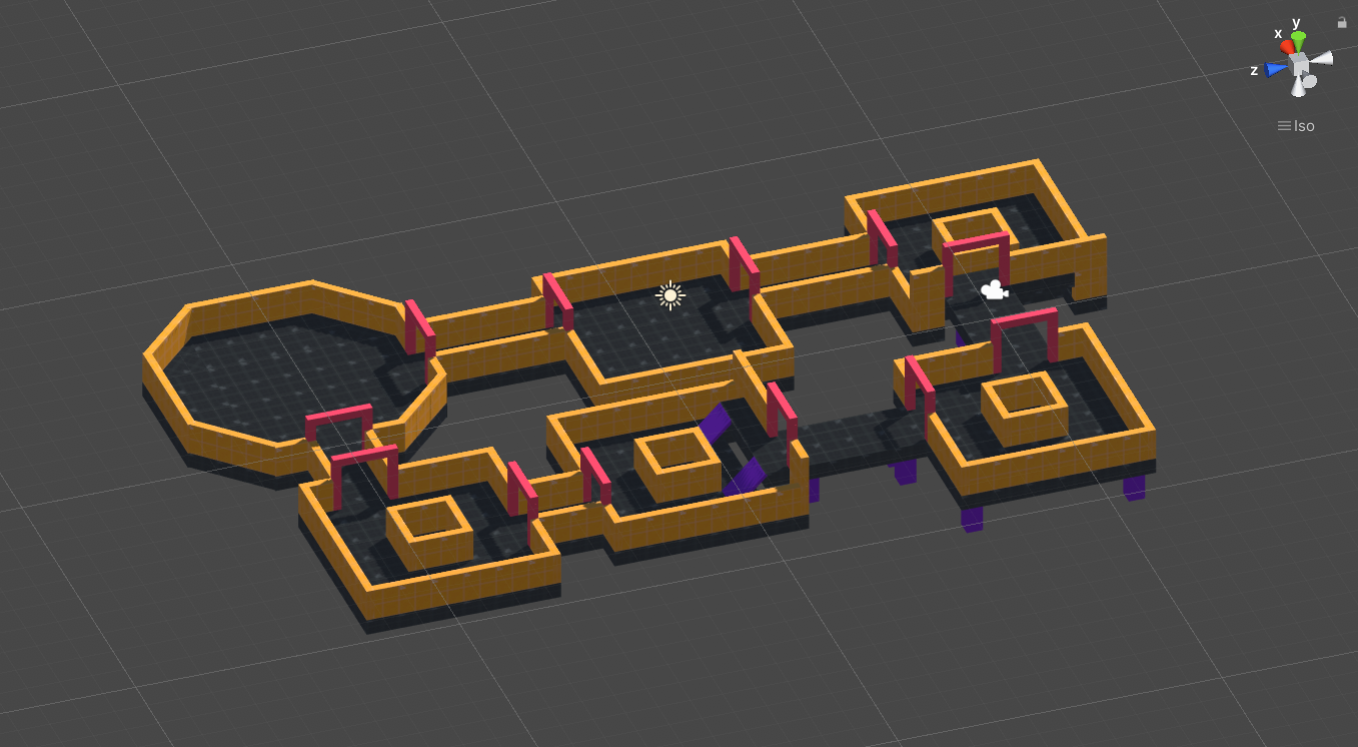
This approach can never lead to generating a level with incorrect elevations because the whole problem was basically transformed to the problem of socket resolution. You can see an example generated level below.
Note: This approach should be used only if you have a very limited number of different elevation levels, ideally only 2 (the same as in the example above) or at most 3.
Note: It is easy to force different parts of the level to be at different elevations. Just pick two rooms in the level graph and give them room templates with different elevations, forcing the generator to work with that.
Note: Make sure to provide enough room templates for all elevation levels and also enough transition room templates that go from one elevation to another.
Option 3: Manual elevation-changing corridors
Another possible approach is to manually place corridors that connect rooms with different elevations. For this guide, I will assume that only corridor can have doors at different elevations.
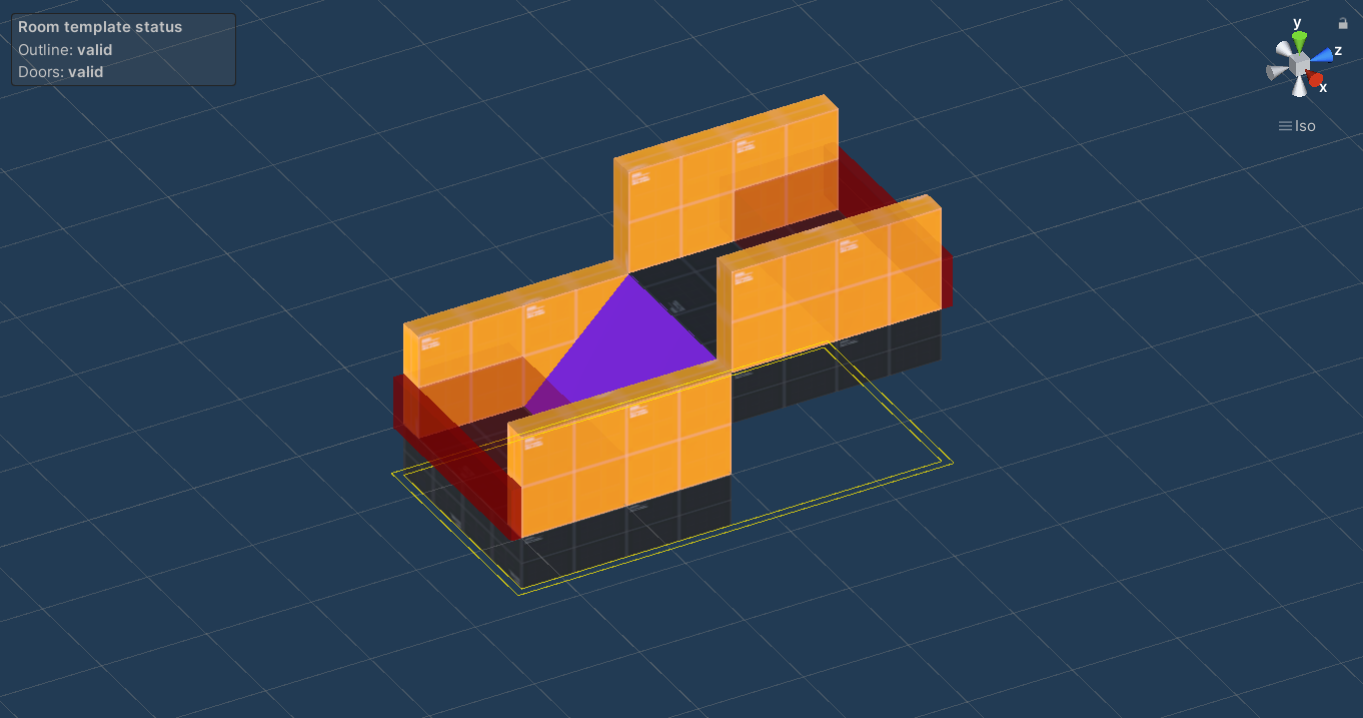
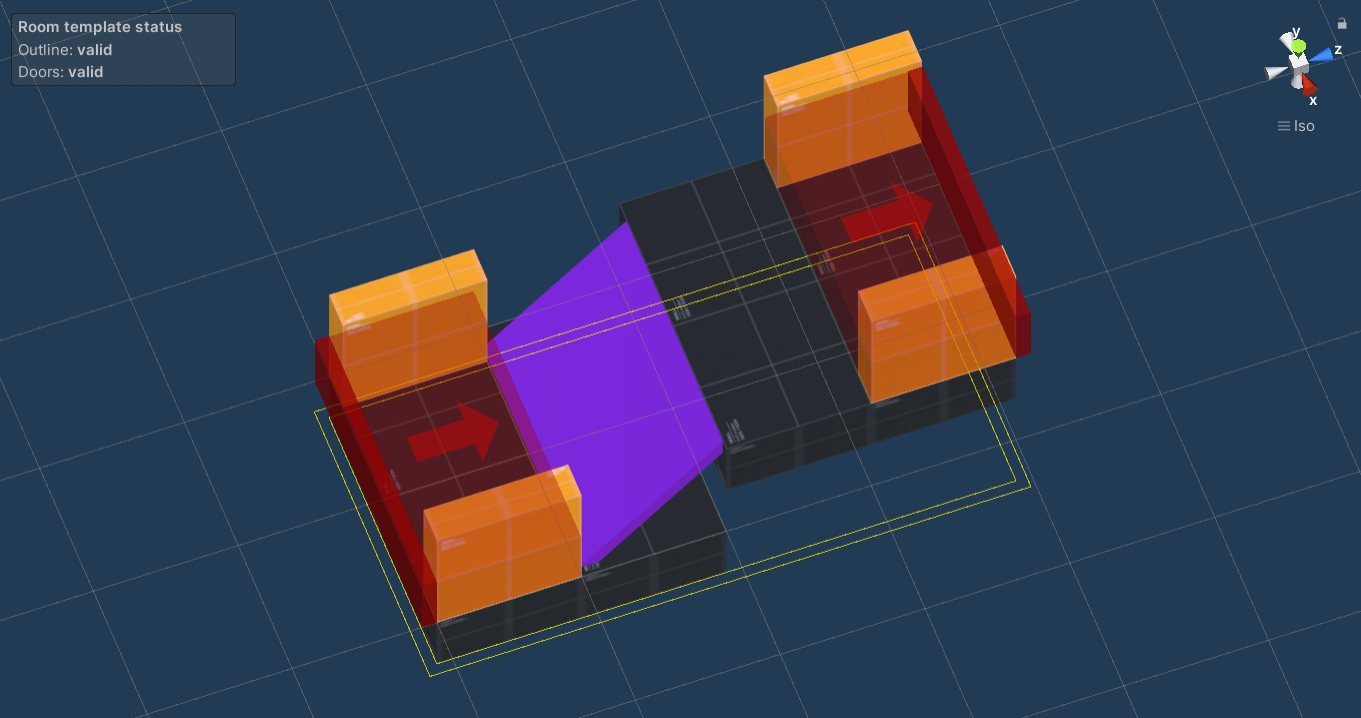
The first step is to create an elevation-changing corridor. For this approach to work, you also have to mark one door (e.g. the lower one) as Entrance and the other one (the upper one) as Exit. The result should look like this:
Next, create a level graph but make sure to enable the Is Directed checkbox. Then, when creating a cycle in the level graph, orient the edges so that they go in the direction of increasing (or more precise non-decreasing) elevation. My level graph looks like this:
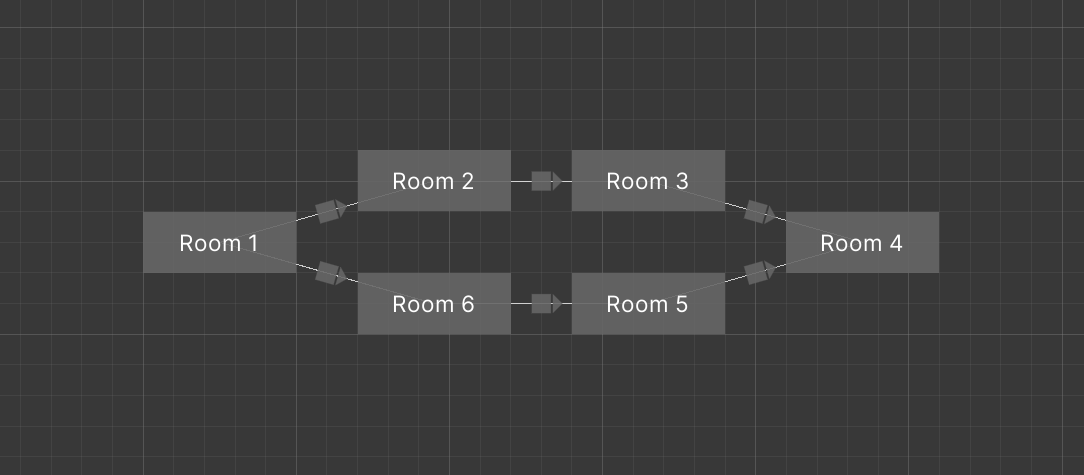
With this level graph, we basically want to say that Room 4 should be positioned higher than Room 1. The way we will achieve that is by manually picking some of the oriented connections and telling the generator that the corridor room template from the previous step must be used.
For this guide, I choose the connection Room 1 -> Room 2 to go 1 meter up, and assigned the correct room template. However, if you choose one connection to go up, you also need to pick another one to go down. Therefore, I did the same setup for the connection Room 1 -> Room 6 to balance the height differences.
You are not limited to have only 2 elevation-changing corridors in the whole cycle - you can use any number, just make sure that you always balance the number of corridors going up and down. Below you can see an example of also changing elevations for connections Room 3 -> Room 4 and Room 5 -> Room 4.

When done correctly, this approach also ensures that all the generated levels have correct elevation changes.
Note: This approach is harder to set up than the previous approaches. But if you really want to go this way, you can use a custom input setup and randomize which connections are elevation-changing.