Room templates
Room templates are one of the main concepts of the algorithm. They describe how individual rooms in the dungeon look and how they can be connected to one another.
Creating room templates#
There are currently two ways of creating room templates: either via the Create asset menu dialog or manually.
Create via Create menu dialog#
To create a new room template, we have to:
- navigate to the folder where should the room template prefab be saved
- right click in the Project window and choose Create -> Edgar -> Dungeon room template
- (optional) rename the prefab file to anything you want
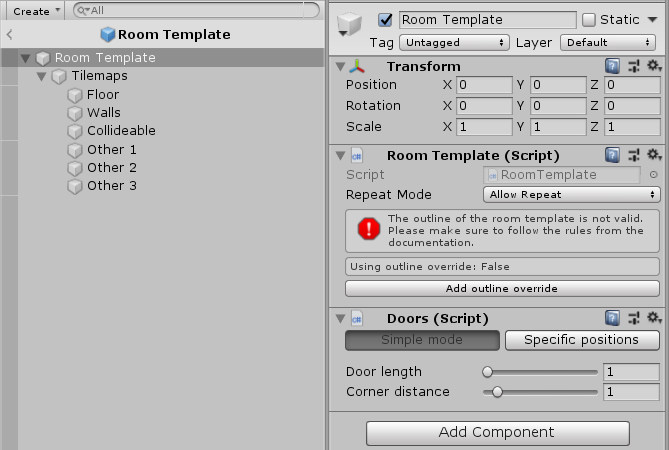
Room template structure#
Below you can see the room template structure after the room template is created:
- Tilemaps game object that contains several tilemaps attached as children
- Room Template script attached to the root game object
- Doors script attached to the root game object
Designing room templates#
We will use Unity Tilemaps to design our room templates so you should be familiar with that. By default, room templates come with several tilemap layers that are children of the Tilemap game object:
- Floor - order 0
- Walls - order 1, with collider
- Collideable - order 2, with collider
- Other 1 - order 3
- Other 2 - order 4
- Other 3 - order 5
It is VERY IMPORTANT that all the room templates have exactly the same structure of tilemaps because the generator will copy all the tiles from individual room templates to shared tilemaps. If you need a different structure of tilemaps, you can override the default behaviour. See Room template customization.
Limitations#
The underlying algorithm works with polygons, not tilemaps, tiles and sprites. We are interested in the outlines of individual room templates. However, there are some limitations as to how a room template may look like in order for the algorithm to be able to compute its outline. The goal of this section is to describe which rules we should follow when designing room templates.
Note: The underlying algorithm does not care about individual tilemaps layers. Instead, it merges all the layers together and then finds all the non-null tiles. Therefore, the outline of the room template will be the same no matter which tilemap layers we use.
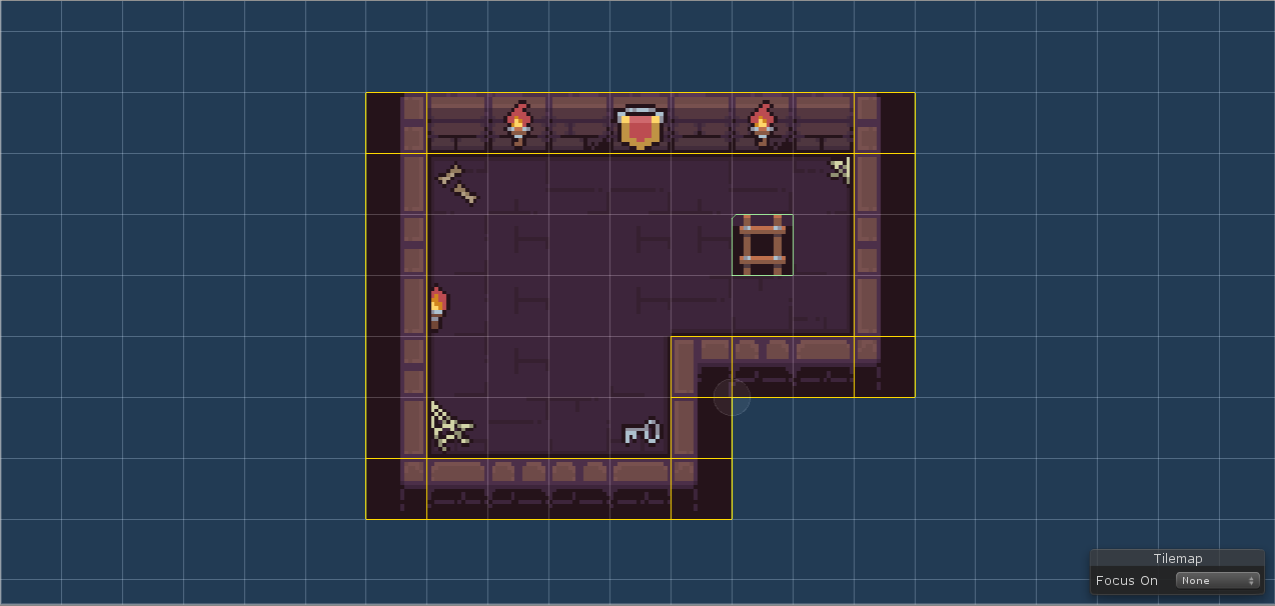
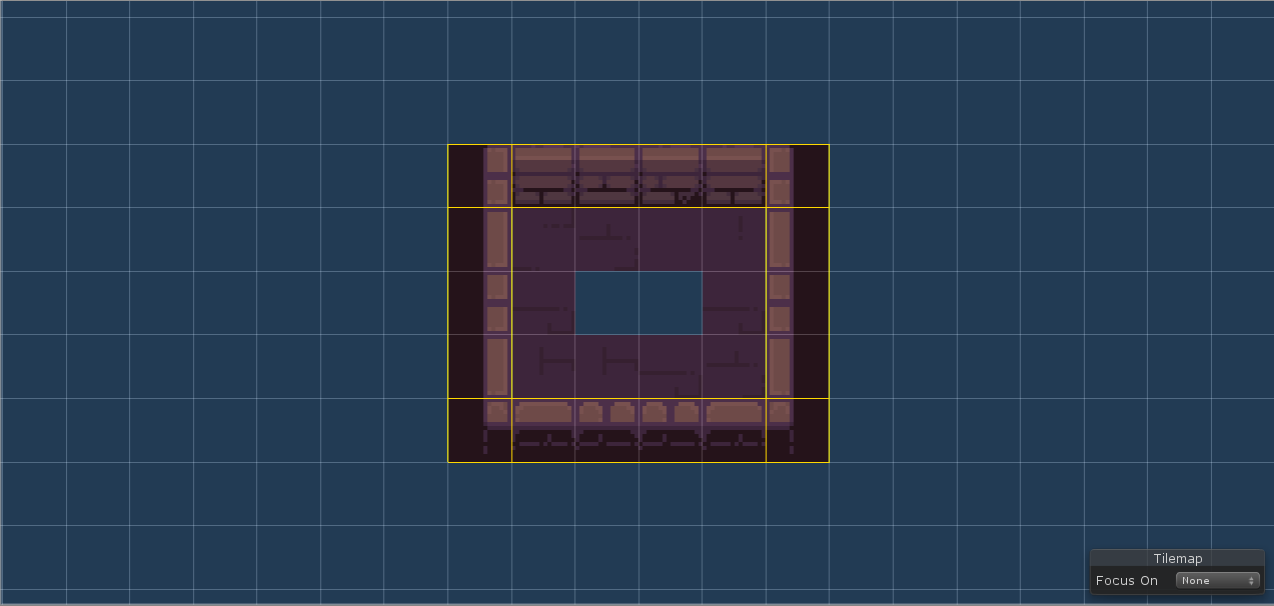
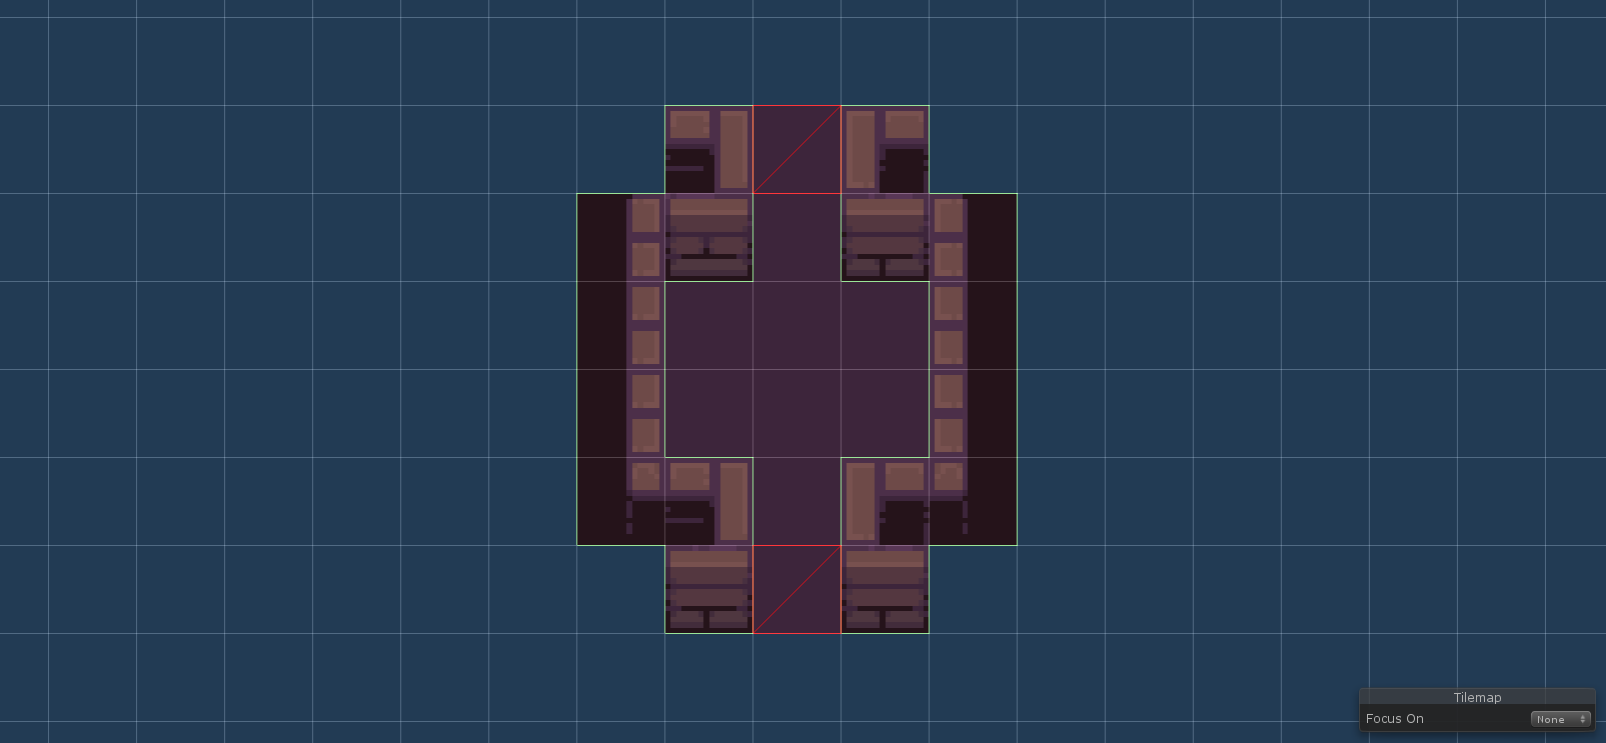
One connected component#
I will not go into formal definitions. The image below should be self-explanatory.
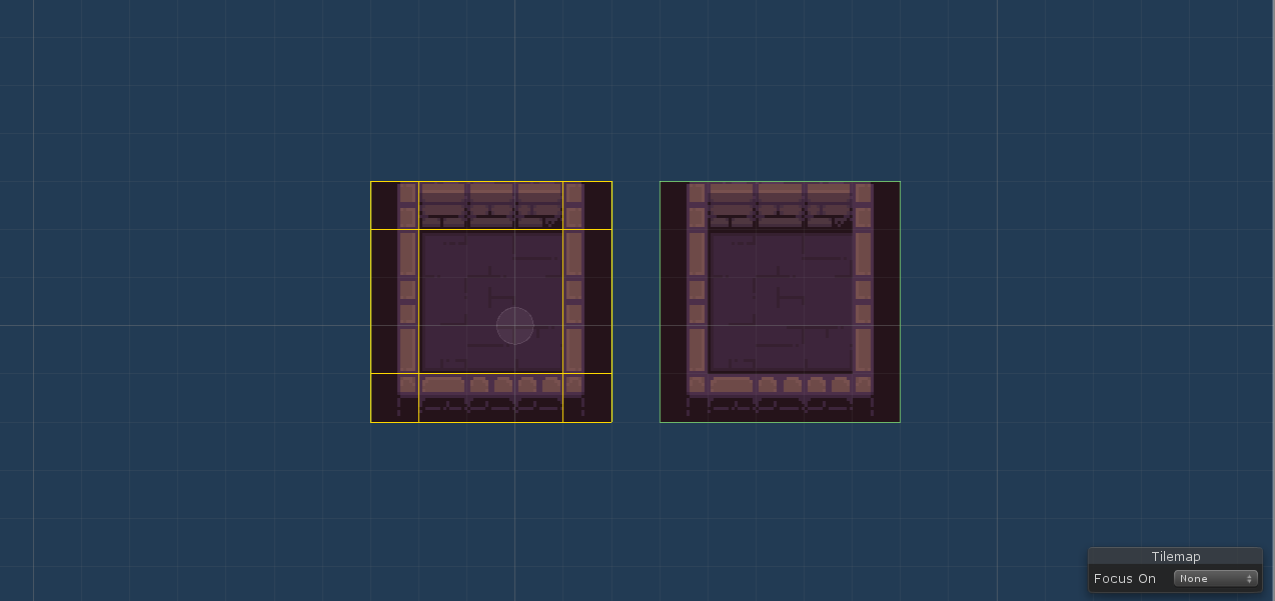
Note: You can see that the algorithm computed some outline (yellow) in in the wrong room template. The current implementation stops after any outline is found and does not check whether all tiles are contained in that outline. This will be improved in the future.
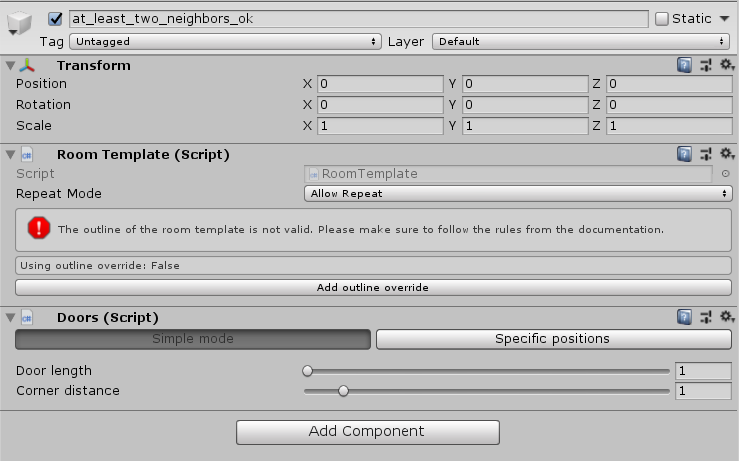
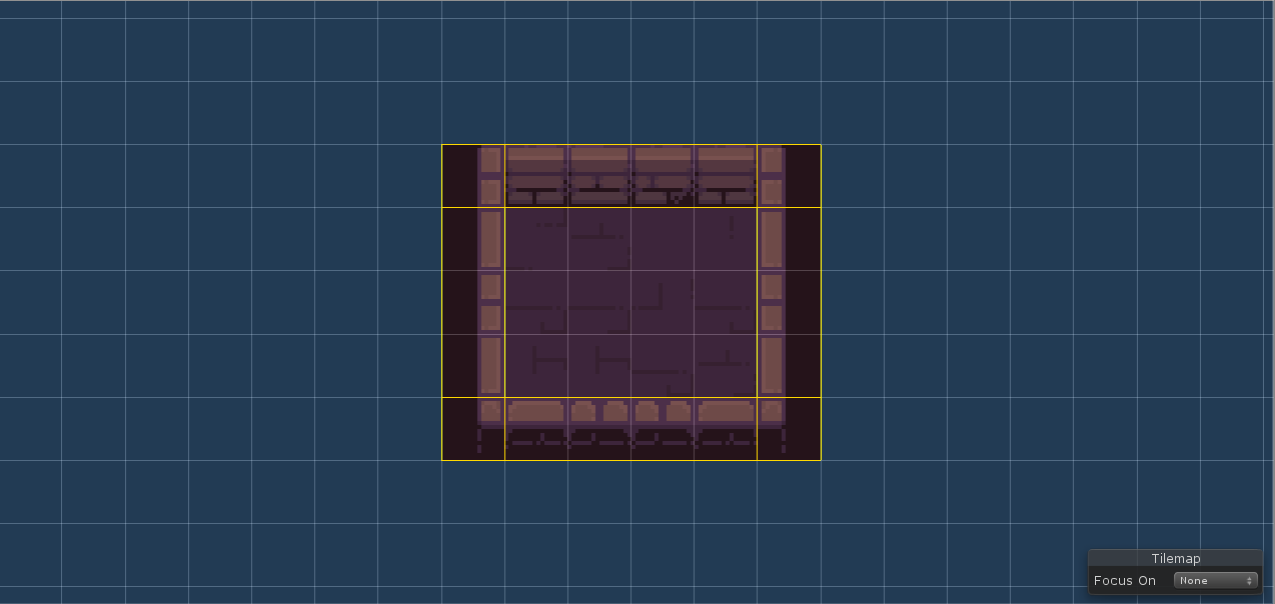
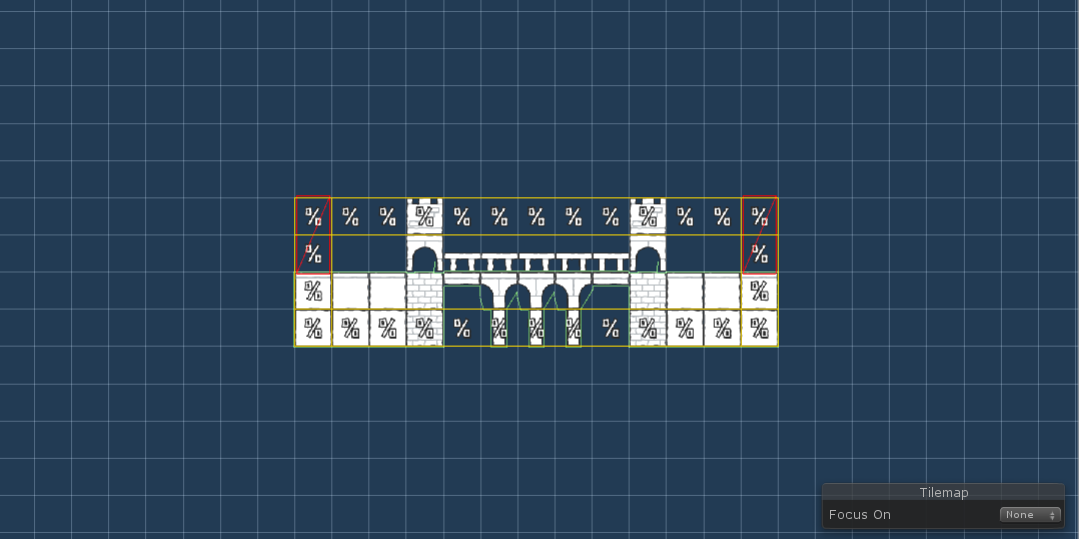
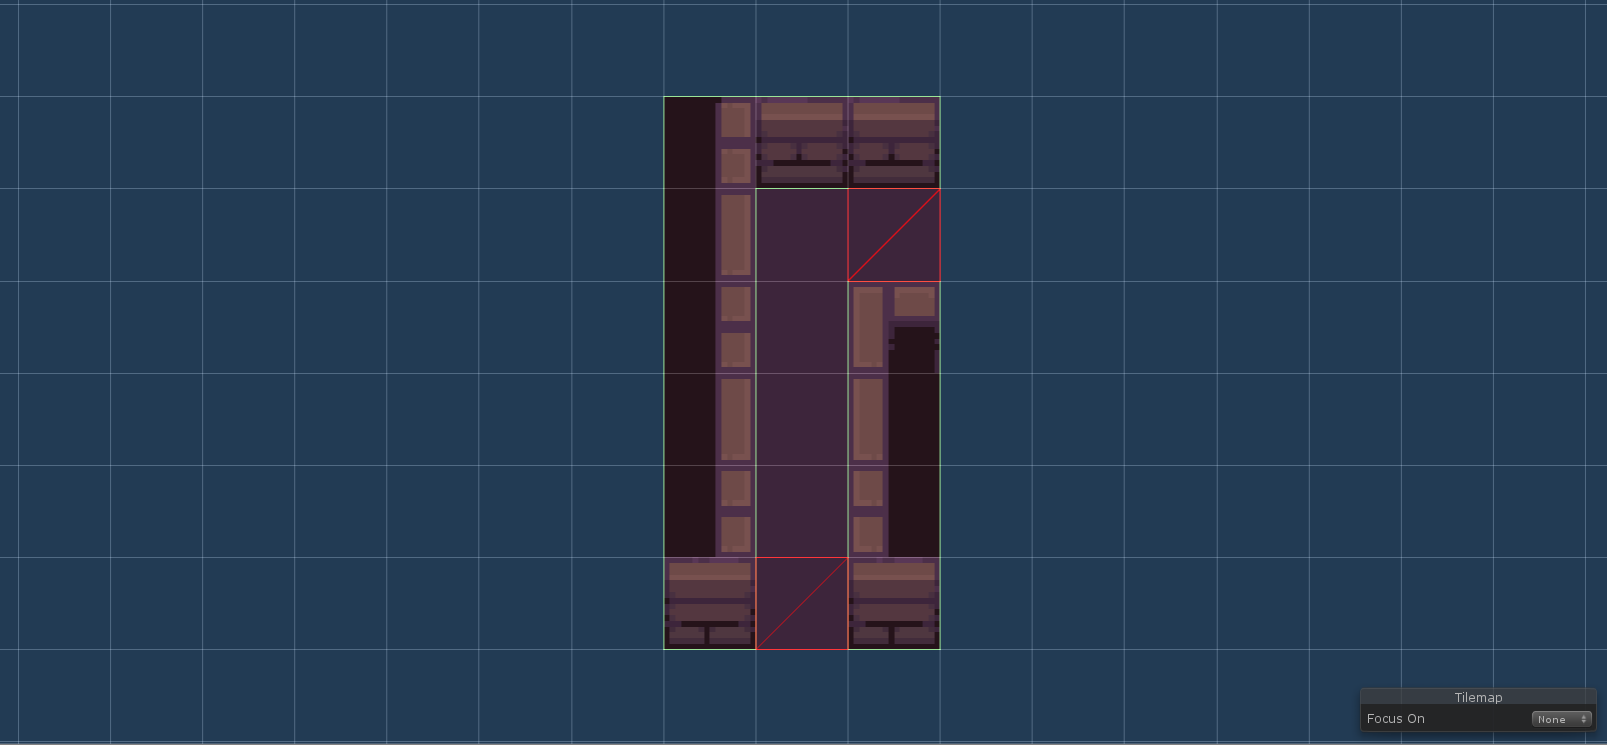
Each tile at least two neighbours#
Each tile must be connected to at least two neighbouring tiles. In the image below, both tiles in the upper row are connected to only a single neighbour so the room shape is not valid. If we need these two tiles, we can use Outline override that is described in the next section.

May contain holes#
There may be holes inside the room template.
NOTE: This was not possible in the 1.x.x version.
Outline override#
If we really need to have a room template whose outline is not valid, we can use the so-called Outline override. It can be enabled by clicking the Add outline override button in the Room template script. As a result, a new tilemap layer called Outline override is created. With this functionality enabled, the algorithm ignores all the other layers when computing the outline. Moreover, nothing that is drawn on this layer will be used in the resulting level, so we can use any tiles to draw on this layer.
Note: When we are done with drawing the outline, we can make the layer (game object) inactive so that we can see how the room template actually looks like. However, we must not destroy the game object.
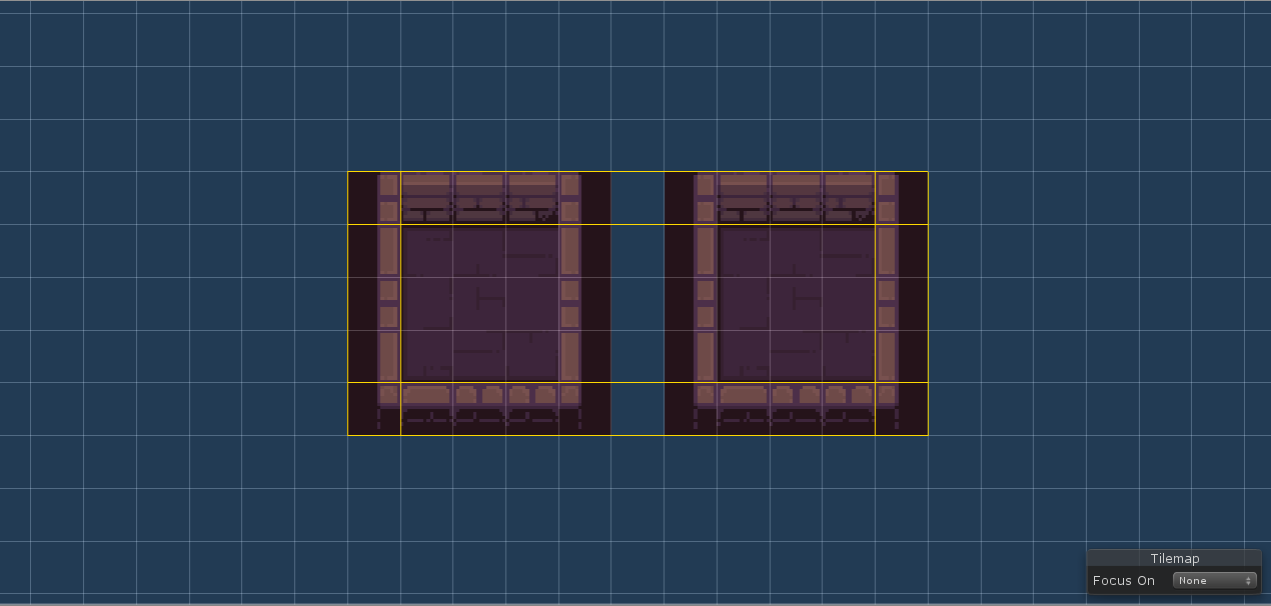
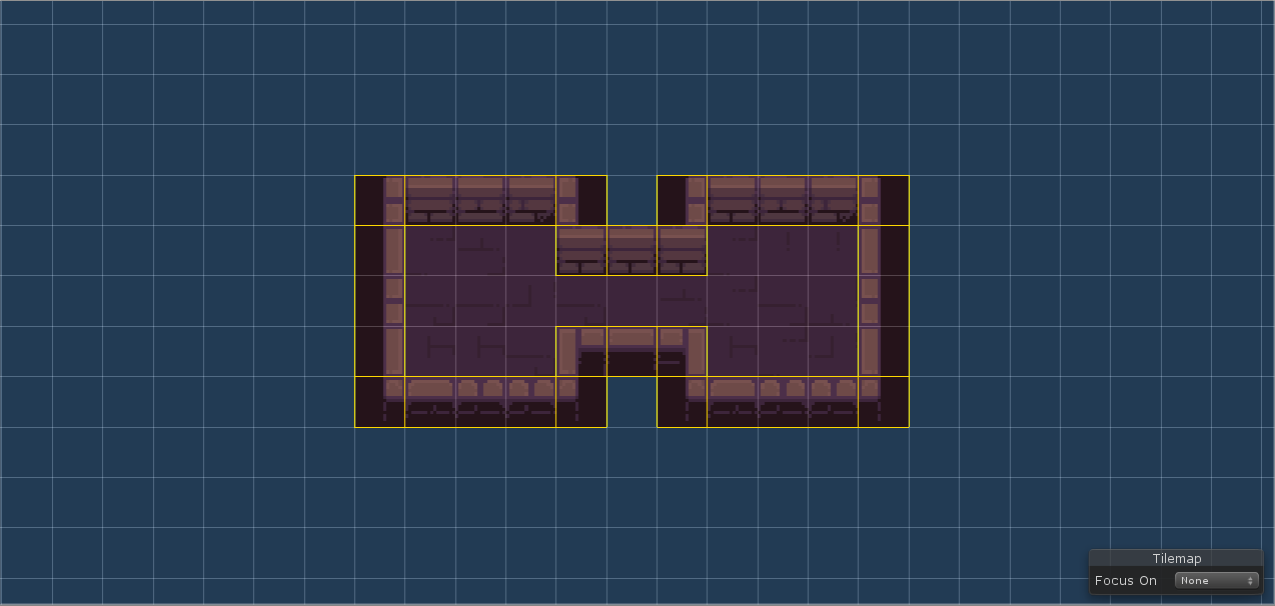
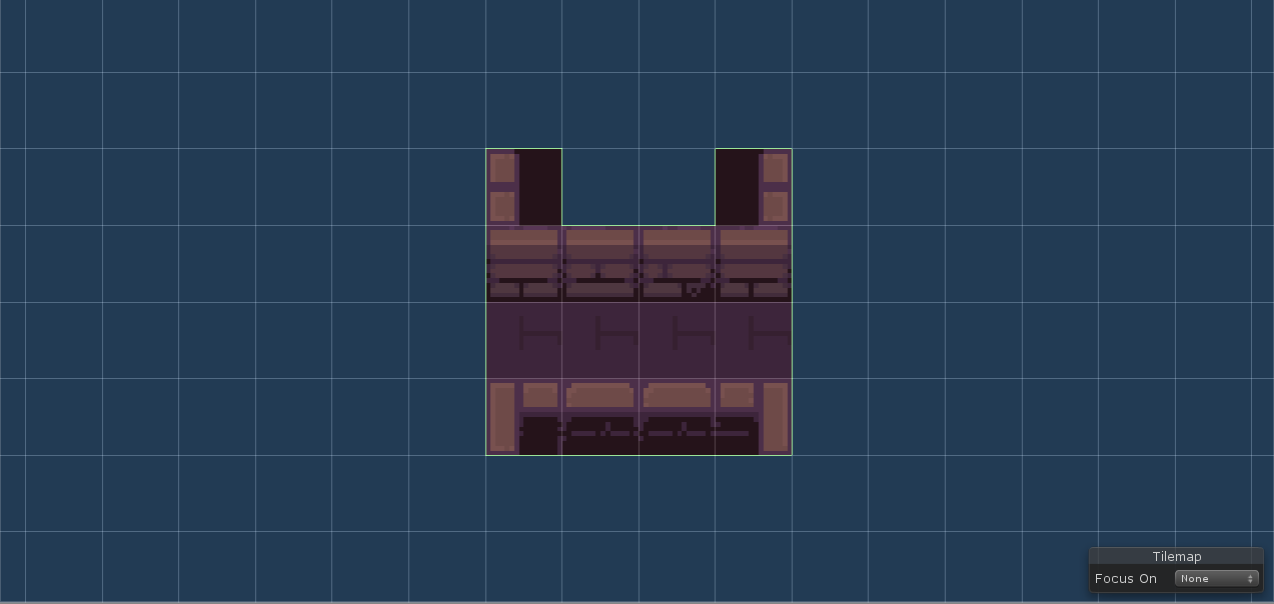
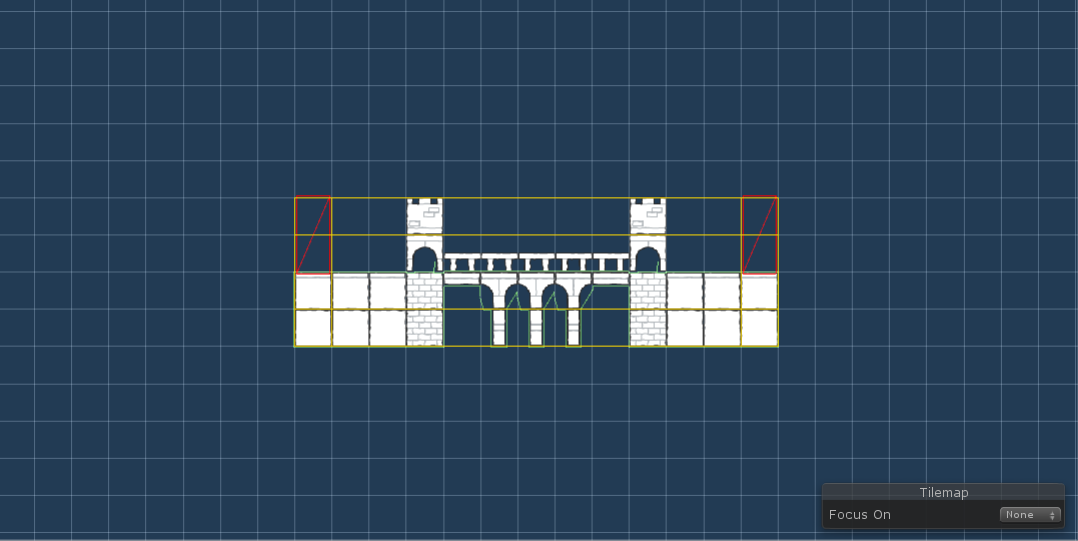
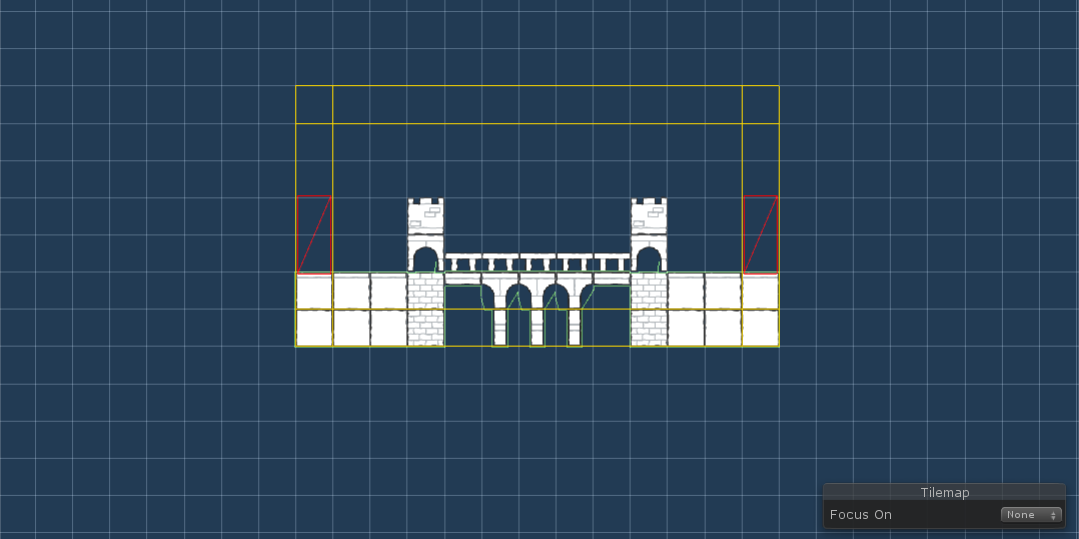
Bounding box outline handler#
In some situations, it would be useful to have an outline which looks like the bounding box of all the tiles in the room template. For example, it can be used to handle an outline of some platformer levels (see the images below). It is also possible to add padding to the top of the outline, which is convenient if we need to add doors that are higher than the outline.
To add the Bounding box outline handler click the Add bounding box outline handler button in the Room template inspector.
Adding doors#
When we are happy with how the room template looks, we can add doors. By specifying door positions, we tell the algorithm how can individual room templates be connected together.
The algorithm may connect two room templates if:
- there exist door positions with the same length
- the two room templates do not overlap after we connect them
- they may share tiles on outlines of corresponding room shapes
Note: In some procedural level generators, all the doors must be used by the algorithm to connect the room to other rooms. That is not the case here, we define all the possible door positions and the generator may pick only some of them.
Door modes#
There are currently two ways of defining door positions. Both ways are currently controlled by the Doors component that is automatically added to the room game object after using the room template initializer.
In both modes, all door positions must be on the outline of the corresponding room template.
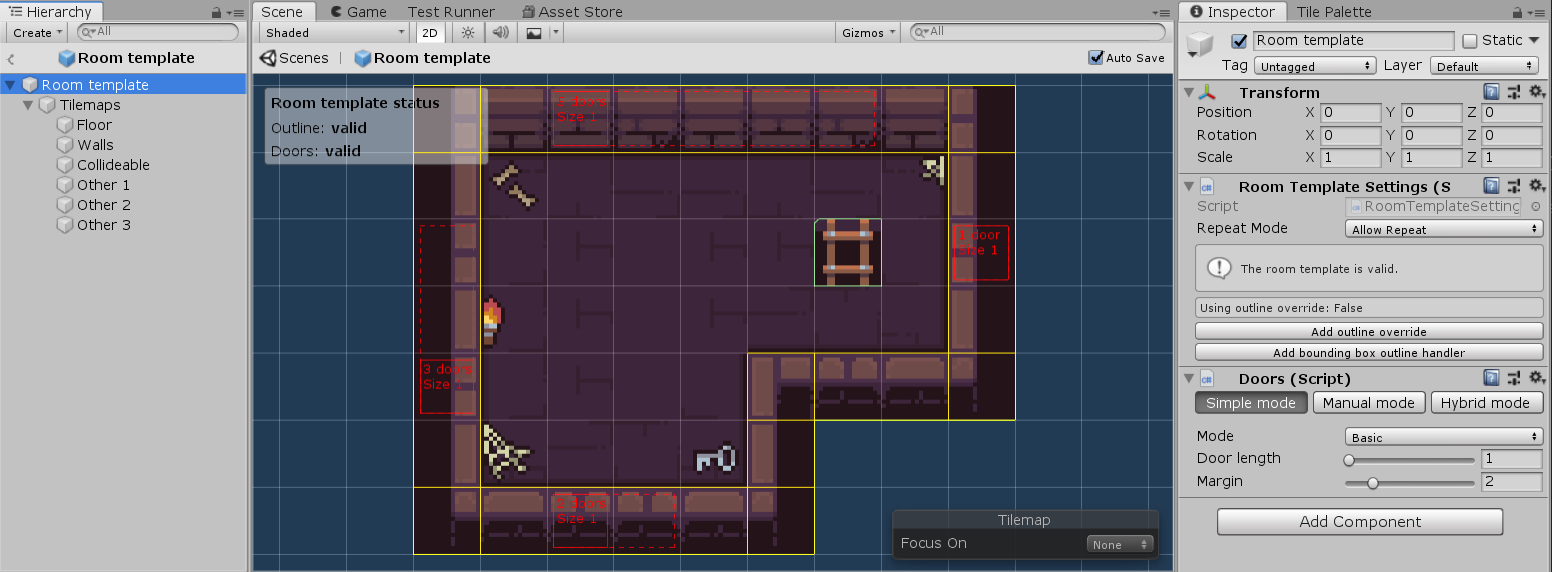
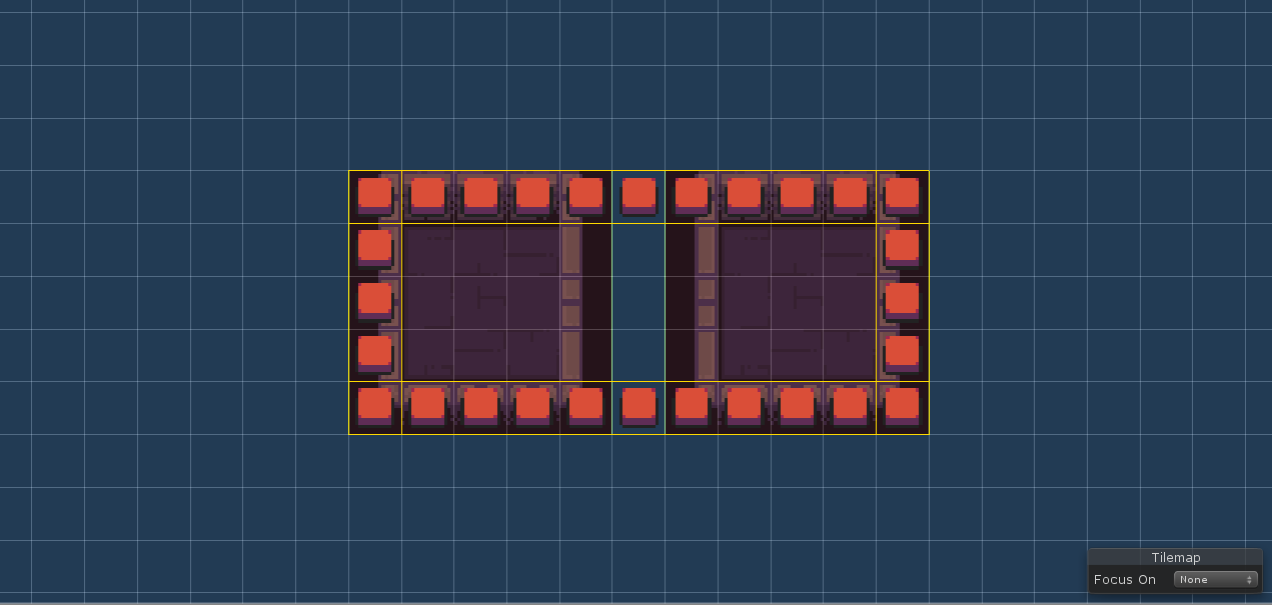
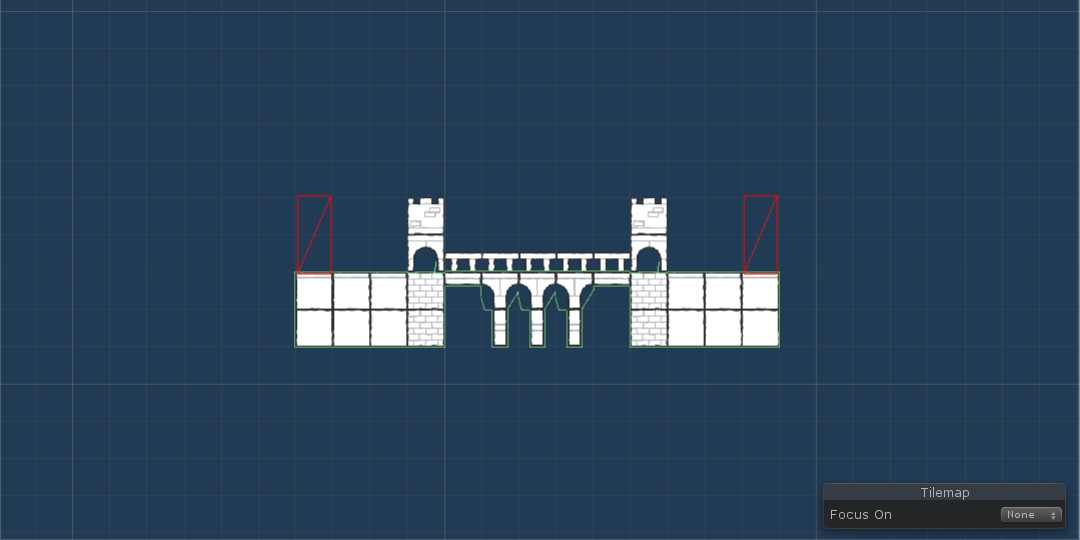
Simple mode#
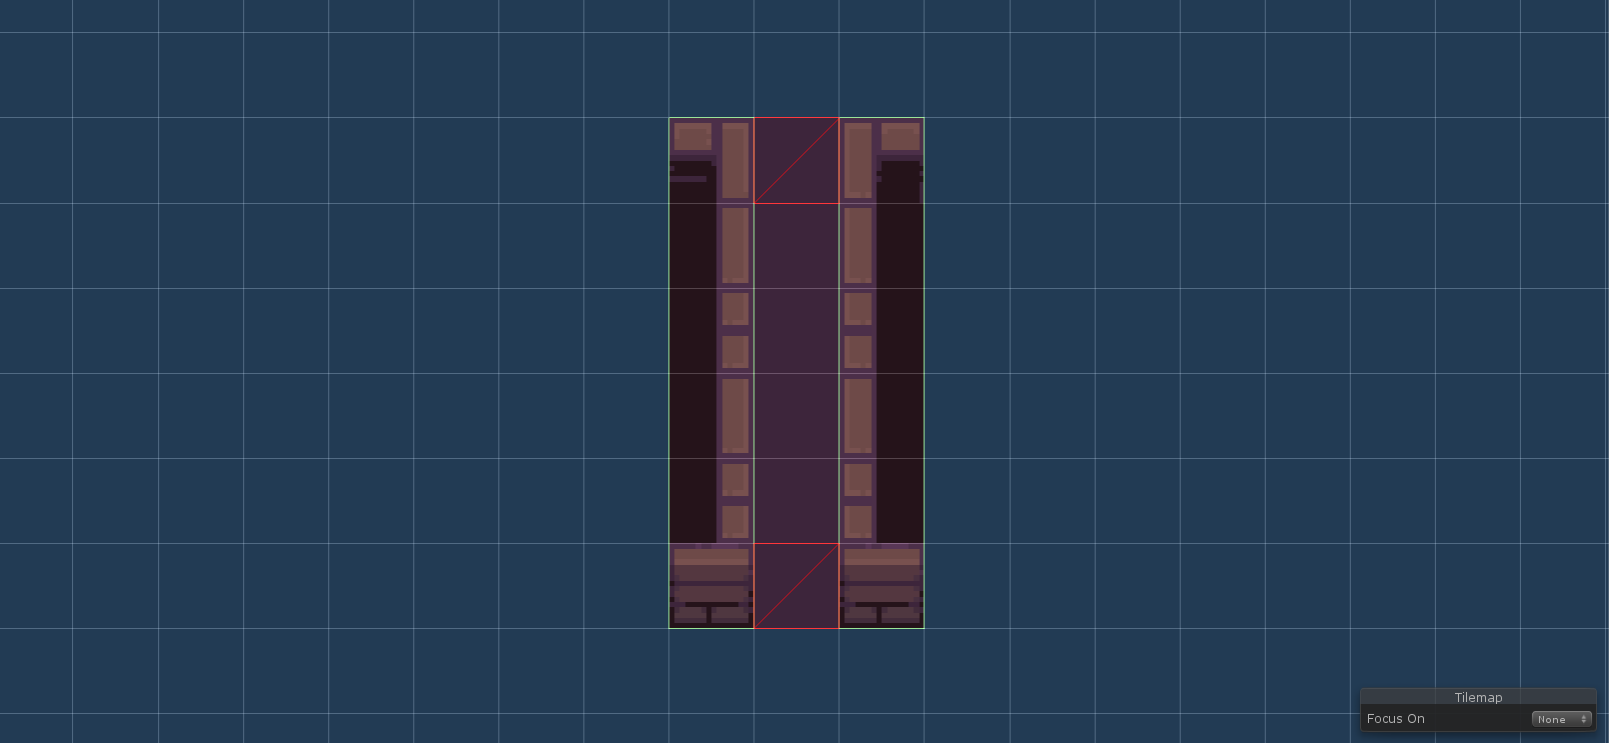
In the simple mode, you specify how long should all doors be and at least how far from corners of the room template they should be positioned. Below you can see how this mode looks.
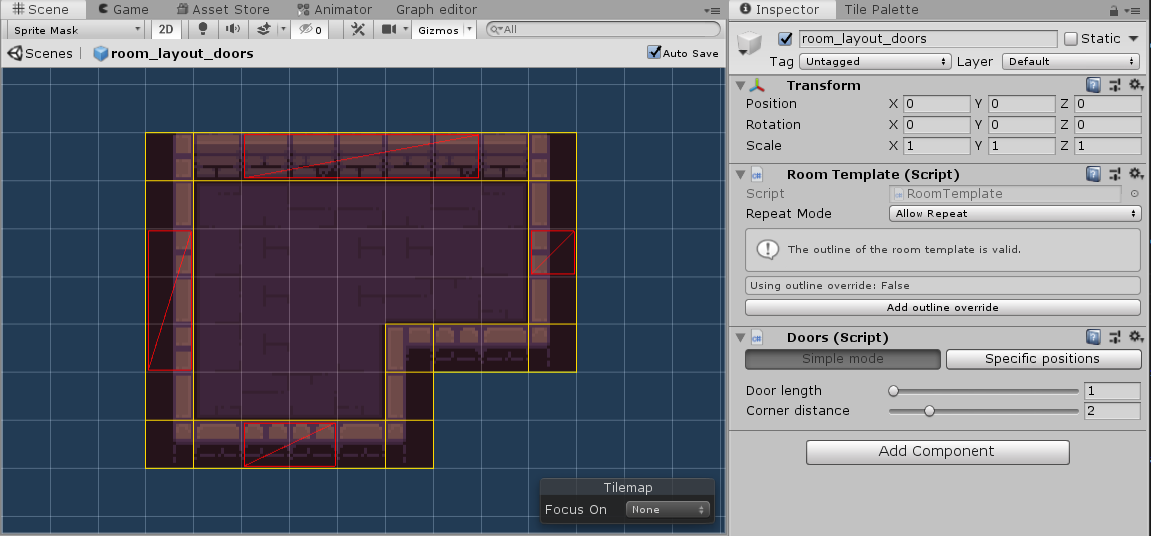
Each red rectangle shows available door positions. You can see that there are no door positions in the bottom-right part of the room template - that is because no tile is placed at least 2 tiles from all corners. If we change the door length to 2, we will loose the door positon on the right side of the room template because there is space only for a single tile.

Note: There is currently an inconsistency in how are door positions displayed. In the simple mode, each red rectangle represents a set of door positions, while in the specific positions mode, each rectangle represents exactly one door position. The reason for this is that it is exactly how the procedural dungeon generator library handles that, but it might be counter-intuitive for users of the plugin and may change in the future.
Manual mode#
In the Manual mode, you have to manually specify all door positions of the room template. This mode gives you complete control over available door positions.
To start adding doors, click the Manual mode button in the Doors script and then click the Add door positions button to toggle edit mode. Then you can simply draw door positions as seen in the video below.
You can see that I am creating doors of various lengths. And at the end of the video, you can also see that individual door positions may overlap.
Note: If you accidentally add a door position that you did not want to add, there are two ways of removing doors:
- Click the Delete all door positions button to delete all the door positions.
- Click the Delete door positions button and then click on door positions that should be deleted.
Note: With multiple doors overlapping, the GUI gets quite messy. In order to make it more clear, I show diagonals of individual rectangles. And it gets even more messy when you have doors of various sizes overlapping. I thought about adding a switch that would show only doors with a specified length.
Note: The inspector script currently lets you add door positions that are not on the outline of the room shape. It will, however, result in an error when trying to generate a dungeon. It should be improved in the future.
(PRO) Door sockets#
By default, when the generator computes how can two room templates be connected, it looks for doors with the same length. If you want to have more control over this process, you can use Door sockets.
(PRO) Door directions#
By default, all doors are undirected, meaning that they can be used both as an entrance or as an exit. With manual door mode, it is possible to configure doors as entrance-only or exit-only. When combined with directed level graphs, it gives you more control over generated levels. See the Directed level graphs guide for more information and examples.
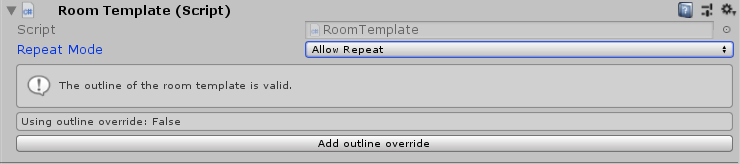
Repeat mode#
Each Room template script has a field called Repeat Mode that is initially set to Allow Repeat. Using this field, we can tell the algorithm whether the room template can be used more than once in generated levels. There are the following possibilities:
- Allow repeat - The room template may repeat in generated levels.
- No immediate - Neighbors of the room template must be different.
- No repeat - The room template can be used at most once.
Note: Instead of setting the Repeat mode on a per room template basis, you can use global override which is configured directly in the dungeon generator.
Note: If you provide too few room templates, they may repeat in generated levels even if you choose the No immediate or No repeat options. To make sure that the repeat mode is satisfied, please provide enough room templates to choose from.
Corridors#
The algorithm distinguishes two types of room templates - basic room templates and room templates for corridor rooms. In theory, we can use any room template with at least two doors to act as a corridor room template. However, to make the algorithm fast, we should follow these recommendations:
- There should be exactly two door positions.
- The two doors should be on the opposite sides of the room template.
- The corridor should not be too long or too wide.

Final steps#
After creating a room template GameObject, you can simply save it as a prefab and it is ready to be used in a level graph.