Example 1
In this tutorial, we will use this tileset by @pixel_poem. Be sure to check their work out if you like the tileset. We will not care about room decorations - we will use just basic walls, floor and door tiles.
Note: All files from this example can be found at Edgar/Examples/Example1.
| Custom post-processing | A custom post-processing task is used to spawn enemies after a level is generated |
Simple example#
The goal is to create two basic rectangular room templates of different sizes and a room template for both horizontal and vertical corridors. We will use the smaller room template for our dead-end rooms and the bigger room template for other rooms.
Basic rooms templates#
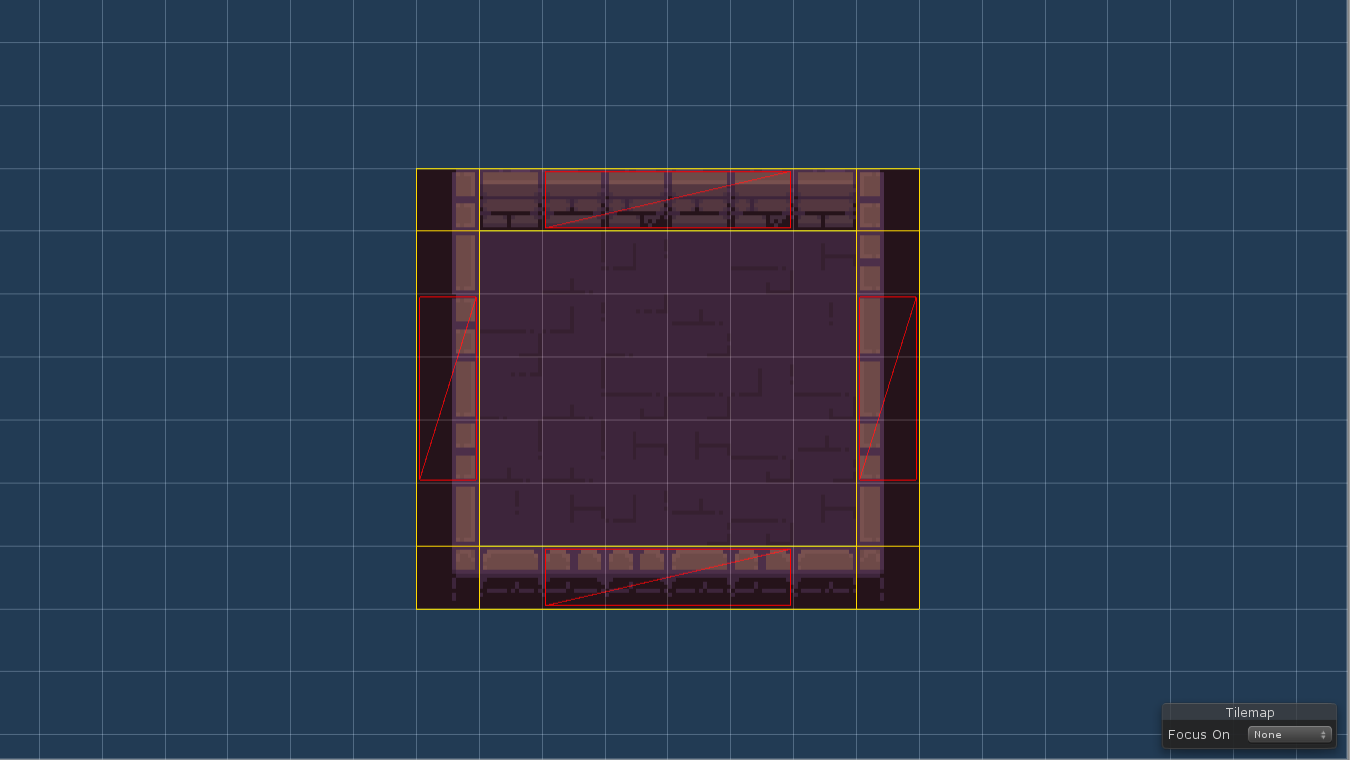
There should be nothing hard about the design of the two rectangular room templates. We use the simple doors mode configured to door length 1 and corner distance 2. We need corner distance 2 in order to easily connect corridors.

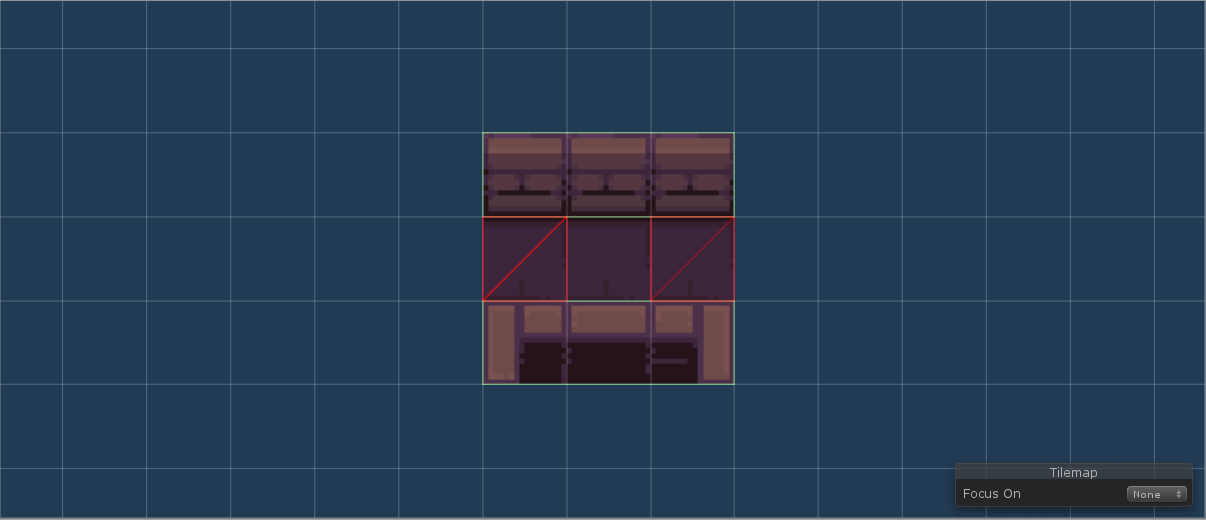
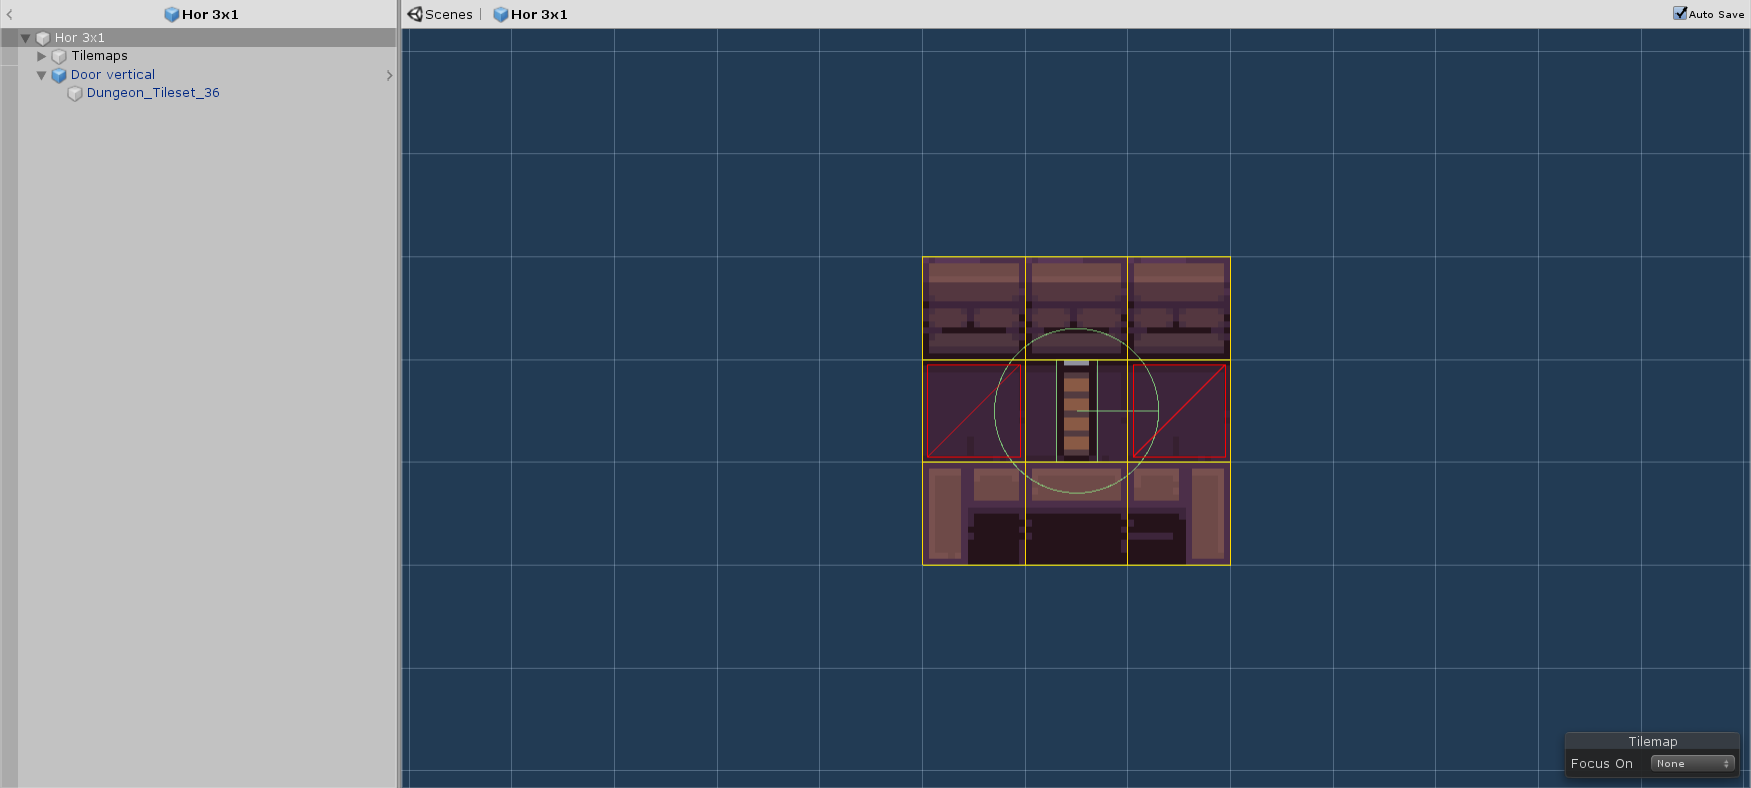
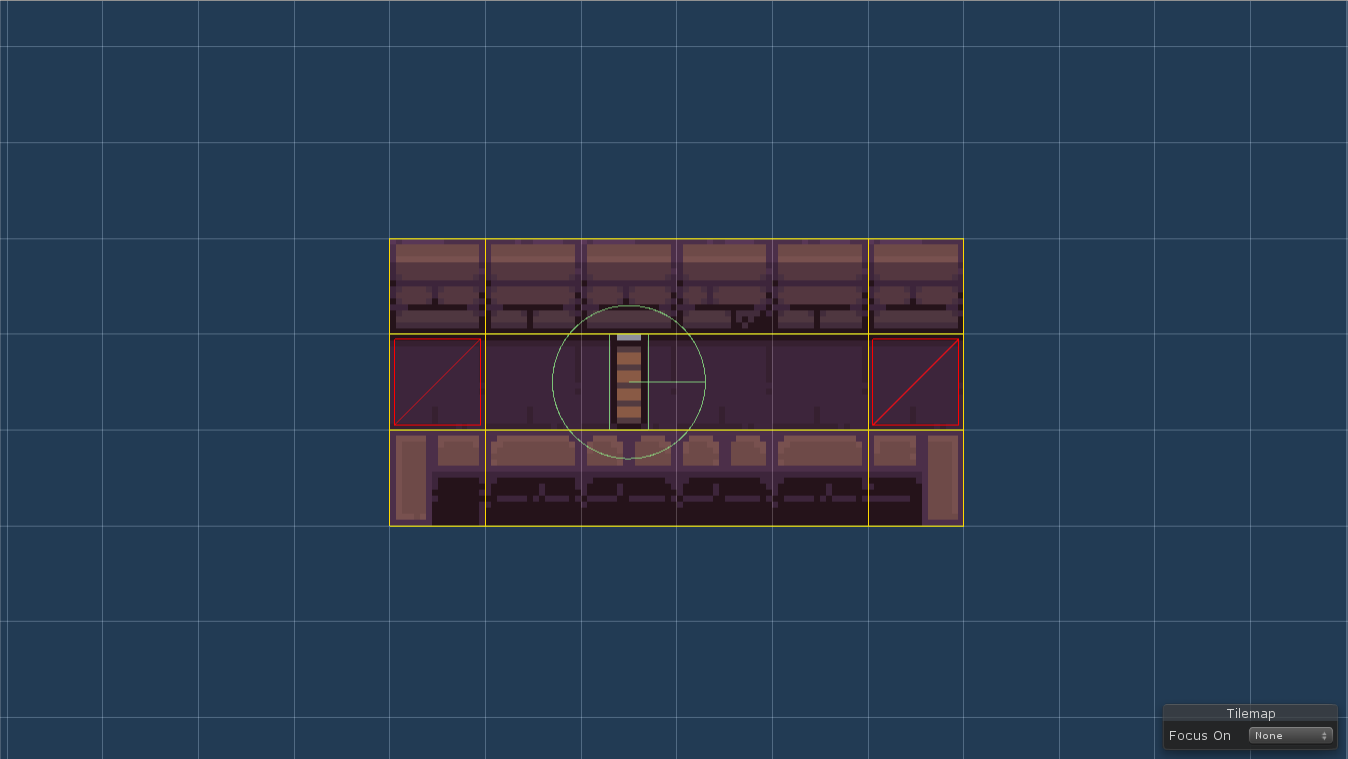
Corridors#
Corridors are very simple with this tileset. We use the specific positions doors mode to choose the two possible door positions. And because corridors are by default placed after non-corridor rooms, these room templates just work without the need of any scripting.
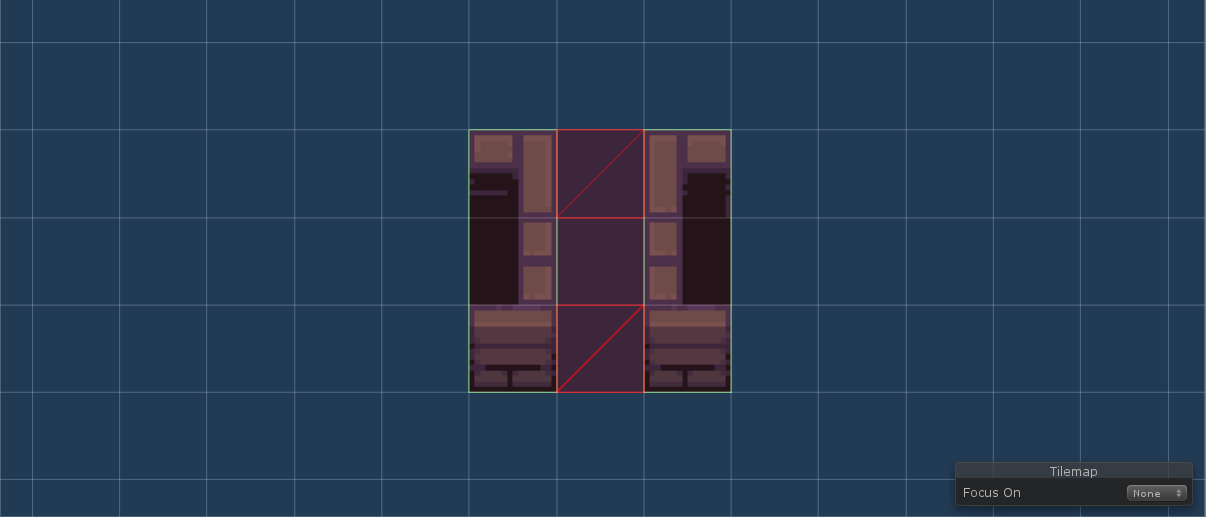
We just need to make sure that we do not allow door positions of non-corridor rooms that are closer than 2 tiles from corners. Below you can see what would happen otherwise. It is possible to allow that but we would have to implement some post-processing logic that would fix such cases.
Level graph#
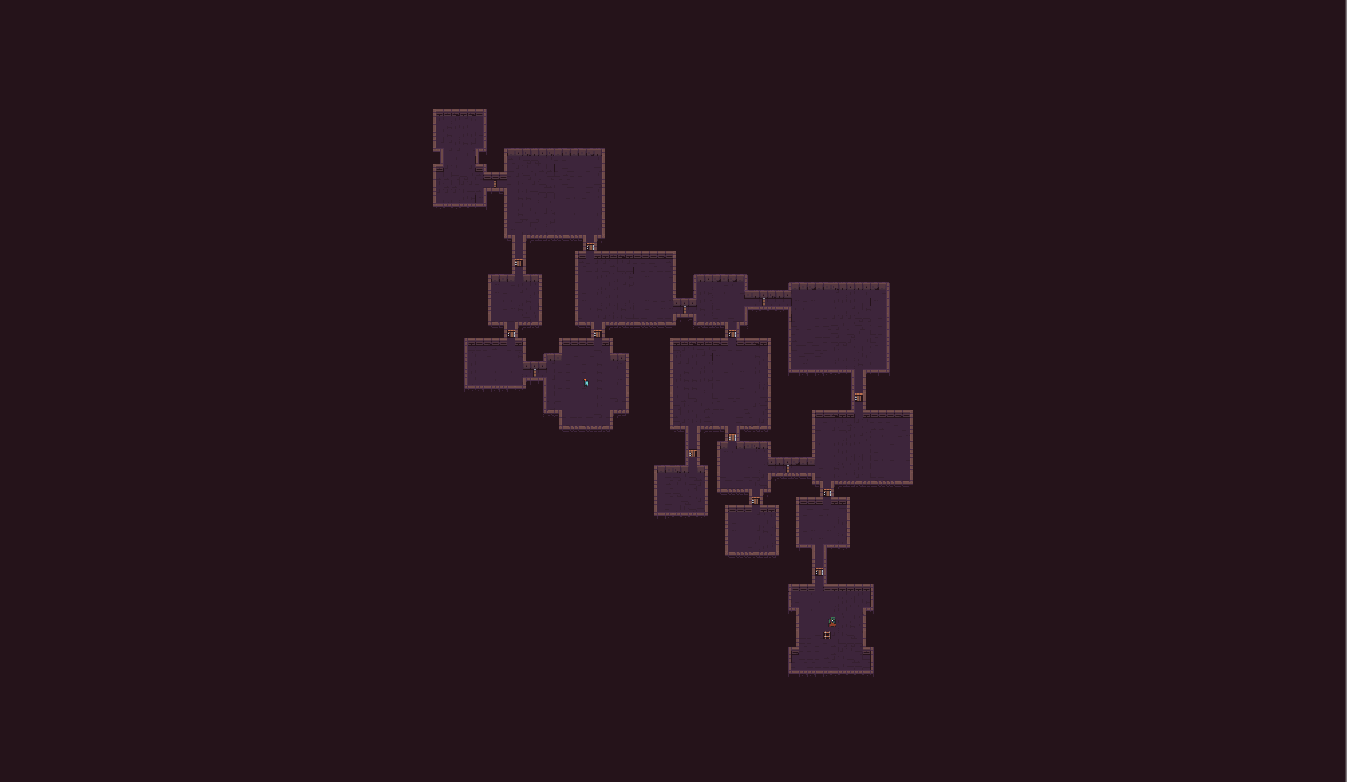
With only two room templates for non-corridor rooms, we must think about which level graphs are possible to lay out and which are not. For example, using only the bigger room template, the algorithm is not able to lay out cycles of lengths 3 and 5 because there simply is not any way to form these cycles with such room templates. But cycles of length 4 are possible so that is what we do here.
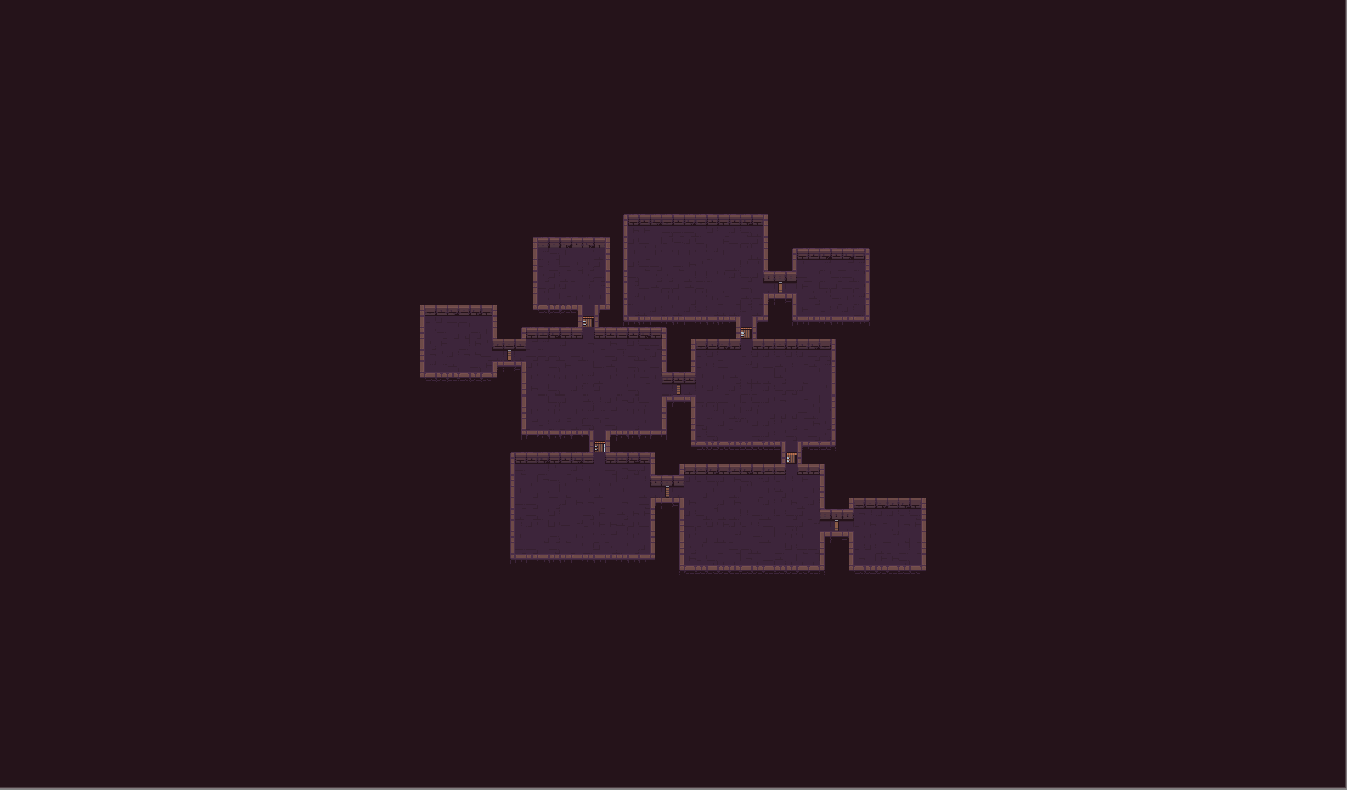
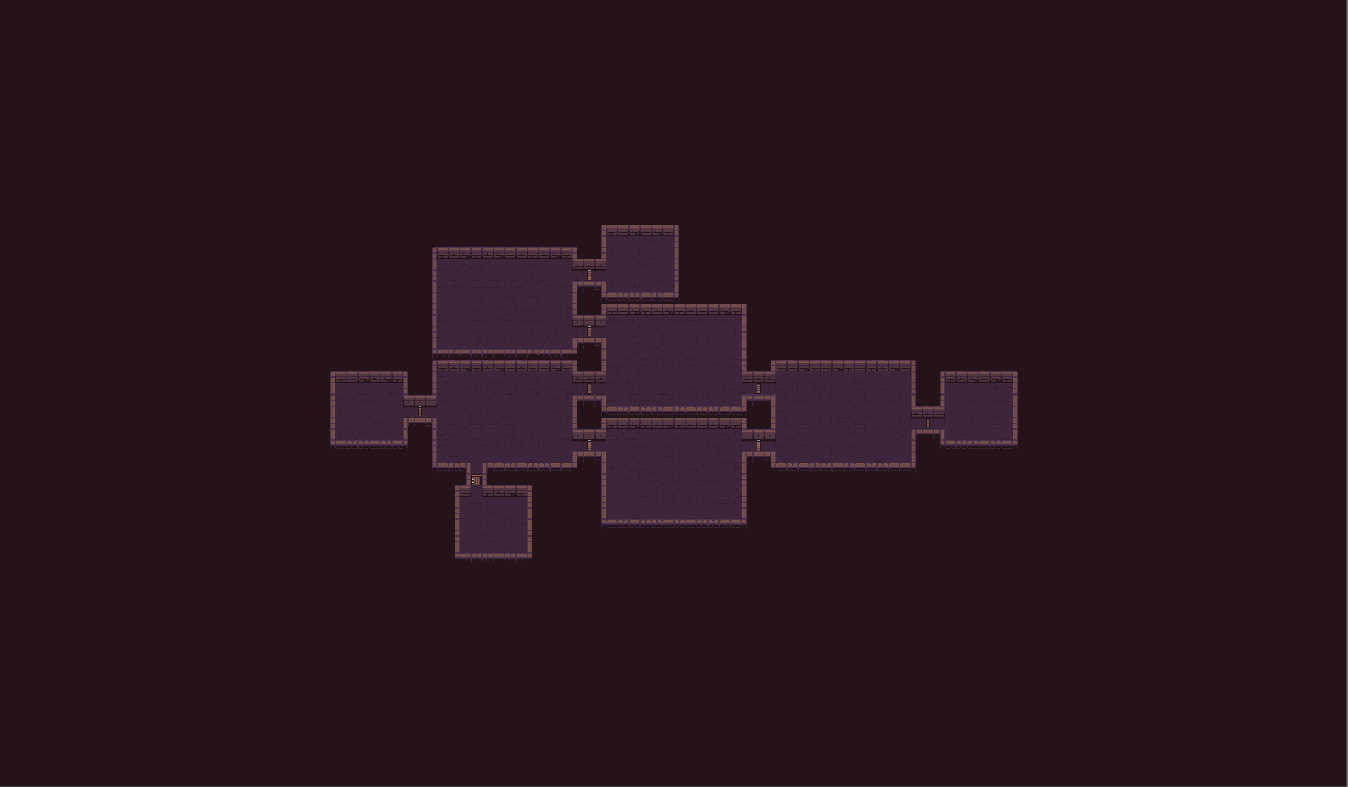
Results#
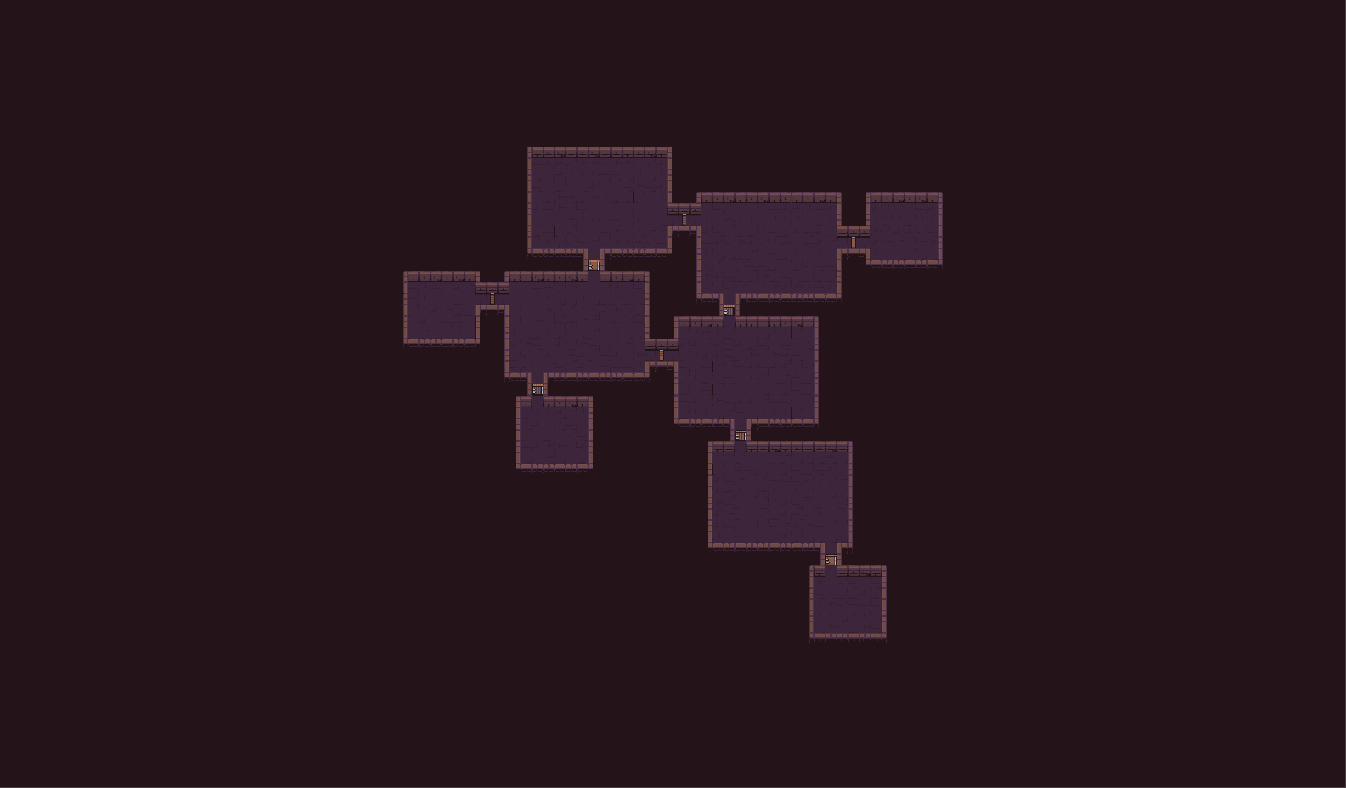
Real-life example#
To create something that is closer to a real-life example, we will:
- add spawn room template that includes a player
- add boss room that contains a ladder to the next level
- add doors to corridors
- add two more corridor room templates
- add enemies
- add more rooms to the level graph
Spawn room#
Our spawn room will look different than our basic rooms. We will also want the generator to spawn our player prefab inside the room. This can be simply achieved by placing our prefab inside the room template, next to the GameObject that holds our tilemaps.
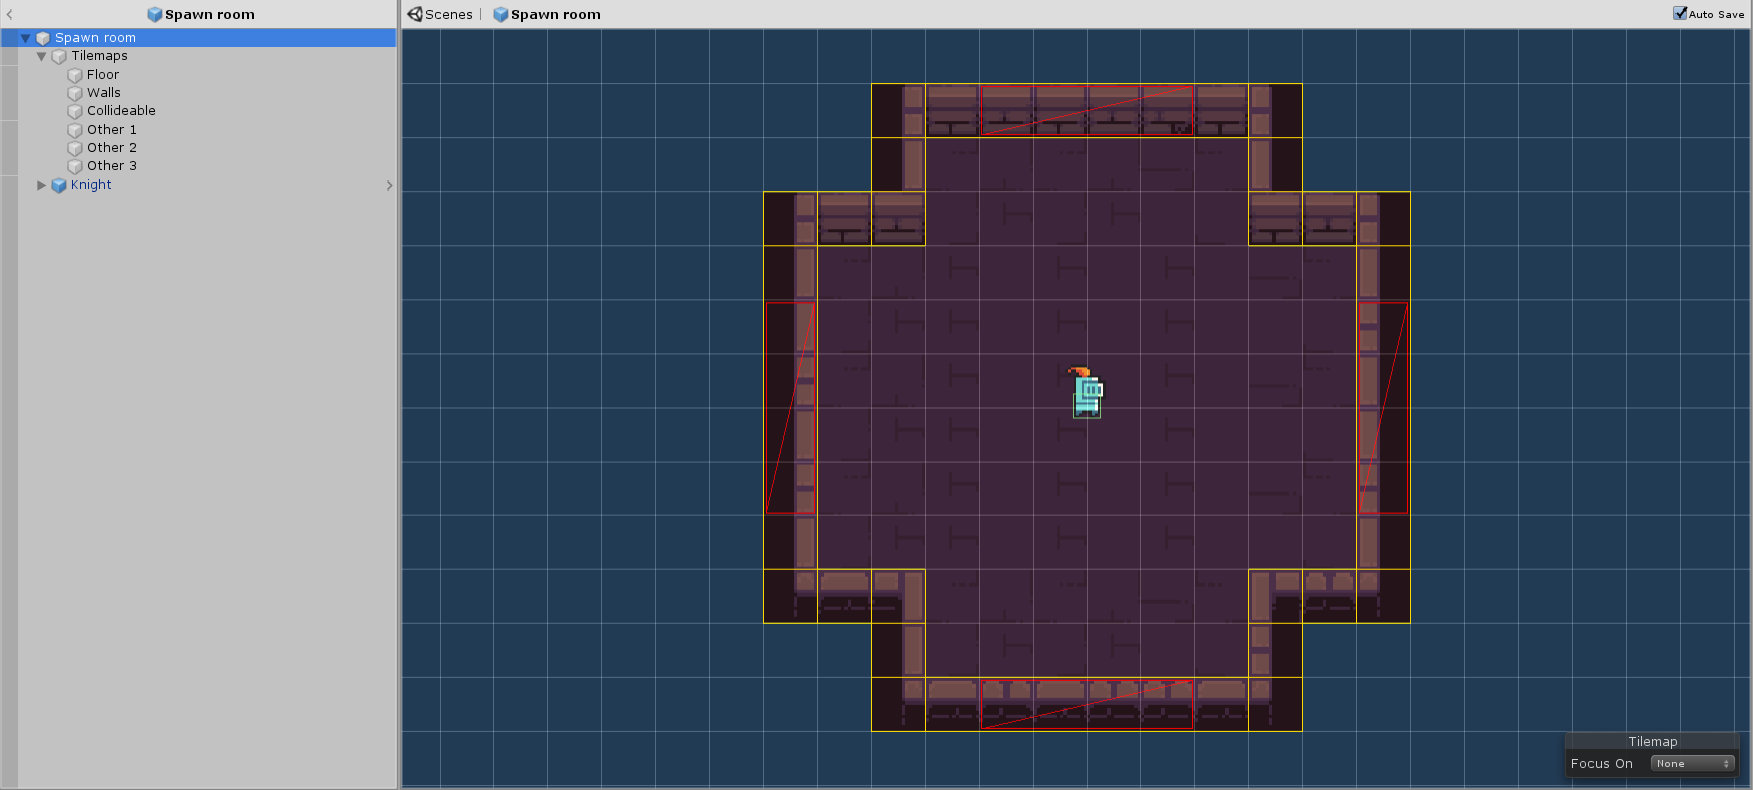
Note: A basic script for player movement is included in the example scene.
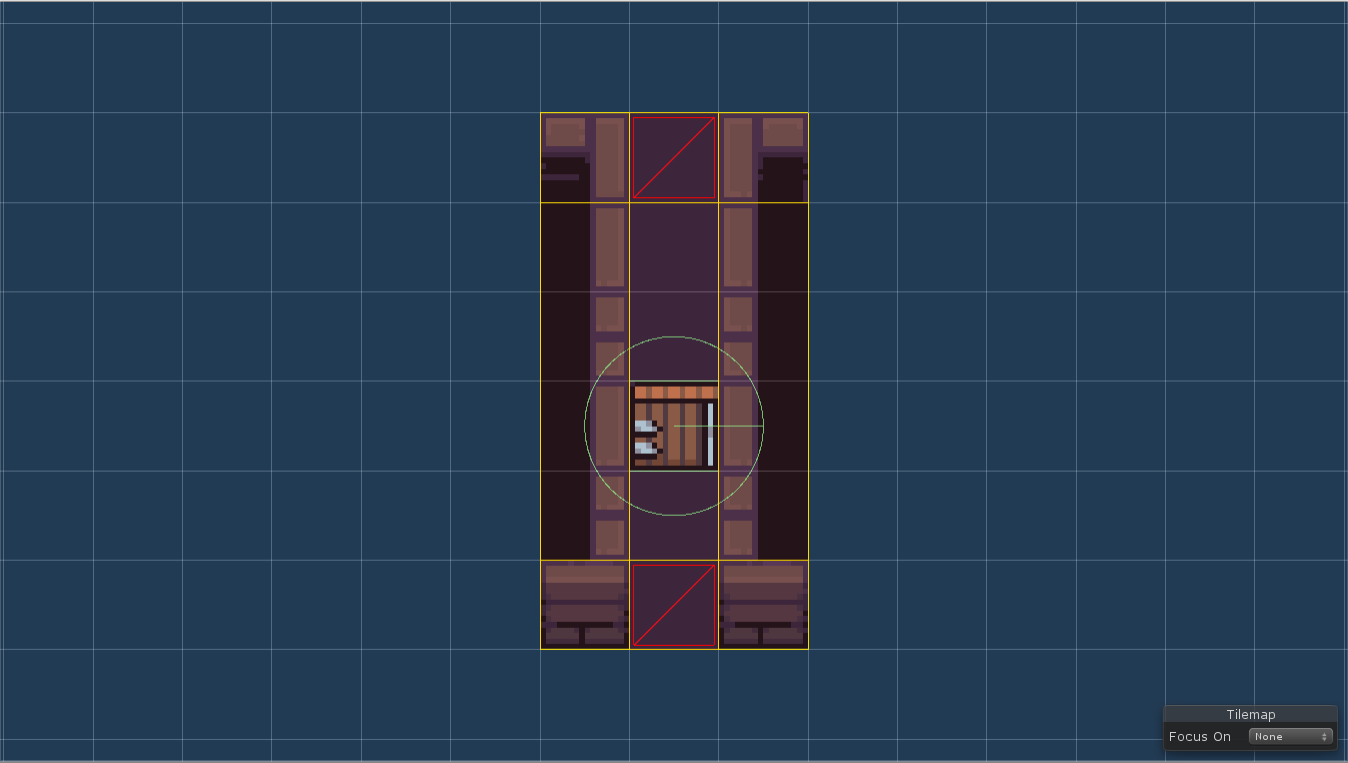
Boss room#
Our boss room will also have a special look. We also created a simple Exit prefab that looks like a ladder a generates a new level when interacted with. And similarly to placing our player prefab, we can also let the generator spawn a mighty ogre that will guard the exit.
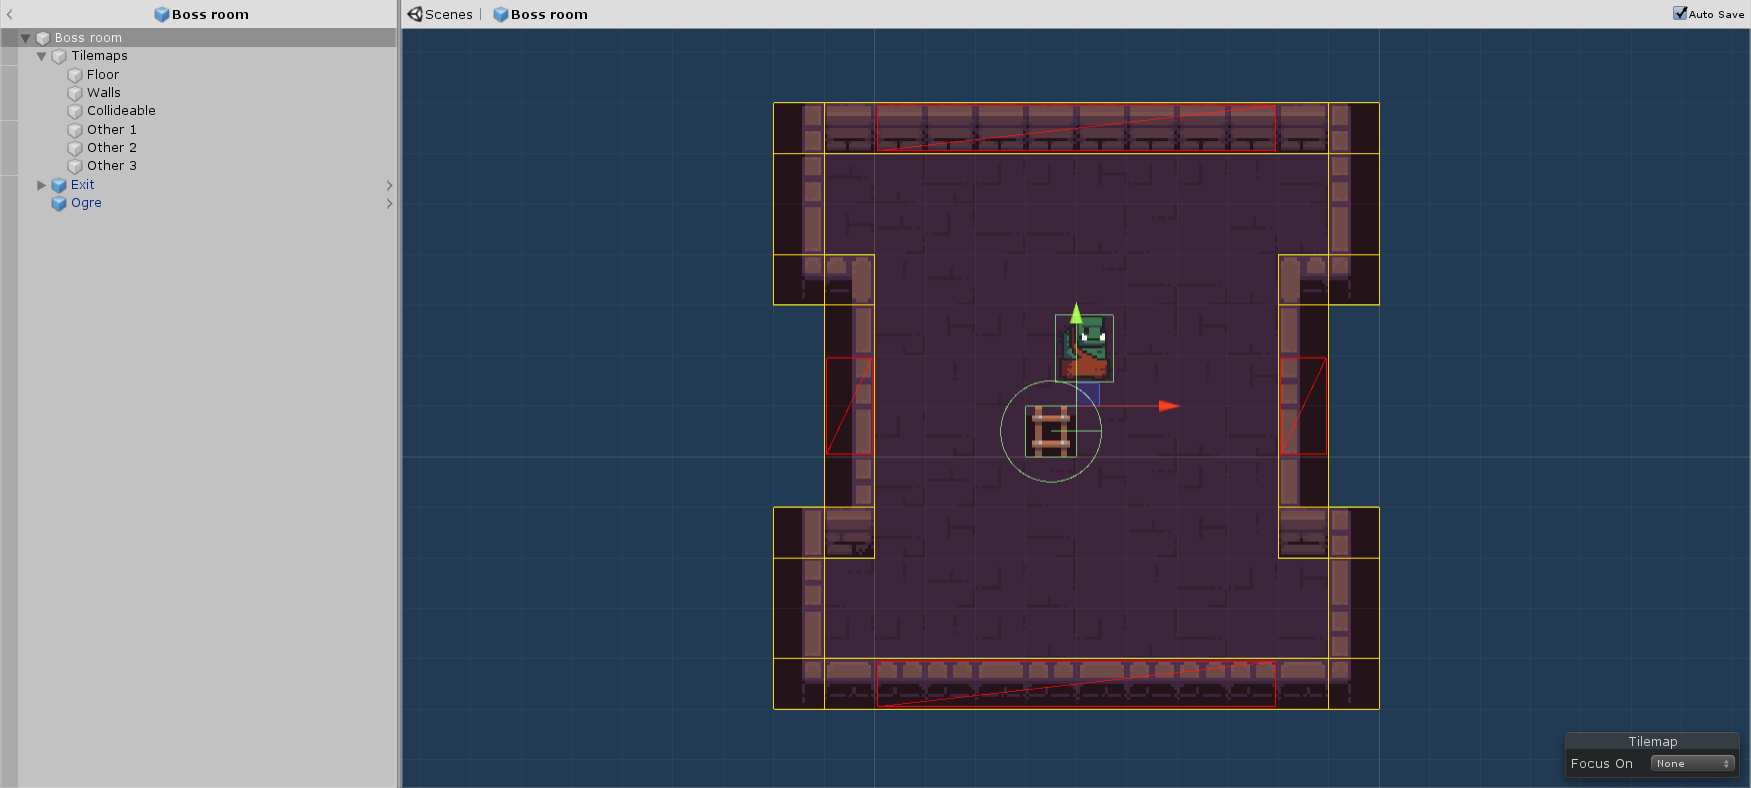
Note: There is no enemy AI so the ogre is really not the mighty.
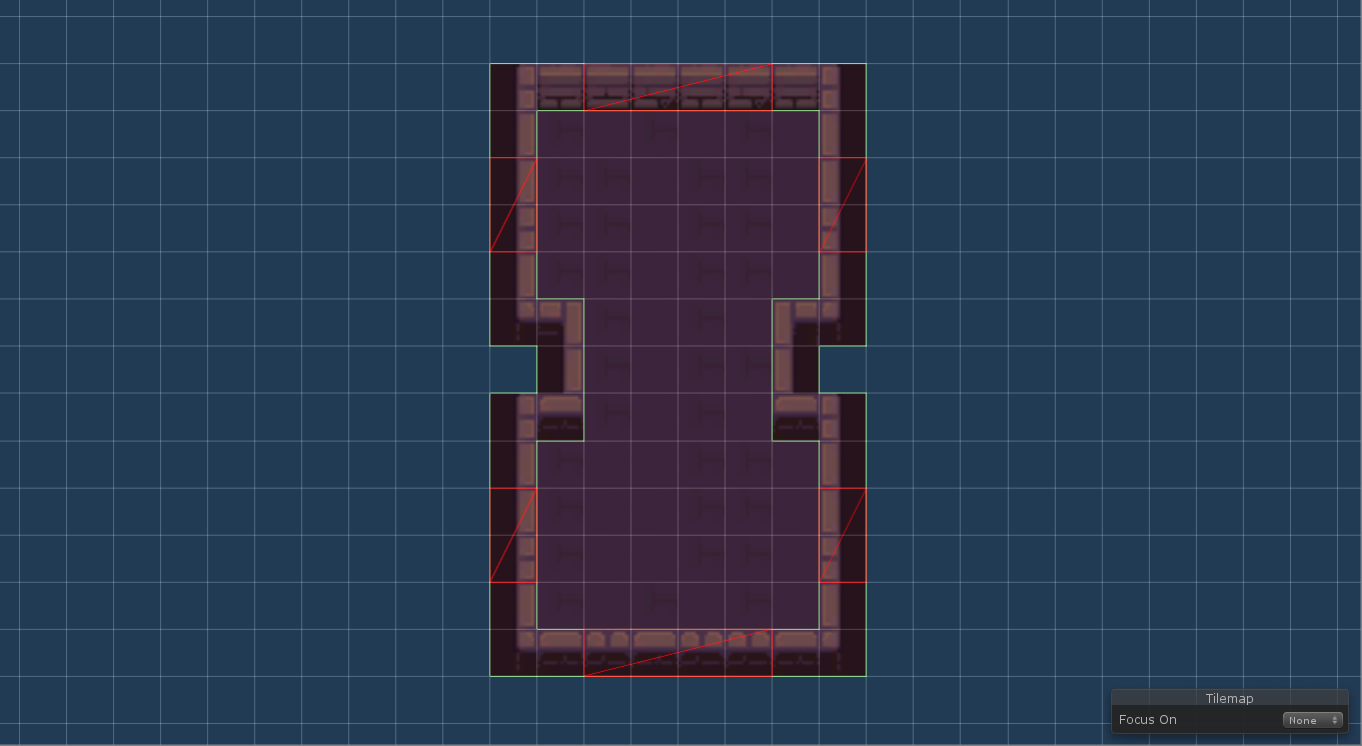
Additional room template#
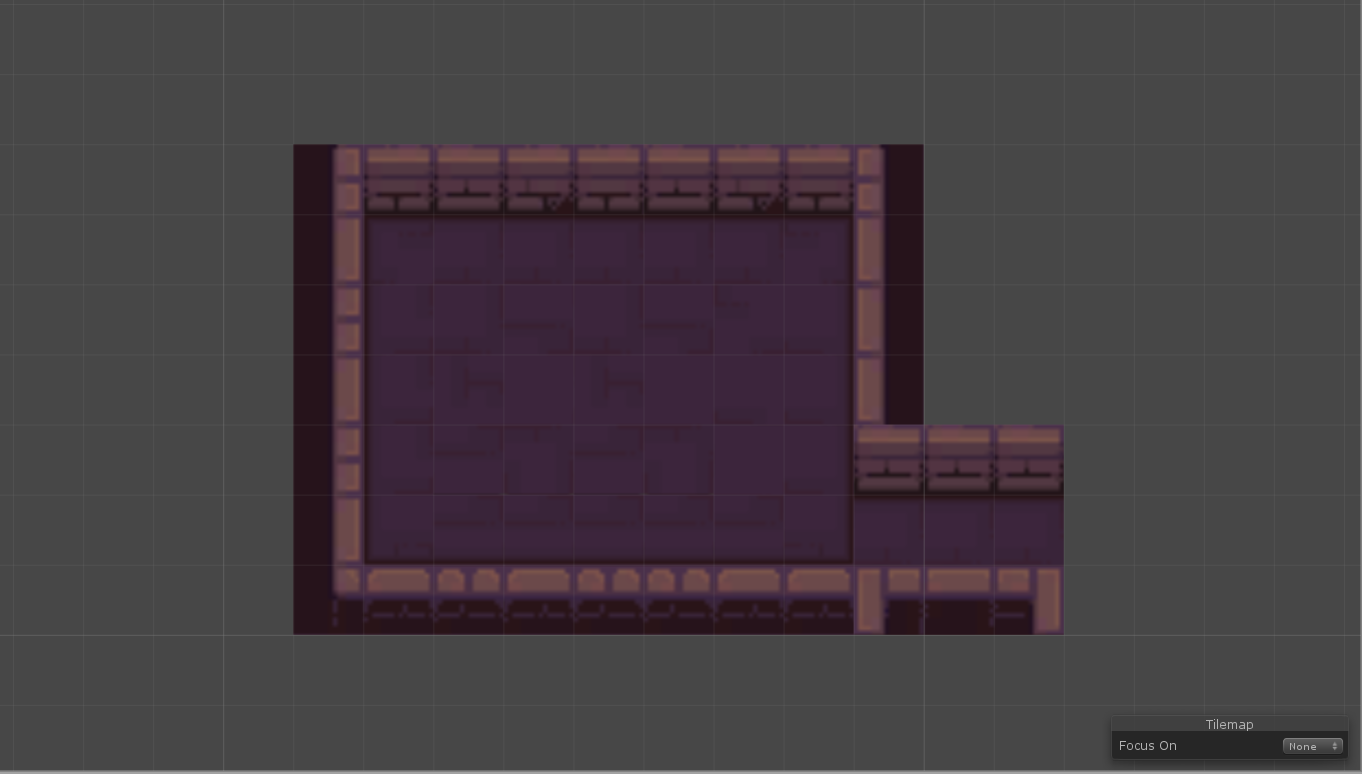
Even for ordinary rooms, we can have non-rectangular room templates.
Doors#
We can easily add doors to our corridors. We created a simple door prefab that has a collider and also a trigger that lets the player open the door.
Longer corridors#
Enemies#
We can easily add enemies to our levels. In this tutorial, we will add enemies directly to room templates and then implement a post-processing task that spawns each enemy with a configurable chance.
We will start by creating a GameObject called "Enemies" in all the room templates that will contain enemies a make all the enemies children of this GameObject.

Note: We must make sure to always name the root GameObject "Enemies" as we will use that name to work with the enemies.
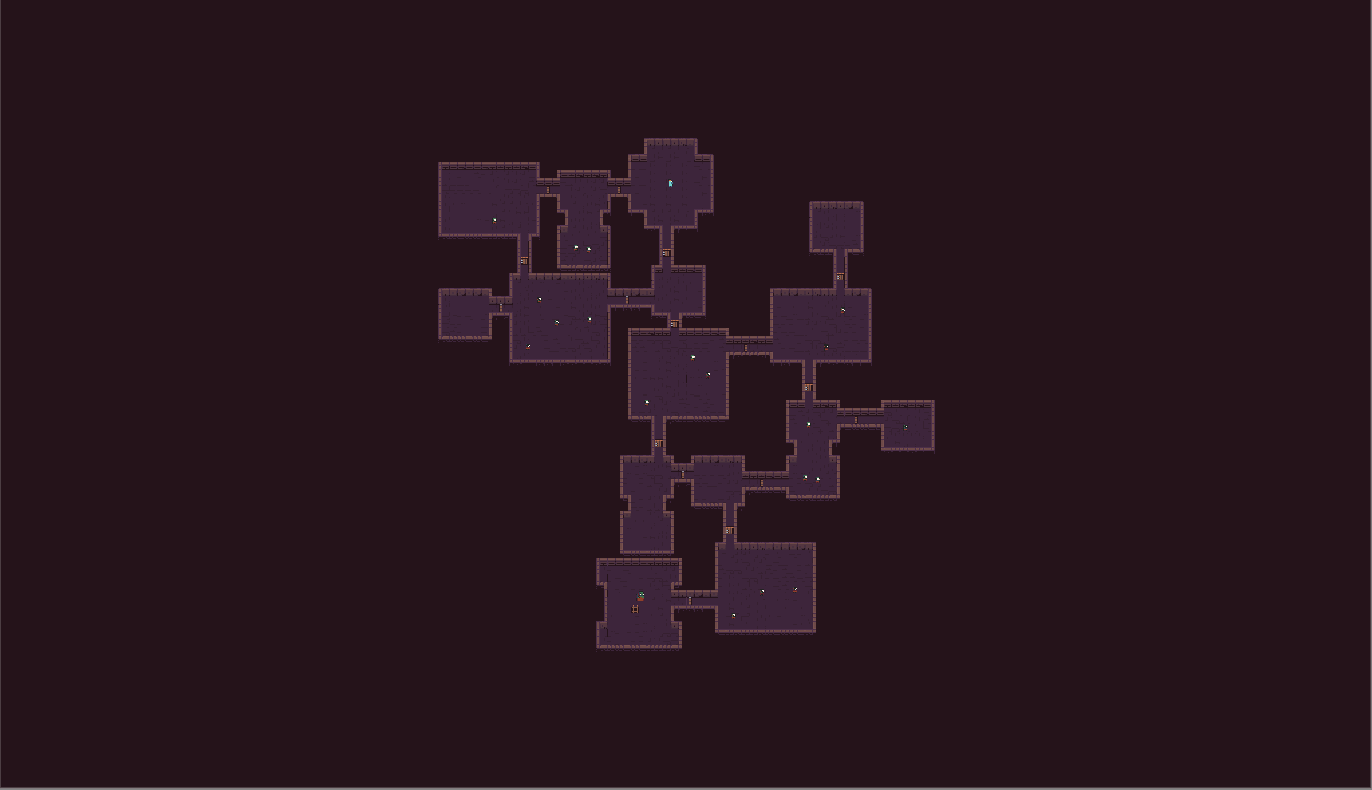
If we now generate the dungeon, we will see that it contains all the enemies that we added to individual room templates.
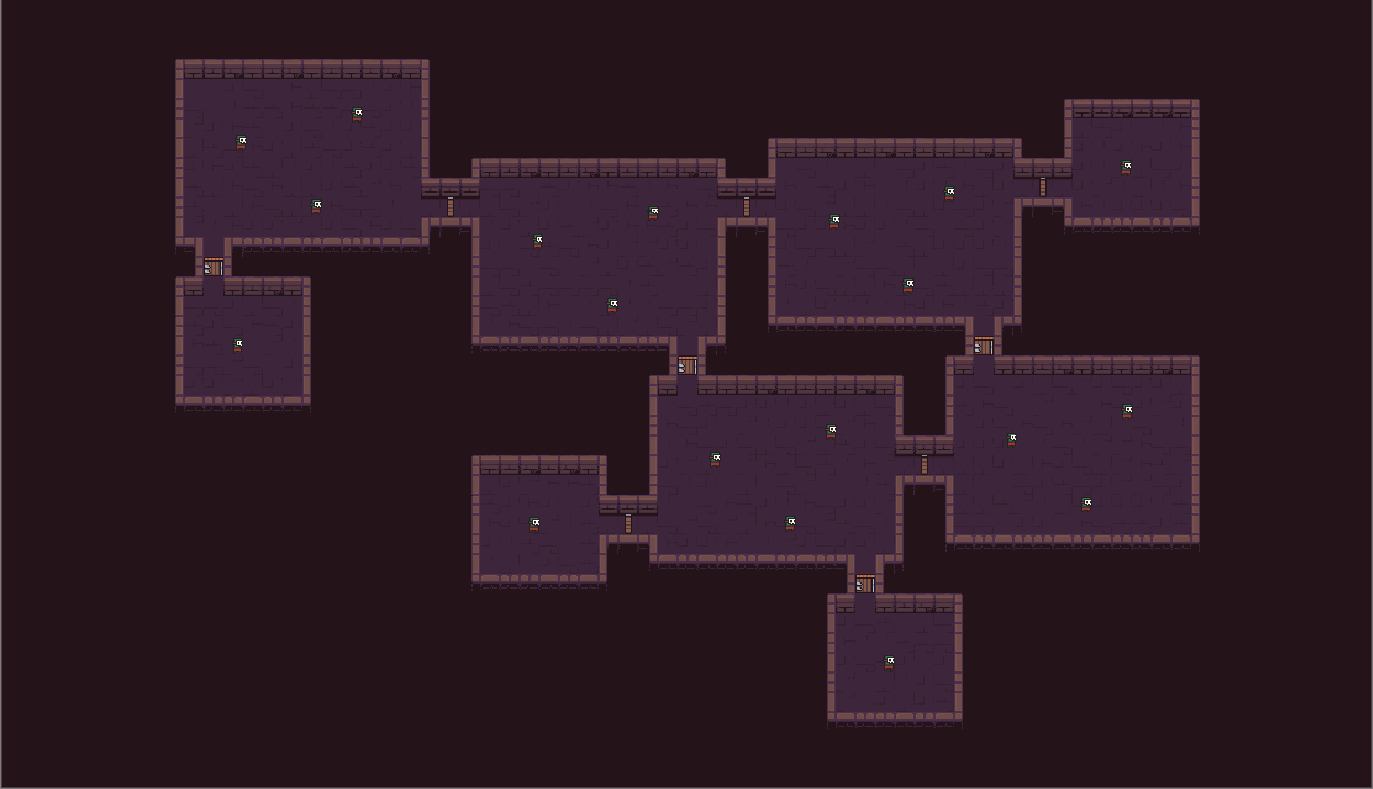
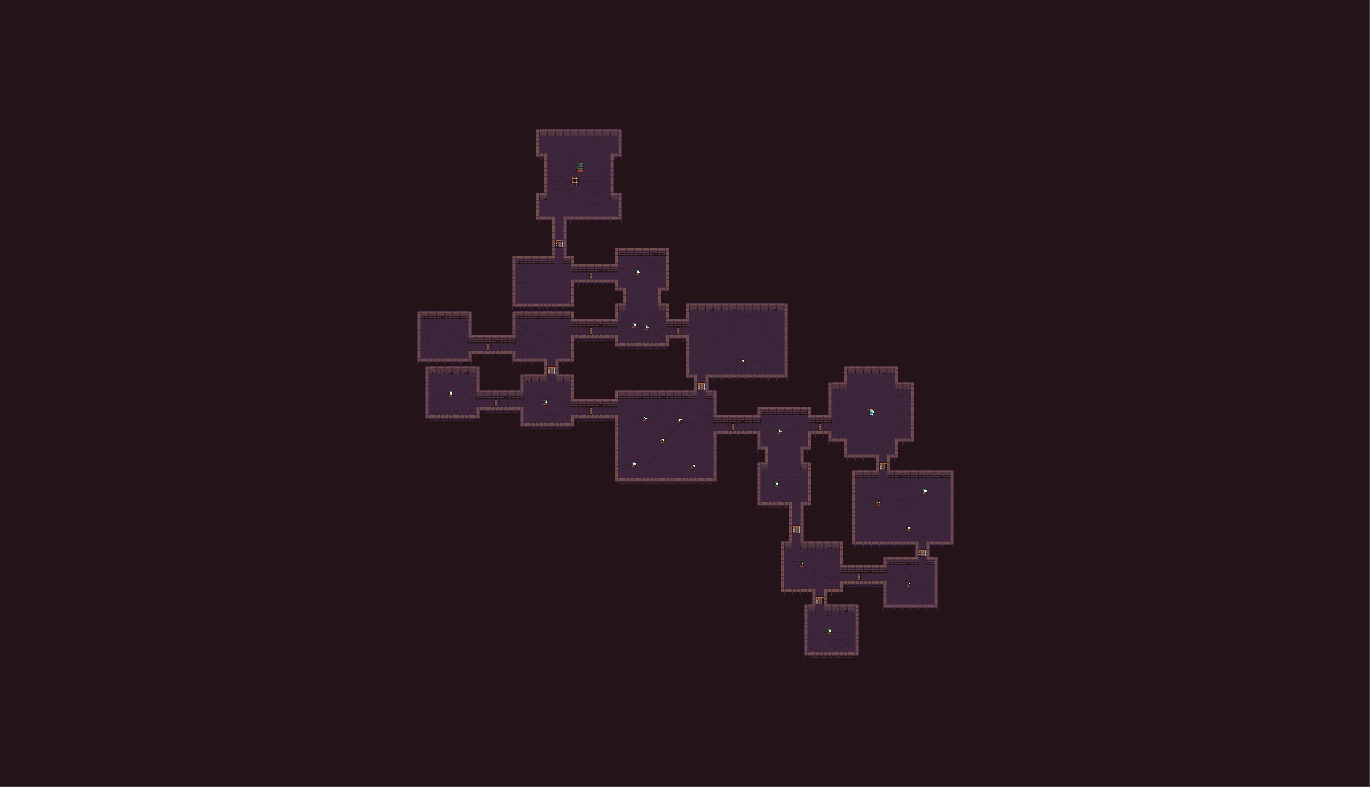
If we are happy with the results, we can stop here. However, to showcase how we can add some post-processing logic to the generator, we will try to spawn each monster with some predefined probability so that different monsters spawn every time. The result can be found below.
We have to create a class that inherits from DungeonGeneratorPostProcessBase and because the base class is a ScriptableObject, we need to add the CreateAssetMenu attribute so we are able to create an instance of that ScriptableObject. After a level is generated, the Run method is called and that is the place where we call our post-process logic.
[CreateAssetMenu(menuName = "Dungeon generator/Examples/Example 1/Post process", fileName = "Example1PostProcess")]public class Example1PostProcess : DungeonGeneratorPostProcessBase{[Range(0, 1)]public float EnemySpawnChance = 0.5f;protected override void Run(GeneratedLevel level, LevelDescription levelDescription){HandleEnemies(level);}private void HandleEnemies(GeneratedLevel level){// Iterate through all the roomsforeach (var roomInstance in level.GetRoomInstances()){// Get the transform that holds all the enemiesvar enemiesHolder = roomInstance.RoomTemplateInstance.transform.Find("Enemies");// Skip this room if there are no enemiesif (enemiesHolder == null){continue;}// Iterate through all enemies (children of the enemiesHolder)foreach (Transform enemyTransform in enemiesHolder){var enemy = enemyTransform.gameObject;// Roll a dice and check whether to spawn this enemy or not// Use the provided Random instance so that the whole generator uses the same seed and the results can be reproducedif (Random.NextDouble() < EnemySpawnChance){enemy.SetActive(true);}else{enemy.SetActive(false);}}}}}
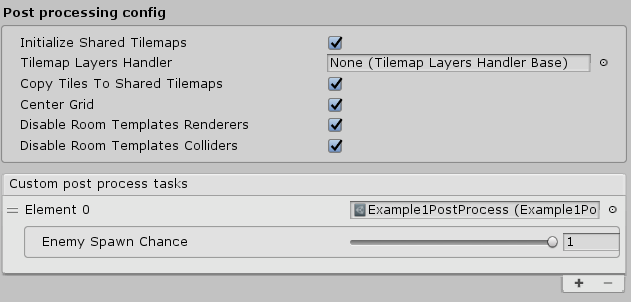
With the implementation ready, we now have to create an instance of that ScriptableObject by right-clicking in the project view and Create -> Edgar -> Examples -> Example 1-> Post process. And the last step is to drag and drop this GameObject in the Custom post process tasks section of the dungeon generator.
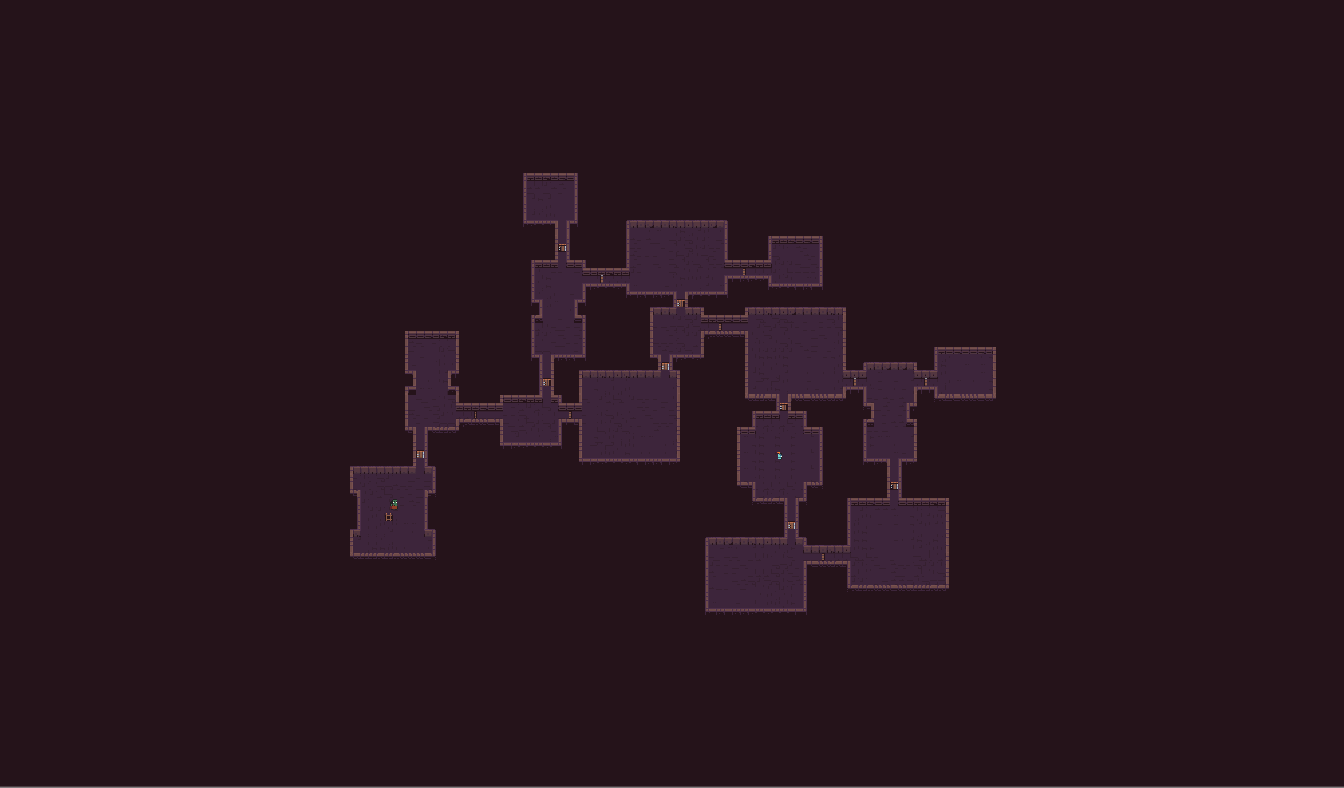
Level graph#
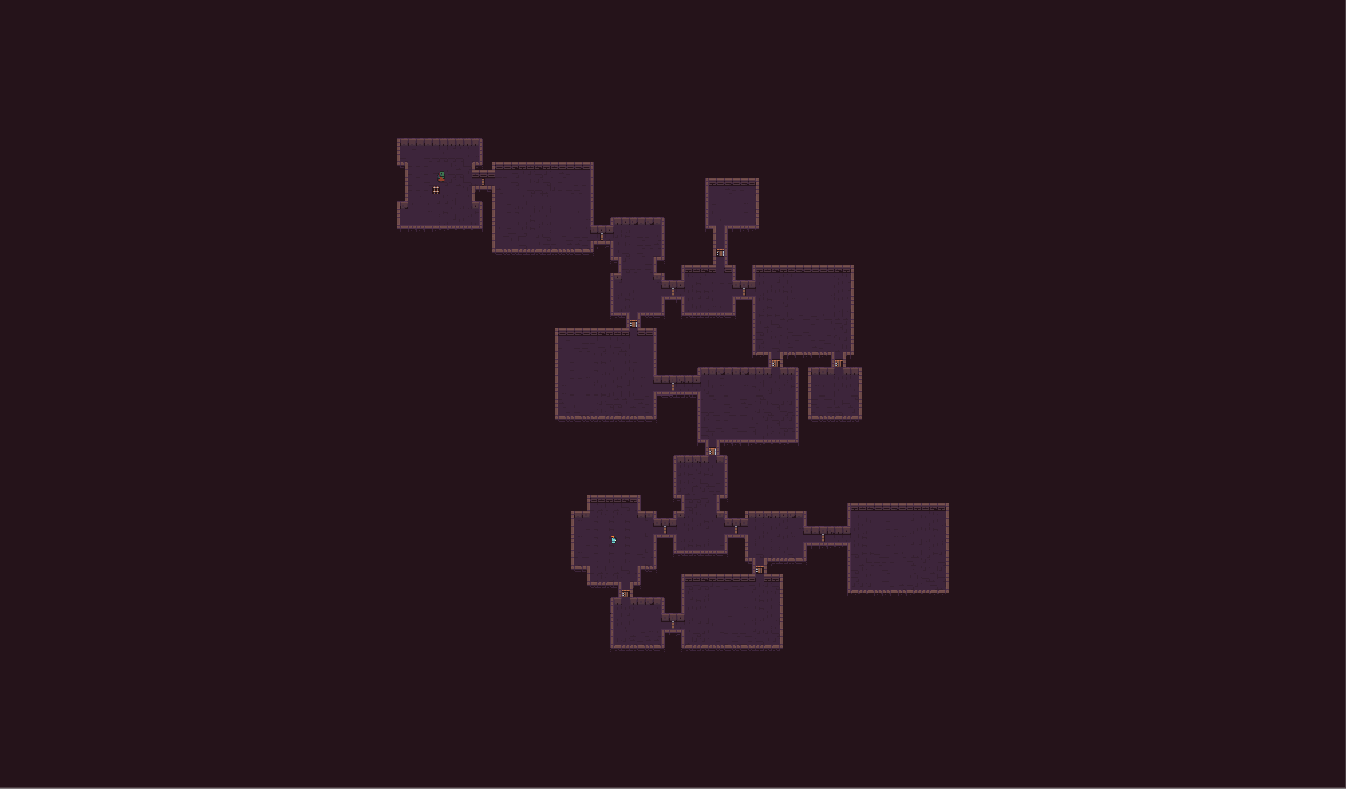
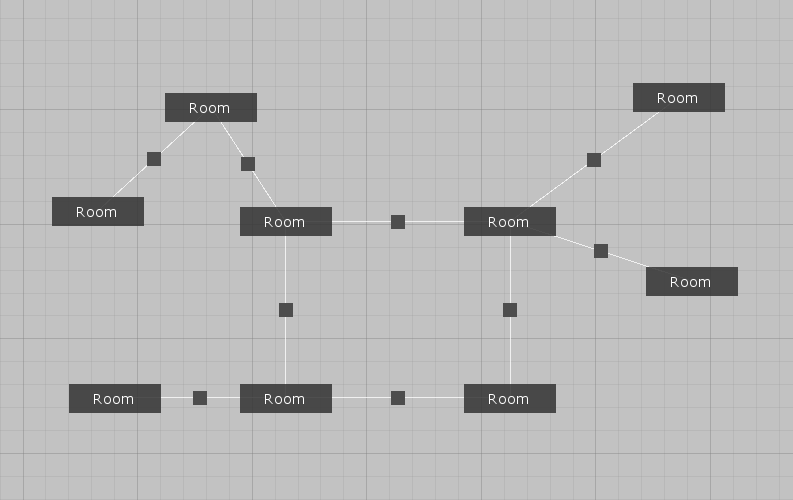
So the goal is to have more rooms than in the simple example and also a spawn room and a boss room. You can see one such level graph below.
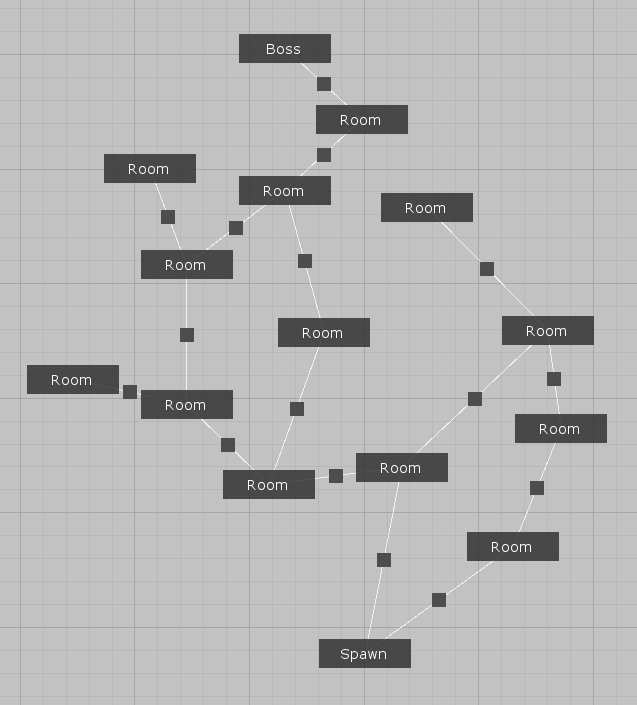
You can also see that with corridors of different lengths and more room templates to choose from, we can now have cycles of various sizes. The boss and spawn rooms have assigned only a single room template.