Quickstart
On this page, you should learn the basics needed to generate your first level. This guide is not meant to be comprehensive. Each topic covered in this guide has its own dedicated page containing all the details that were not mentioned here.
Note: If you prefer a video tutorial, you can watch one on youtube.
Room templates
The main documentation page about room templates can be found here.
Room templates are one of the core concepts of the generator. They describe how individual rooms in the dungeon look and how they can be connected to one another.
Creating room templates
To create a new room template, you have to:
- navigate to the folder where the room template prefab should be saved
- right click in the Project window and choose Create → Edgar → Dungeon room template
- (optional) rename the prefab file to anything you want
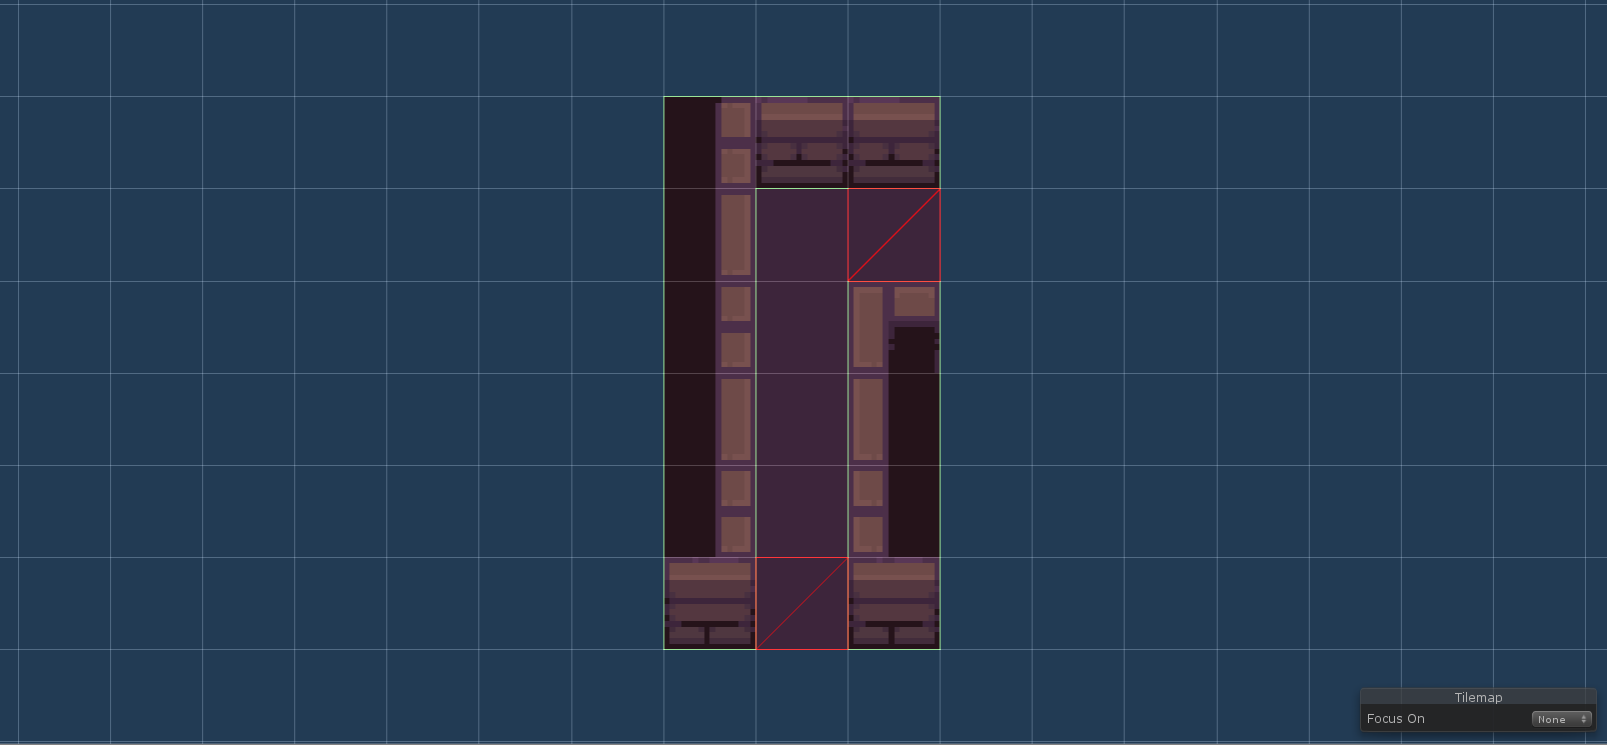
Designing room templates
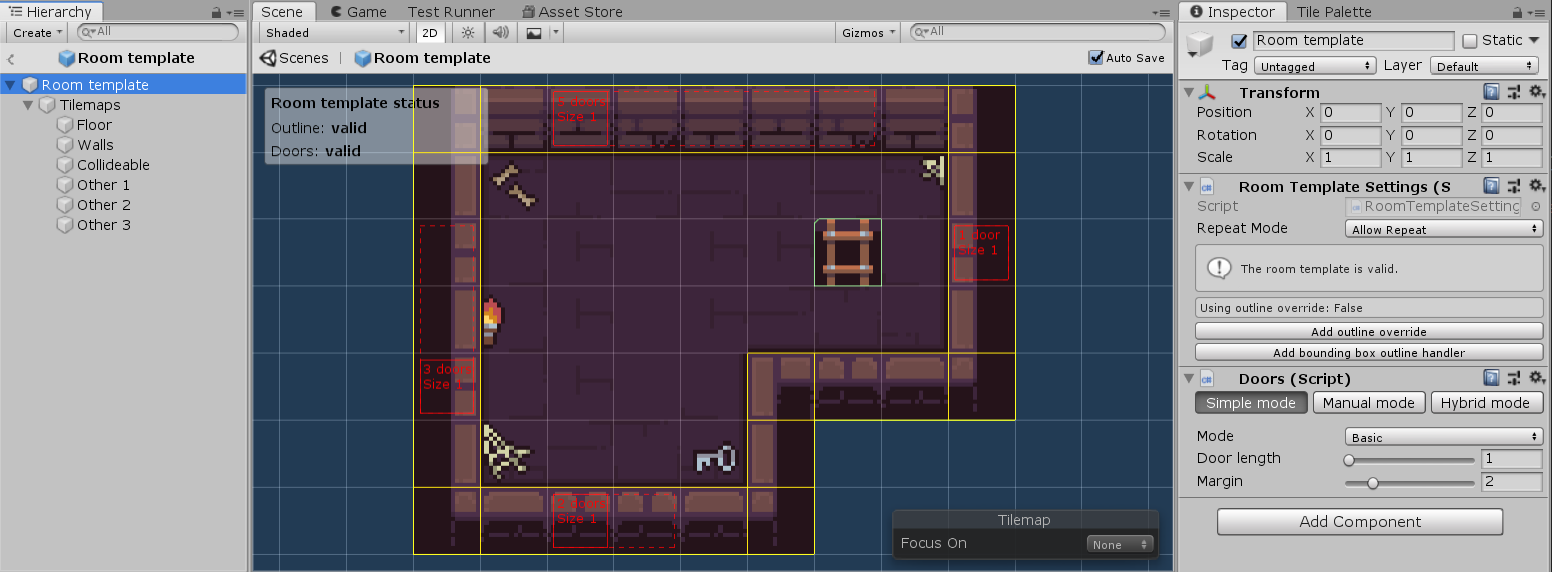
After you open a room template prefab, you will see that there is a Tilemap game object that contains multiple tilemap layers like Walls, Floor, etc. You can use all the available tilemap tools like brushes or rule tiles to design the room template.
VERY IMPORTANT: If you want to change the structure of room templates (add another tilemap layer, add a collider), read the Room template customization guide. But you should probably use the default structure if this is the first time working with Edgar.
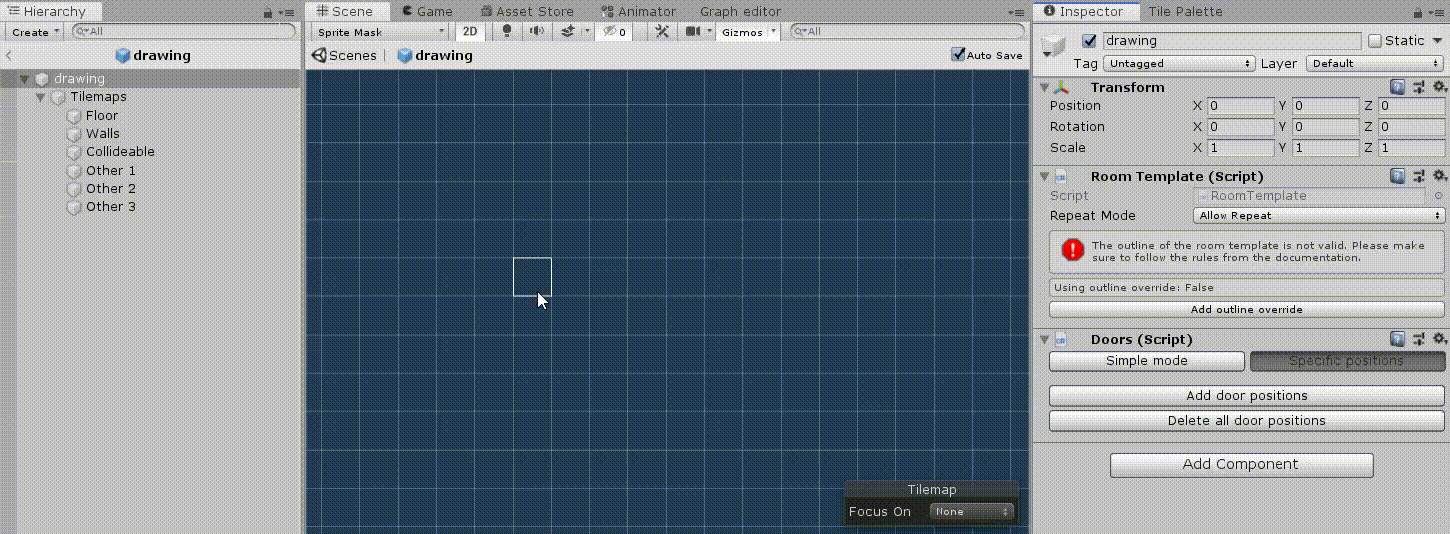
Note: Under the hood, the generator has to compute an outline of each room template. Therefore, there are some limitation as to how a room template can look like. For example, a room template cannot consist of two groups of tiles that are not connected by any other tile.
Doors
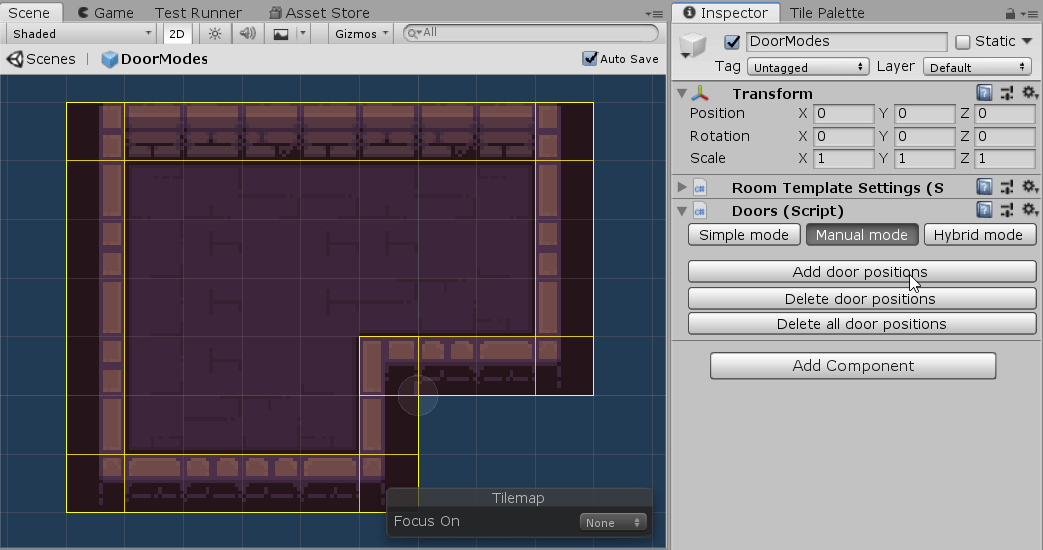
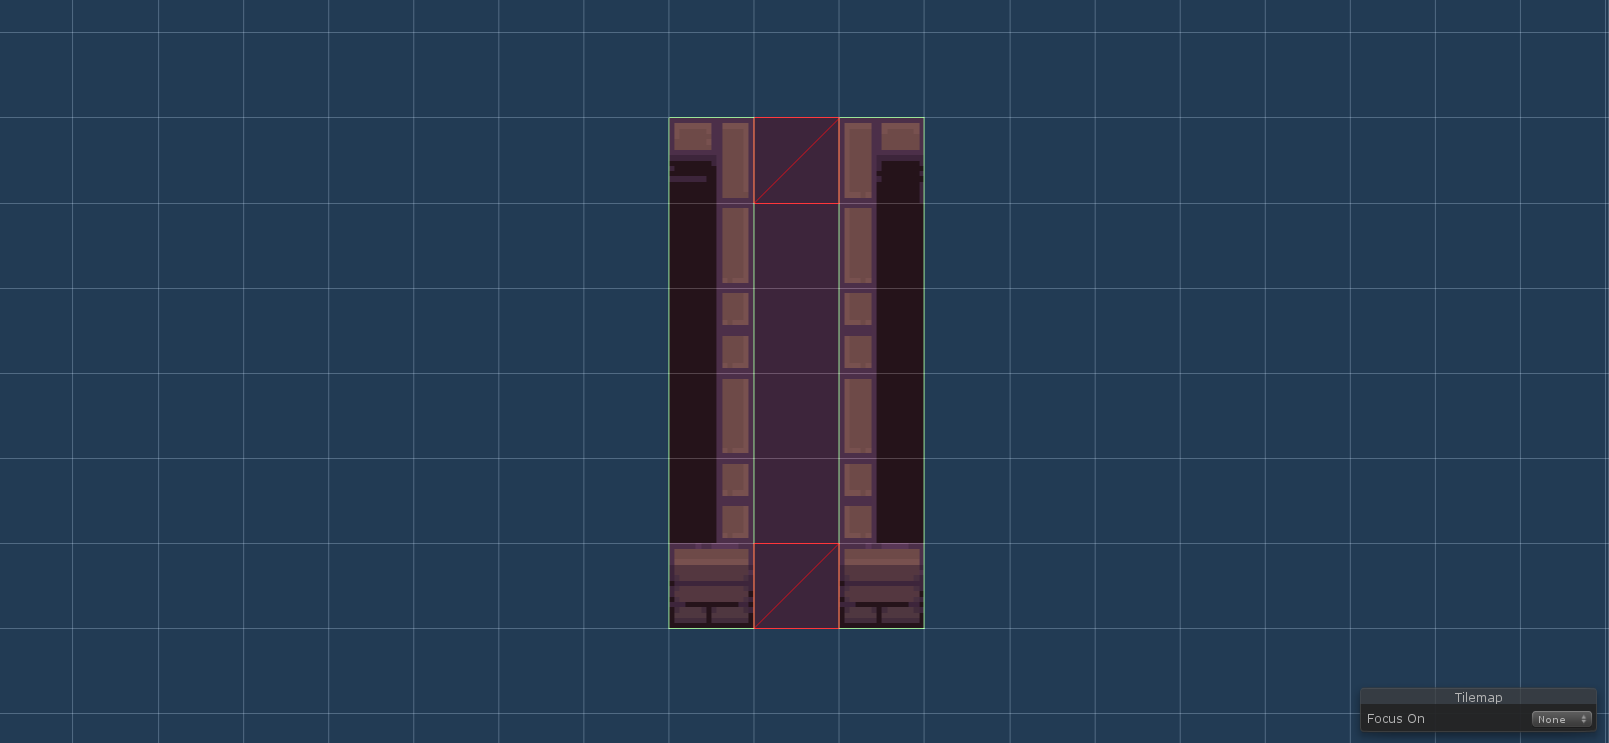
When you are happy with the visuals of a room template, you can add doors. By specifying door positions, you tell the algorithm how individual room templates can be connected. The most important rule is that two doors must have the same length in order to be compatible.
Door positions are added through the Doors (Grid2D) component that is attached to the root game object of the room template. There are multiple ways of adding room templates:
- Simple door mode: With the simple door mode, you basically say that you do not care too much where the doors are: they can be anywhere on the outline. You just specify the length of the doors (and their margin) and the algorithm automatically adds all the doors.
- Manual door mode: With the manual door mode you will have to mark all the door positions manually.
Note: If you are just starting with Edgar, it is recommended using the Simple door mode whenever possible. The reason is that the generator might not be able to generate a level if you specify too few door positions. With the simple door mode, there are usually enough door positions for the generator to be fast enough.
Corridors
In order to connect two ordinary room templates in a level, the generator uses so-called corridor room templates. They are created the same way as normal room templates. The only difference is that they usually have exactly two door positions.
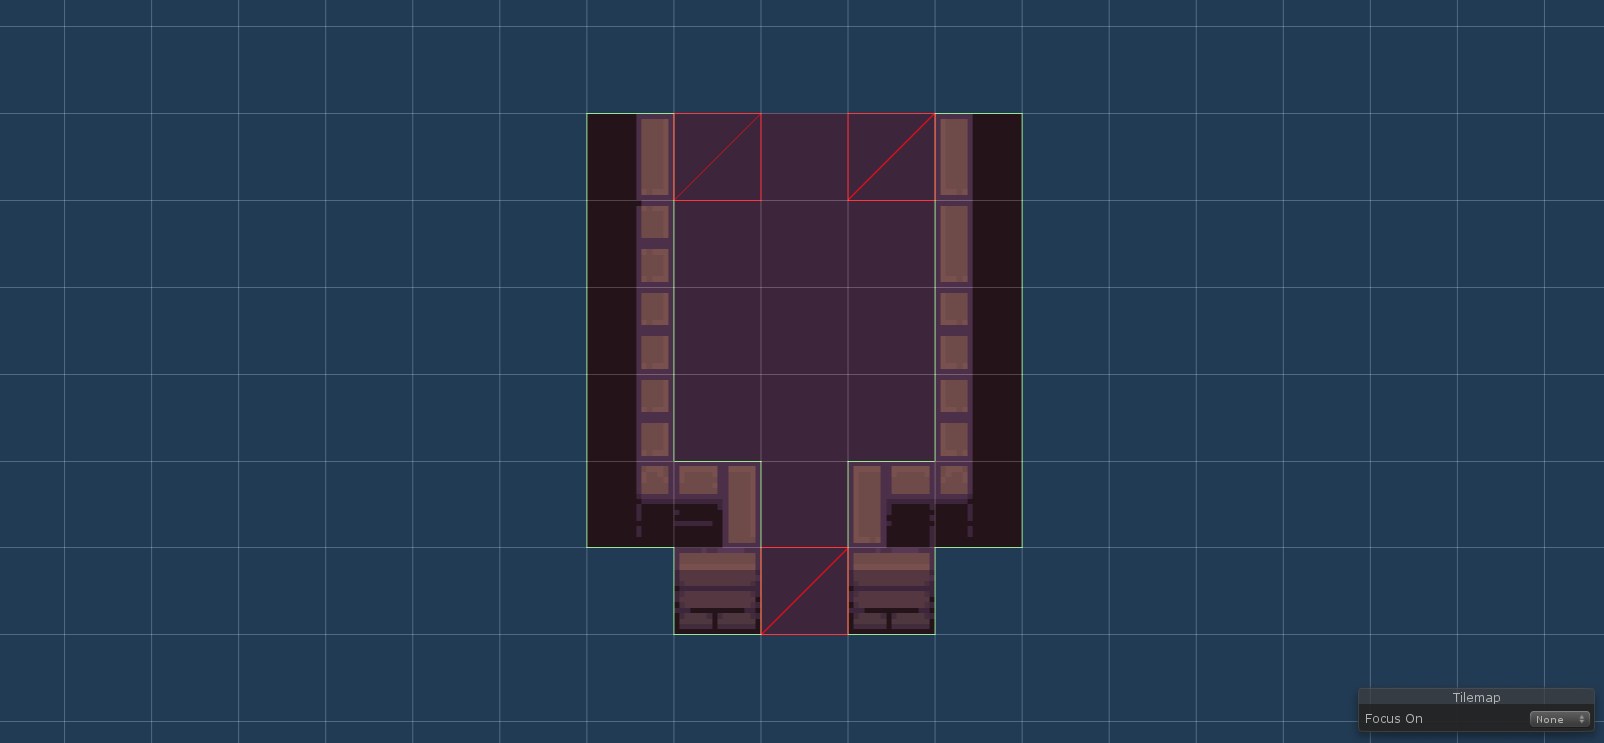
Note: The second and third type of corridor room templates are actually supported by the generator. It is just not recommended due to performance implications.
Level graphs
The main documentation page about level graphs can be found here.
The second most important concept of the generator are so-called level graphs. They describe:
- how many rooms there should be in each generated level
- which rooms should be connected
- which room templates can be used for different rooms in the level
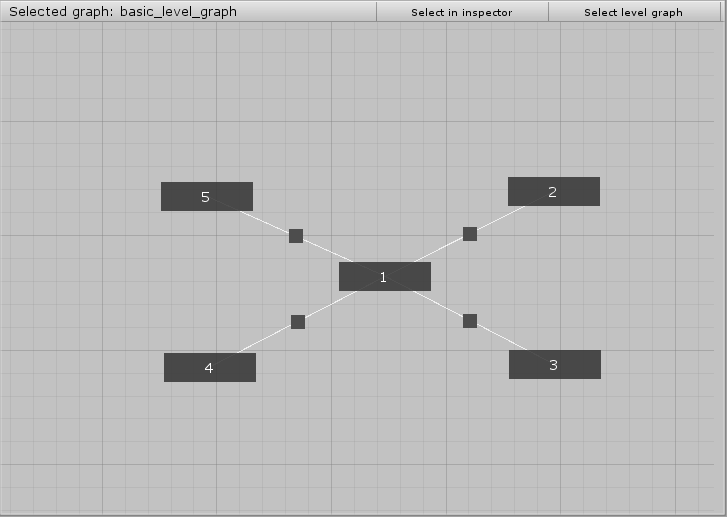
Working with level graphs
First, create a level graph using Create → Edgar → Level graph. Then, double-click the created scriptable object to open the editor.
Basic controls:
- Create room: double-click on an empty space in the grid
- Configure room: double-click on an existing room
- Delete room: press Ctrl + Del, or right-click on a room and select Delete room
- Move room: left click and then drag around
- Add connection: hold Ctrl while left-clicking a room and then move the cursor to a different room
- Delete connection: right-click on a connection handle and select Delete connection
Note: When creating your first level graph, you should start small:
- Add only a few rooms (i.e. less than 6).
- Do not add too many connections (i.e. make the graph connected but use at most a single cycle)
It is best to start small and make sure that you understand all the main concepts of the generator. If you start with a really complex level, there is a high chance that you have missed some important detail of the whole setup, and it will be much harder to figure out where the problem is. This also applies to designing room templates.
Assign room templates
When you have the level structure ready, it is time to choose which room templates are available for the generator. In the Level graph inspector window, you can see 2 sections - Default room templates and Corridor room templates. Drag and drop your basic room templates to the Default room templates → Room Templates field and your corridor room templates to the Corridor room templates → Room Templates field.
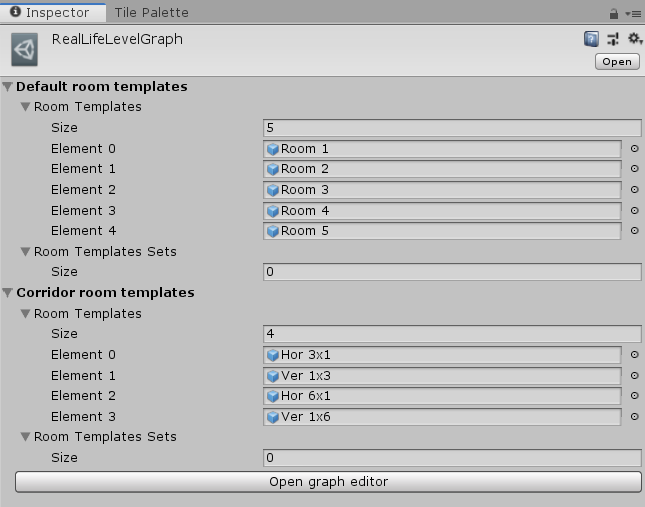
Note: You can also specify that some rooms should have different room templates. To do so, double-click a room in the level graph and add room templates to the Individual Room Templates field. If there is at least a single room template assigned to a room, it will be used instead of the default room templates.
Generator setup
The main documentation page about the dungeon generator setup can be found here.
The last step is create an instance of the dungeon generator.
- Add the Dungeon Generator (Grid2D) component to any Game Object in the Scene.
- Assign your level graph to the Level Graph field.
- Hit the Generate dungeon button or enable Generate on start and enter play mode

Troubleshooting
It sometimes happens that the generator will freeze and then output a timeout error to the console. It usually means that you either configured the generator badly or that your setup is just too difficult for the generator to handle.
When that happens, take a look at the console output as there will usually be some diagnostic information that should help you fix the problem. For example, the diagnostics algorithm might tell you that you have too many cycles in your level, and you have to change that.
If you are not able to fix the problem yourself, come join our Discord server where I can usually help you quite quickly.