FAQ
This document contains solutions to common questions that are often asked on Discord and other channels.
Table of Contents
- How to spawn the player in a specific room?
- What to do with a
TimeoutException? - How to deal with wider walls/doors?
- Changes to a room template are lost after a level is generated
- Rooms are generated too close to one another
- Send the same level to multiple players (in a multiplayer game)
- Keep prefab references when generating levels inside the editor
- Is it possible to track the progress of the generator?
- Is Edgar suitable for an endless level generation?
- How to generate levels without corridors?
- Is it possible to have non-rectangular rooms?
- How to implement a save and load system?
- The generator works in the editor but not in the build
- How to handle pathfinding?
- How to spawn enemies?
How to spawn the player in a specific room?
The easiest solution is to design a special spawn room template and place the player prefabs inside that room template. Then, make this room template the only room template for the Spawn room in your level graph. This approach is described in Example 1.
Another option is to move your player in a post-processing logic. Instead of putting the player prefabs inside the Spawn room template, you can just mark the spawn spot with an empty game object. Then, after a level is generated, you can run a post-processing script that will move the player to the marked position. This approach is described in the Dead Cells example.
What to do with a TimeoutException?
Sometimes, when you want to generate a level, you get a TimeoutException in the console instead. The error means that the generator was not able to produce a level in a given time limit which is 10 seconds by default. The error can have two different meanings:
- the level graph is too hard for the generator (there are too many rooms, too many cycles, restrictive room templates, etc.)
- or there is a problem somewhere in the configuration (maybe the doors of two neighboring room templates are not compatible)
Usually, it is the second case. To help you fix the error, the generator dumps some diagnostic information above the error in the console. The type of information that you can find in the console is for example that the lengths of doors are suspicious or that there are maybe too many rooms in the level graph.
If you are not able to fix the problem yourself, come to our Discord and I will try to help. Also, you can read the Performance tips page.
How to deal with wider walls/doors?
Some tilesets have walls that are wider than a single tile. If you try to approach this scenario the same way as 1-wide walls, you will find out that the corridor will not go through the whole multi-tile-wide wall but only through the first tile. The solution for this problem is using the Outline Override feature to modify the outline of corridors. This setup is described in the Example 2 tutorial where there is a tileset with an additional layer of wall tiles on top of horizontal walls. (The most important part is the Vertical corridos section.)
Changes to a room template are lost after a level is generated
It often happens that you want to change the default structure of a room template. Maybe you want to add a collider, add another tilemap layer, or change the properties of the grid-like the cell size. But when you hit the Generate button, the changes are not there and the level looks exactly like before.
The reason is that after a level is generated, all the room templates are merged into a single set of shared tilemaps. So, if you want to change something, you also have to instruct the generator that the changes should also be applied to the shared tilemaps. You can find a dedicated guide here.
Rooms are generated too close to one another
The generator will often produce a level where the walls of one room are right next to the walls of another room. Usually, this is perfectly okay, but sometimes, it may cause problems. For example, if rule tiles are used for walls, a room that is too close may interfere with tiles in a different room.
To solve this problem, look for the Minimum Room Distance field in the dungeon generator inspector and increase the value to 2. You can increase the value even more for an even larger distance between rooms. Just keep in mind that every increase in this field makes it harder for the generator to produce a level (and can, therefore, lead to timeouts). Read more about the Minimum Room Distance config here.
Send the same level to multiple players (in a multiplayer game)
If you want to use the generator in a multiplayer scenario, you might wonder how to distribute the same level to all the players. The easiest solution is to send the seed of the generator to every player and then run the generator with the seed on all clients. You can read more about the seed here and how to see the seed programmatically here.
Keep prefab references when generating levels inside the editor
After a level is generated, each room template prefab that was used in the level goes through the Object.Instantiate() method. This method removes the connection to the original prefab, which basically means that the whole prefab is unpacked (described here in Unity docs.) However, it might be sometimes useful to keep the references to the prefabs. For example, if the level generator is used in the Editor and then manual changes are made to that level.
The solution is to use one of the options of Room Template Prefab Mode that can be configured in the generator config. You can use the InstantiatePrefab option to keep all the prefab references, or the InstantiatePrefabAndUnpackRoot option to keep the prefab references but unpack the root prefab object. See more in the Generator config section of the Dungeon Generator page.
Is it possible to track the progress of the generator?
Short answer: No.
Unfortunately, due to the non-linear and randomized nature of Edgar's procedural level generation algorithm, it's not possible to track the progress of the generator in a meaningful way.
The algorithm works by placing rooms one by one until all of them are correctly positioned. However, as the placement of each room is influenced by the position of previously placed rooms, the generator may have to backtrack and "un-place" some already placed rooms to achieve the desired layout. The backtracking behavior of the algorithm is unpredictable and depends on a range of factors, such as the specific seed used and the placement of the first few rooms.
As a result, trying to track the progress of the generator is not a viable option. We recommend using a simple loading indicator to indicate that the level is being generated. This will provide players with an idea of the current state of the game, without causing any confusion or frustration caused by inaccurate progress tracking.
Is Edgar suitable for an endless level generation?
Short answer: No.
One of the main ideas of Edgar is that you specify the structure of a level with a so-called level graph, and the generator tries to produce a level that conforms to that structure. If the level graph contains 15 rooms, all the generated levels will have exactly 15 rooms. Therefore, it is not possible to generate endless levels using this approach.
How to generate levels without corridors?
In the majority of example scenes that are included in Edgar, you can see corridors connecting individual rooms in the level. However, it is also possible to generate levels with no corridors between rooms.
Approach 1 (Not recommended)
In the "Input Config" section of the generator component, you can uncheck the "Use Corridors" field. However, this is not the recommended approach. In Edgar, corridors are very useful. After a level is generated, corridors are placed only after non-corridor rooms. As a result, corridors overwrite the walls of rooms, carving holes in them and making it possible to go from one room to another. If you uncheck the "Use Corridors" option, you will end up with a bunch of rooms but no way to traverse the level. This configuration is very niche as it requires you to write some post-processing logic to add doors/holes to the rooms.
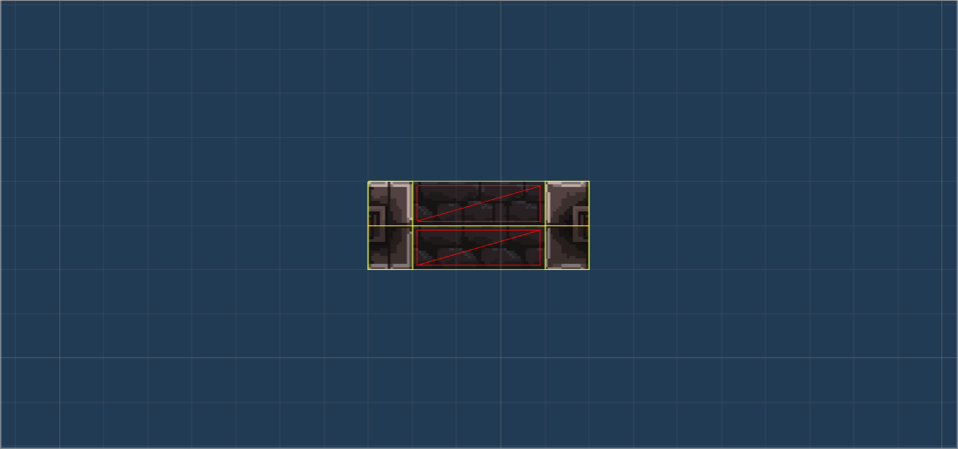
Approach 2 (Recommended)
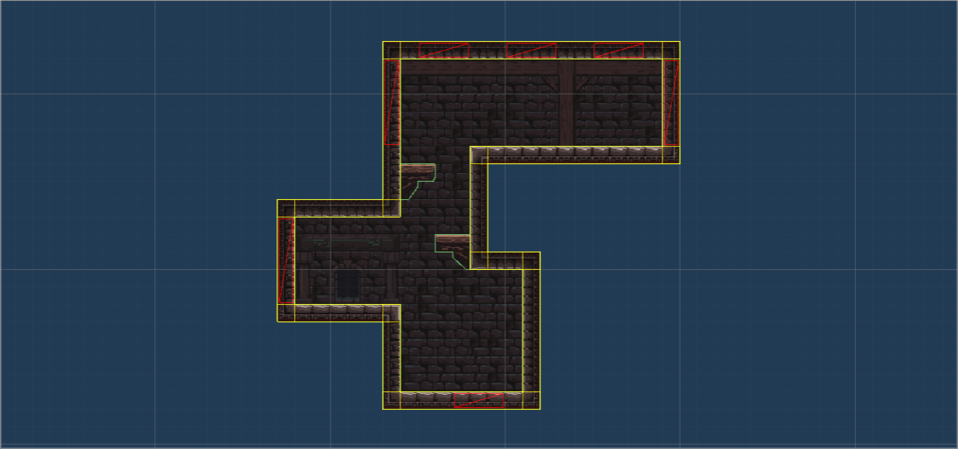
The recommended approach is to have a pair (or more) of specially designed corridor room templates. The trick is that these corridors are only 2 tiles wide so it looks like there are no corridors at all. However, these corridors allow you to control how exactly two neighboring rooms connect. Below is an example of corridor room templates used in the Dead Cells example scene.

Additional resources
- The special corridors are used in the Dead Cells example scene
- The special corridors are used in the Platformer 1 example scene
Is it possible to have non-rectangular rooms?
Short answer: Yet, it is.
You can have room templates of any shape as long as it conforms to the underlying grid. Throughout this documentation, you can find many non-rectangular rooms in various example scenes:
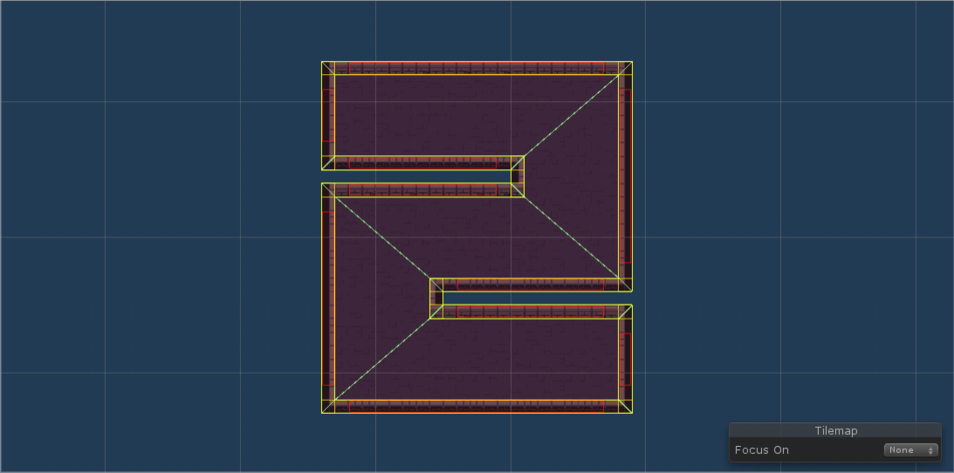
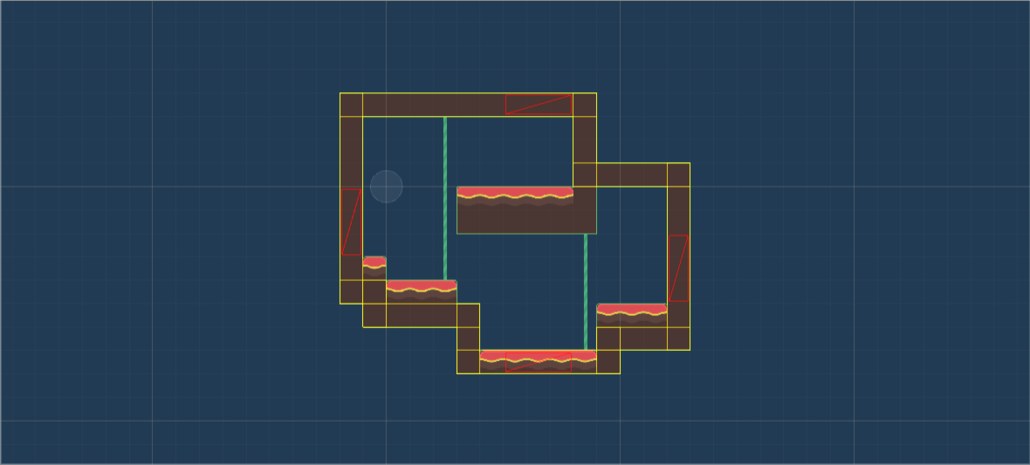
However, there are some benefits to having mostly box-shaped rooms:
- If a room template has many straight walls => that usually means there can be many available door positions on the outline of the room template => which in turn usually makes the performance of the generator better.
- The underlying algorithm works better with rectangular rooms than with other irregular shapes. For example, it is usually much easier to successfully lay out a square room rather than a big L-shaped room.
That being said, you should not have to worry too much if you use irregular room shapes in moderation. It is completely fine to have rounded corners or a few really irregular room shapes. You can always experiment and see for yourself whether it affects performance in your specific use case.
How to implement a save and load system?
There is no built-in feature for saving and loading generated levels because we feel like each game has very different requirements and it would be very hard to come up with a universal save system that would work for everyone. However, you should be able to implement your own save and load system.
Step 1 - Store the seed of the generator
In the majority of procedural level generators, there is something called the seed of the generator. It is (usually) a number that controls the randomness of the generator. If you use the same seed twice, the generator will produce the same level. You can learn more about seeds and how to use them on the Dungeon generator page.
Knowing how seeds work can help you implement the save and load system. When you save the game, you store the seed of the generator. That is a very simple task because the seed is just a number so it is very easy to save to a file. When you want to load the level, you will read the seed and configure Edgar to generate a level with that seed. Edgar will generate the same level and run all the post-processing steps.
Note: If you have some custom post-processing logic doing something random, you must make sure to use a seeded random generator. For example, if you want to spawn random enemies at random locations in a post-processing code, you should use the provided
Randomproperty available in all post-processing classes, or you need to handle the seeds yourself. If you do not do that, the load system might not be fully deterministic.
Step 2 - Save the dynamic parts of the level
Most levels are not static - they change in some way after they are generated. For example, enemies are defeated or damaged, chests are looted, and doors are opened. All these changes you have to track yourself. You must be able to save these changes when the game gets saved and apply these changes to the level after it is generated with the original seed. There are no shortcuts built-in for this in Edgar as each game has different needs and different entities to track.
Additional resources
- What is the seed of the generator and how to use it - (Controlling the seed of the generator in the Dungeon generator guide)
The generator works in the editor but not in the build
Sometimes the generator may work perfectly fine in the editor but fails to produce a level if you build and run the game. This usually indicates there is a problem with some code that runs immediately before or after Edgar generates a level. Check the logs to see where is the problem. You might be using some APIs that are not available in the build, or maybe you forgot to configure an asset to be included in the build. You can also try disabling all the post-processing scripts to check if the problem is somewhere in there.
How to handle pathfinding?
It is common to have enemies that can pathfind towards the player. There are many ways to achieve that such as using the built-in Unity navmesh, using 2D navmesh from NavMeshPlus or using the A* Pathfinding Project asset. If you have a static level, you can usually just press a button to initialize the pathfinding solution and that is all. In Edgar, it is almost as easy as that. The only difference is that you have to call the pathfinding script after the level is generated. The simplest way to achieve that is to write a simple [custom post-processing script that runs after the generator produces a level. Each pathfinding asset usually provides an API that can be called from a script, which is exactly what you need to call from the post-processing logic.
Additional resources
- How does post-processing work in Edgar - Post-processing
- How to write custom post-processing logic - Custom post-processing
How to spawn enemies?
There are multiple approaches to spawning enemies in Edgar. Let's go through them to see what are their strengths and weaknesses.
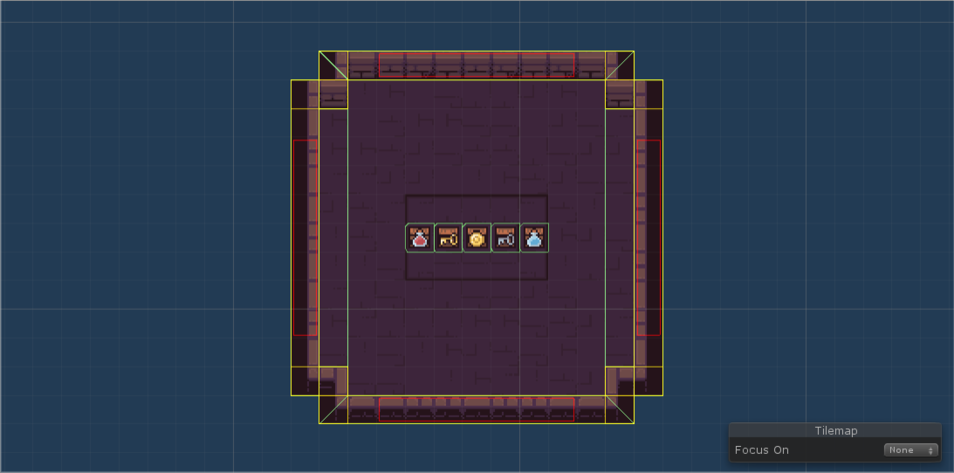
Approach 1: Put enemies inside room templates
The simplest solution is to put your enemy prefabs directly inside room templates. Everything that is inside a room template gets instantiated together with that room template. This might be a good solution if you want to just quickly test some enemies without any complex setup.
Pros of this solution:
- Simple setup
- Place the enemies exactly where you want them
Cons of this solution:
- Always the same enemies in each room template (although each room template can have different enemies)
- Unable to scale the number/type of enemies based on the game difficulty
If you want to make this approach a bit better, you can always place more enemies than you want and then write a piece of post-processing logic that randomly hides some of the enemies, making the whole setup a bit less static.
Approach 2: Put spawn point markers inside room templates
The main idea of this approach is that instead of placing enemy prefabs inside room templates, you use empty game objects as markers for places where enemies can be spawned. After a level is generated, you use a post-processing script to get all these marker objects and you choose which enemies to spawn. This approach is used in the Dead Cells example in the Enemies section and it also includes a code snippet.
This approach has many advantages:
- You can place the markers only in places where it is suitable to spawn enemies
- You can place many markers but spawn only a few enemies, resulting in randomized enemy positions
- You can dynamically choose which enemies to spawn based on the biome, difficulty, current room, etc.
- You can choose the number of enemies to spawn (as long as it is not more than the total number of markers)
Approach 3: Use colliders to find suitable spawning places
The third approach is completely procedural. After a level is generated, you can go through each room and generate random points inside the collider of the floor tilemap layer. For each such point, you can check if there is already an enemy/another object and if not, spawn an enemy there. This approach is used in the Enter the Gungeon example in the Enemies section.
The main disadvantage of this approach is that it can be very slow. Depending on the number of enemies and the size of the room, the algorithm can have problems generating enemies in a reasonable time.
Recommended approach
I usually recommend Approach 2 because it is very robust. It needs a bit of work to set up all the spawn point markers but otherwise it is a very good approach.