(PRO) Enter the Gungeon
In this tutorial, we will look into how to generate levels similar to what we can see in Enter the Gungeon. We will use this tileset by @pixel_poem - be sure to check out their work if you like the tileset.
Disclaimer: We are in no way affiliated with the authors of the Enter the Gungeon game and this plugin is not used in the game. This is only a case study about how to use this plugin to create something similar to what is done in that game.
Note: All files from this example can be found at Examples/Grid2D/Gungeon.
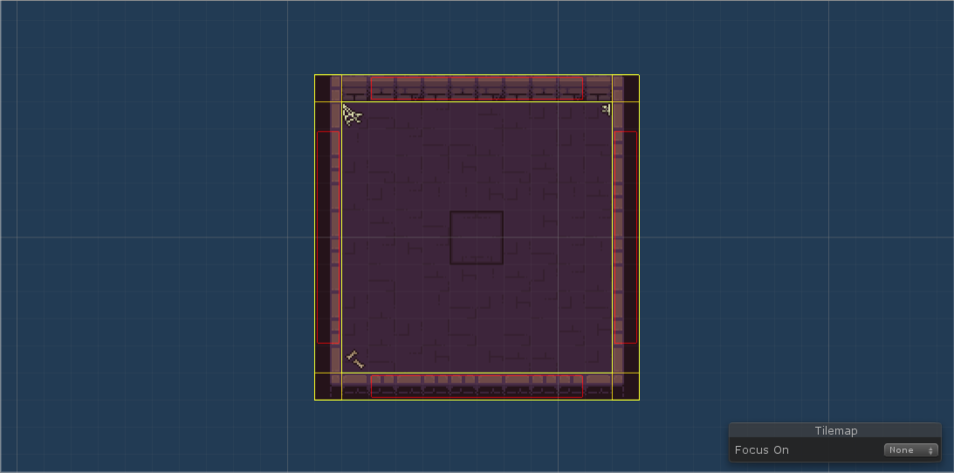
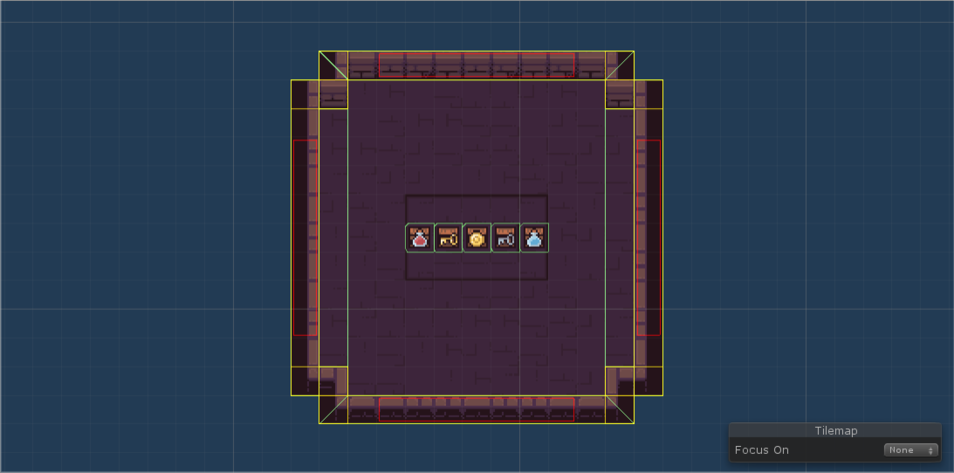
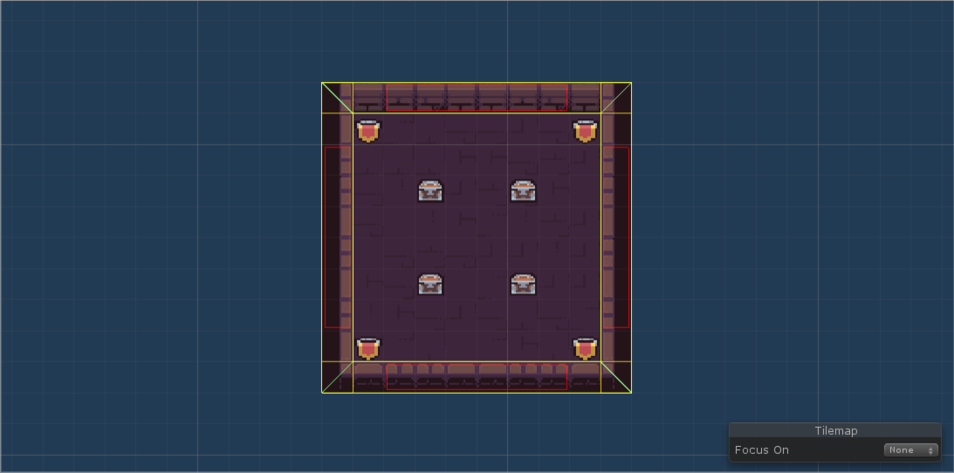
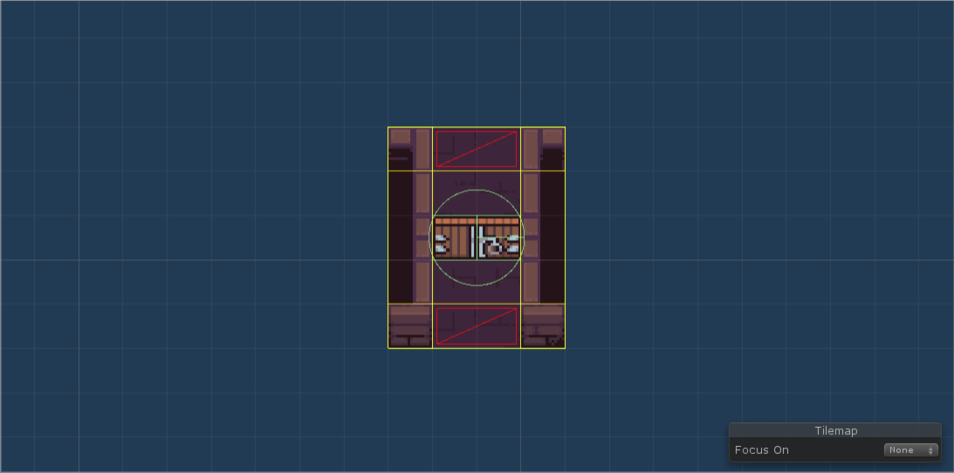
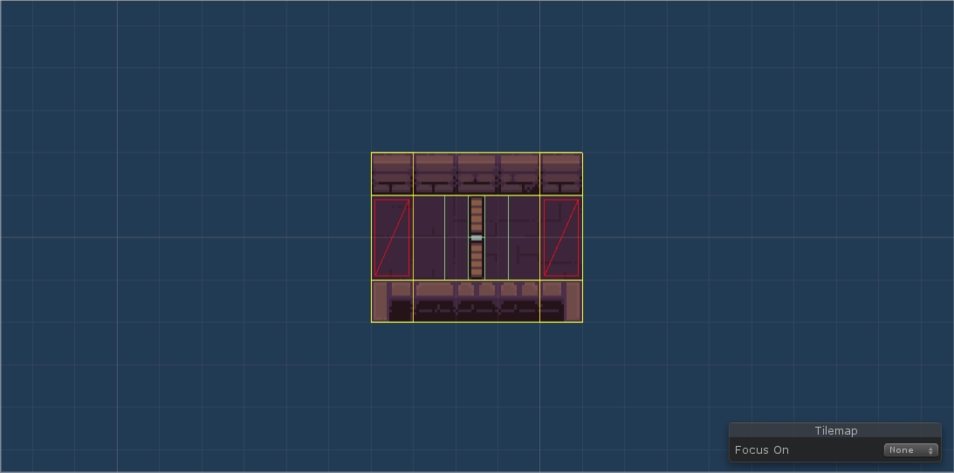
Room templates
Note: If you want to add some more room templates, be sure to use the Create menu (Examples/Gungeon/Room template) or duplicate one of the existing room templates.
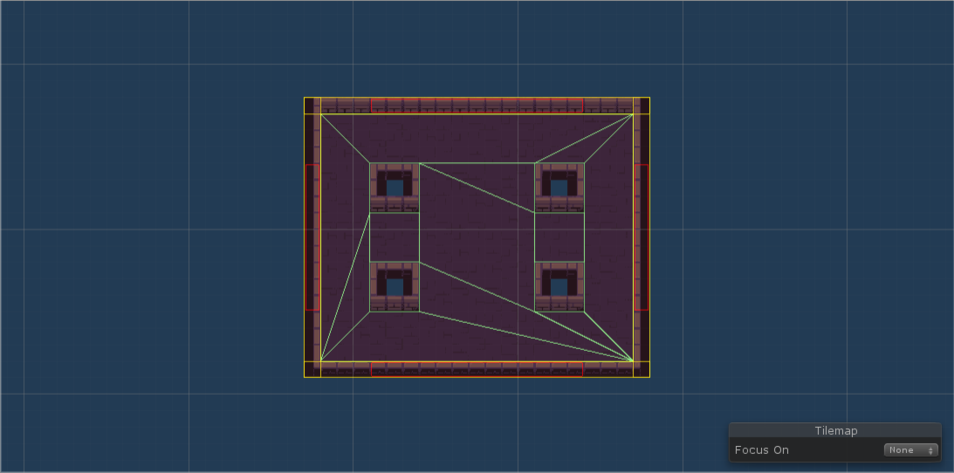
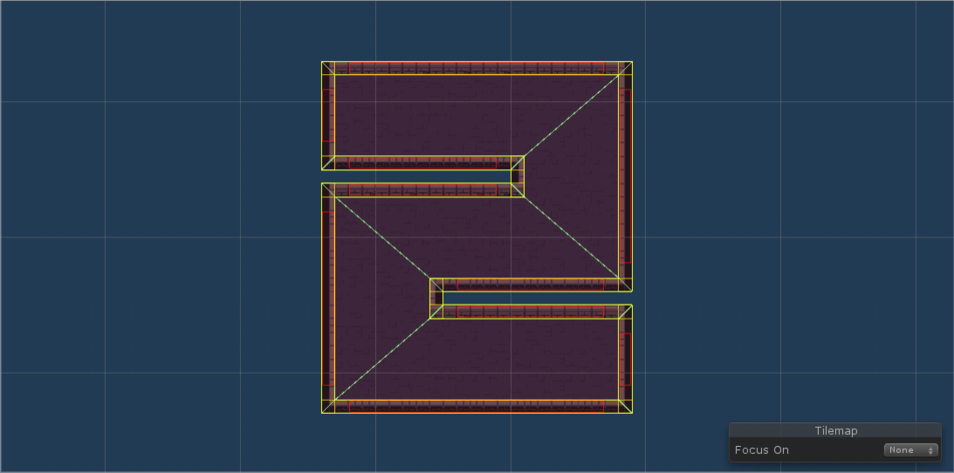
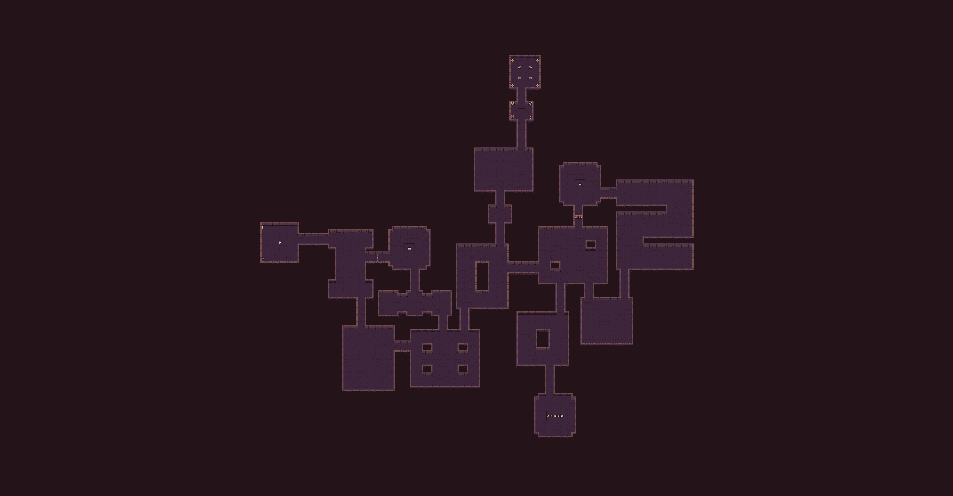
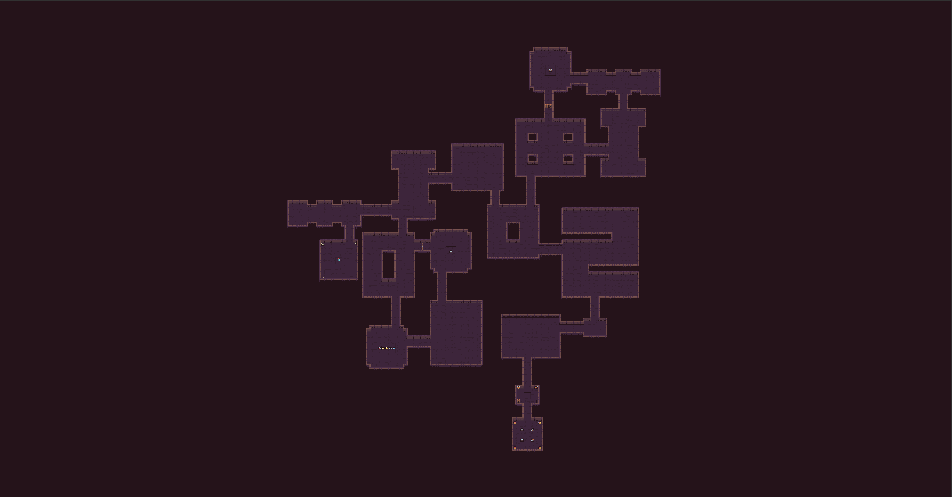
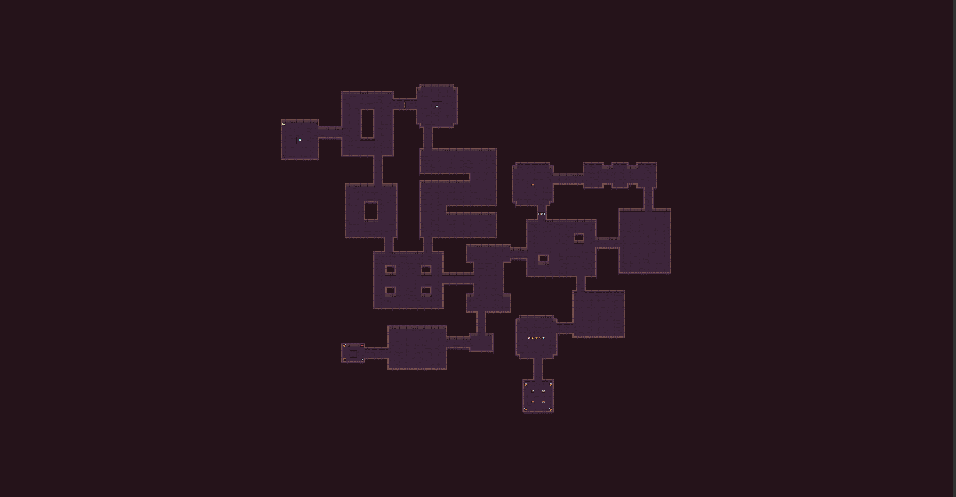
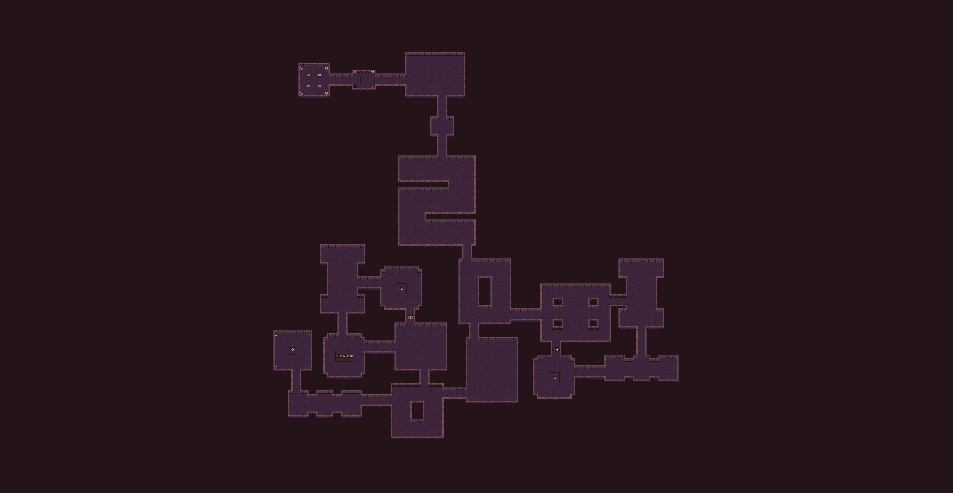
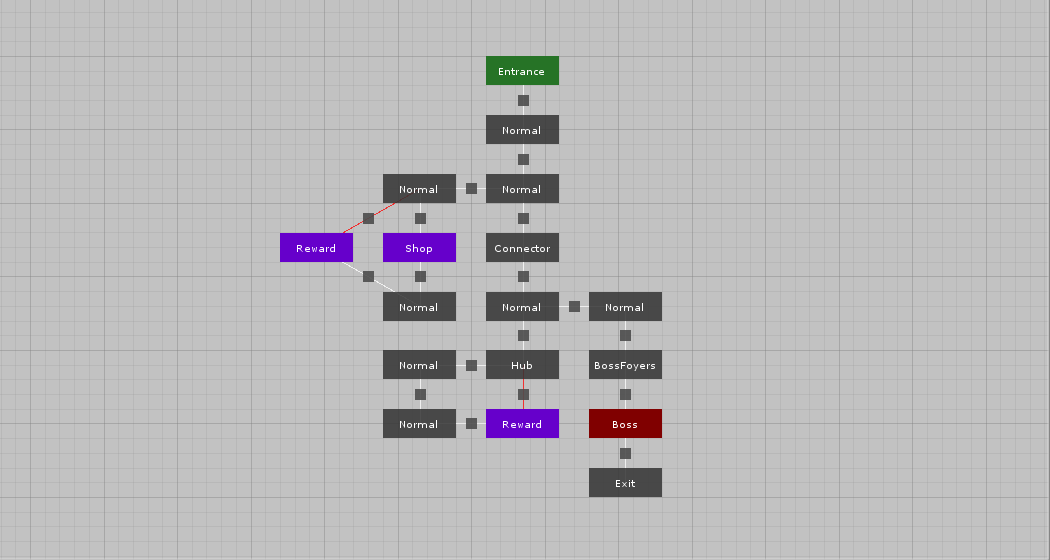
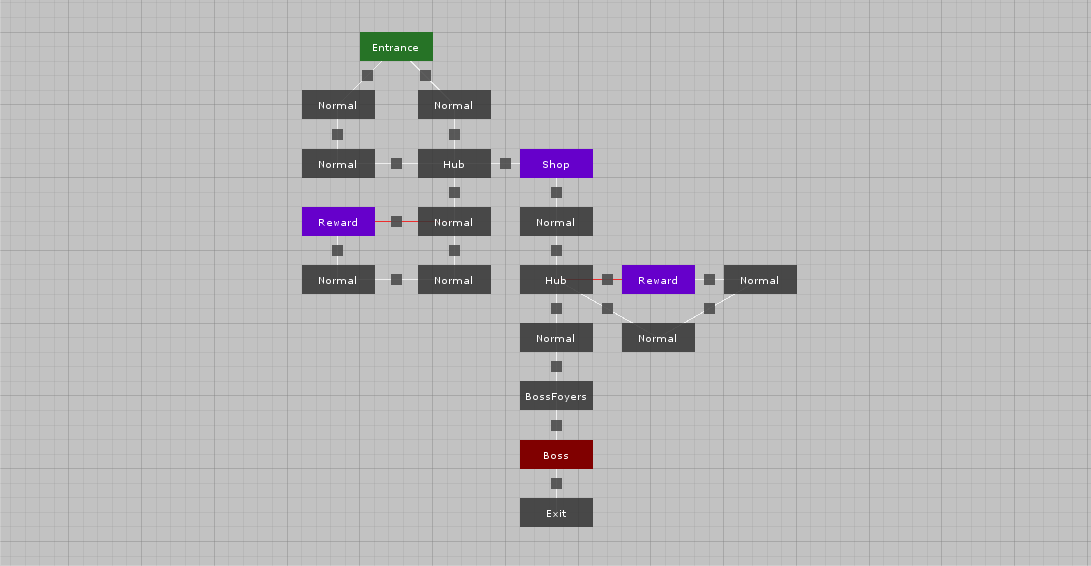
Level graphs
In Enter the Gungeon, they use multiple level graphs for each stage of the game.
Custom rooms and connections
In the level graph above, we used custom room and connection types. We use this feature to add additional data to rooms and connections and also to change how they are displayed in the editor.
Rooms
Each room in Enter the Gungeon has its type - there are rooms with enemies, treasure rooms, shops, etc. We use a custom room implementation to add the GungGungeonRoomType Type field to each room. Moreover, we use different colors to distinguish different types of rooms in the level graph editor.
Connections
Some corridors in Enter the Gungeon are locked and can be unlocked only from the other side of the door. This is usually used to force the player to go through a loop that ends with a treasure or shop room and the door then serves as a shortcut to get back to the main path. We use a custom connection implementation to add the bool IsLocked field. If the door is locked, we use red color to draw the line between the two rooms.
- GungeonRoom.cs
- GungeonConnection.cs
public class GungeonRoom : RoomBase
{
    public GungeonRoomType Type;

    public override List<GameObject> GetRoomTemplates()
    {
        // We do not need any room templates here because they are resolved based on the type of the room.
        return null;
    }

    public override string GetDisplayName()
    {
        // Use the type of the room as its display name.
        return Type.ToString();
    }

    public override RoomEditorStyle GetEditorStyle(bool isFocused)
    {
        var style = base.GetEditorStyle(isFocused);

        var backgroundColor = style.BackgroundColor;

        // Use different colors for different types of rooms
        switch (Type)
        {
            case GungeonRoomType.Entrance:
                backgroundColor = new Color(38 / 256f, 115 / 256f, 38 / 256f);
                break;

            case GungeonRoomType.Boss:
                backgroundColor = new Color(128 / 256f, 0 / 256f, 0 / 256f);
                break;

            case GungeonRoomType.Shop:
                backgroundColor = new Color(102 / 256f, 0 / 256f, 204 / 256f);
                break;

            case GungeonRoomType.Reward:
                backgroundColor = new Color(102 / 256f, 0 / 256f, 204 / 256f);
                break;
        }

        style.BackgroundColor = backgroundColor;

        // Darken the color when focused
        if (isFocused)
        {
            style.BackgroundColor = Color.Lerp(style.BackgroundColor, Color.black, 0.7f);
        }

        return style;
    }
}
public class GungeonConnection : Connection
{
    // Whether the corresponding corridor should be locked
    public bool IsLocked;

    public override ConnectionEditorStyle GetEditorStyle(bool isFocused)
    {
        var style = base.GetEditorStyle(isFocused);

        // Use red color when locked
        if (IsLocked)
        {
            style.LineColor = Color.red;
        }

        return style;
    }
}
Input setup task
We will use a custom input setup task because it gives us more control when working with the input. We will use it to choose a random level graph and add a random secret room. The base of the task is the same as in the Dead Cells example.
Pick random level graph
Because we have multiple level graphs for each stage of the game, we want to choose the level graph randomly from the available options. The implementation is straightforward:
[CreateAssetMenu(menuName = "Edgar/Examples/Gungeon/Input setup", fileName = "Gungeon Input Setup")]
public class GungeonInputSetupTask : DungeonGeneratorInputBaseGrid2D
{
    [Range(1, 2)]
    public int Stage = 1;

    public LevelGraph[] Stage1LevelGraphs;

    public LevelGraph[] Stage2LevelGraphs;

    protected override LevelDescriptionGrid2D GetLevelDescription()
    {
        // Pick random level graph
        var levelGraphs = Stage == 1 ? Stage1LevelGraphs : Stage2LevelGraphs;
        var levelGraph = levelGraphs.GetRandom(Random);

        // The instance of the game manager will not exist in Editor
        if (GungeonGameManager.Instance != null)
        {
            GungeonGameManager.Instance.CurrentLevelGraph = levelGraph;
        }

        /* ... */
    }
}
Then we just assign level graphs to the two arrays. The last step is to control the current stage of the game. We can do that in the game manager before we generate a level:
private IEnumerator GeneratorCoroutine(DungeonGeneratorGrid2D generator)
{
    /* ... */

    // Configure the generator with the current stage number
    var inputTask = (GungeonInputSetupTask) generator.CustomInputTask;
    inputTask.Stage = Stage;

    /* ... */
}
Random secret rooms
Even though all the levels are primarily guided by hand-made level graphs, there is a bit of randomness included. When we set up the input for the algorithm, we roll a die to determine if we want to add a secret room to the level. We can add a float SecretRoomChance field to the input setup and configure this value directly in the generator inspector. In Enter the Gungeon, they also choose whether to connect the room to a dead-end room or to any rooms - this is controlled with SecretRoomDeadEndChance.
To add the secret room to the level, we first get all the rooms from the level description and randomly choose one of them to attach the secret room to. Then we have to do 3 things. First, we create an instance of the secret room - this corresponds to a room node in the level graph. Second, we create an instance of the connection between the two rooms - this corresponds to an edge in the level graph. And third, because we use corridors, we also need to create an instance of the corridor room that is between the two rooms.
Note: Our secret rooms are not really secret as we do not hide them in any way. I may revisit this in the future to make them really secret.
Show code block
[CreateAssetMenu(menuName = "Edgar/Examples/Gungeon/Input setup", fileName = "Gungeon Input Setup")]
public class GungeonInputSetupTask : DungeonGeneratorInputBaseGrid2D
{
    public LevelGraph LevelGraph;

    /* ... */

    public GungeonRoomTemplatesConfig RoomTemplates;

    // The probability that a secret room is added to the level
    [Range(0f, 1f)]
    public float SecretRoomChance = 0.9f;

    // The probability that a secret room is attached to a dead-end room
    [Range(0f, 1f)]
    public float SecretRoomDeadEndChance = 0.5f;

    protected override LevelDescriptionGrid2D GetLevelDescription()
    {
        /* ... */

        // Add secret rooms
        AddSecretRoom(levelDescription);

        /* ... */
    }

    private void AddSecretRoom(LevelDescriptionGrid2D levelDescription)
    {
        // Return early if no secret room should be added to the level
        if (Random.NextDouble() > SecretRoomChance) return;

        // Get the graphs of rooms
        var graph = levelDescription.GetGraph();

        // Decide whether to attach the secret room to a dead end room or not
        var attachToDeadEnd = Random.NextDouble() < SecretRoomDeadEndChance;

        // Find all the possible rooms to attach to and choose a random one
        var possibleRoomsToAttachTo = graph.Vertices.Cast<GungeonRoom>().Where(x =>
            (!attachToDeadEnd || graph.GetNeighbors(x).Count() == 1) && x.Type != GungeonRoomType.Entrance
        ).ToList();
        var roomToAttachTo = possibleRoomsToAttachTo[Random.Next(possibleRoomsToAttachTo.Count)];

        // Create secret room
        var secretRoom = ScriptableObject.CreateInstance<GungeonRoom>();
        secretRoom.Type = GungeonRoomType.Secret;
        levelDescription.AddRoom(secretRoom, RoomTemplates.GetRoomTemplates(secretRoom).ToList());

        // Prepare the connection between secretRoom and roomToAttachTo
        var connection = ScriptableObject.CreateInstance<GungeonConnection>();
        connection.From = roomToAttachTo;
        connection.To = secretRoom;

        // Connect the two rooms with a corridor
        var corridorRoom = ScriptableObject.CreateInstance<GungeonRoom>();
        corridorRoom.Type = GungeonRoomType.Corridor;
        levelDescription.AddCorridorConnection(connection, corridorRoom, RoomTemplates.CorridorRoomTemplates.ToList());
    }
}
Room manager
In Enter the Gungeon, when a player visits a (combat-oriented) room for the first time, two things happen. First, all the doors to neighboring rooms get closed and locked. And second, enemies are spawned. Only after all the enemies are defeated, the doors unlock.
Note: The enemies in this example are very dumb - they just stand there and can be killed if the player collides with them. The game manager keeps track of how many enemies are left in the room and if there are non, it opens the doors.
Current room detection
The base of this setup is detecting when a player enters a room. We will use the same setup as we described in the Current room detection tutorial. That means that we have a floor collider that is set to trigger, and it informs RoomManager when the player enters a room.
Enemies
We will use a very simple approach to a randomized spawn of enemies. We will use the floor collider that we set up in the previous step to get a random position inside the room.
The algorithm works as follows:
- Get a random position inside floor collider bounds
- Check if the position is actually inside the collider (there may be holes)
- Check that there are no other colliders near the position
- Pick a random enemy and instantiate it at the position
Show code block
public class GungeonRoomManager : MonoBehaviour
{
    /* ... */

    /// <summary>
    /// Enemies that can spawn inside the room.
    /// </summary>
    [FormerlySerializedAs("Enemies")]
    public GameObject[] EnemyPrefabs;

    /// <summary>
    /// Enemies that are still alive in the room. (Do not change manually)
    /// </summary>
    public List<GungeonEnemy> RemainingEnemies;

    /// <summary>
    /// Whether enemies were spawned.
    /// </summary>
    public bool EnemiesSpawned;

    /// <summary>
    /// Collider of the floor tilemap layer.
    /// </summary>
    public Collider2D FloorCollider;

    /// <summary>
    /// Use the shared Random instance so that the results are properly seeded.
    /// </summary>
    private static System.Random Random => GungeonGameManager.Instance.Random;

    /* ... */

    private void SpawnEnemies()
    {
        EnemiesSpawned = true;

        var enemies = new List<GungeonEnemy>();
        var totalEnemiesCount = Random.Next(4, 8);

        while (enemies.Count < totalEnemiesCount)
        {
            // Find random position inside floor collider bounds
            var position = RandomPointInBounds(FloorCollider.bounds, 1f);

            // Check if the point is actually inside the collider as there may be holes in the floor, etc.
            if (!IsPointWithinCollider(FloorCollider, position))
            {
                continue;
            }

            // We want to make sure that there is no other collider in the radius of 1
            if (Physics2D.OverlapCircleAll(position, 0.5f).Any(x => !x.isTrigger))
            {
                continue;
            }

            // Pick random enemy prefab
            var enemyPrefab = EnemyPrefabs[Random.Next(0, EnemyPrefabs.Length)];

            // Create an instance of the enemy and set position and parent
            var enemy = Instantiate(enemyPrefab, roomInstance.RoomTemplateInstance.transform, true);
            enemy.transform.position = position;

            // Add the GungeonEnemy component to know when the enemy is killed
            var gungeonEnemy = enemy.AddComponent<GungeonEnemy>();
            gungeonEnemy.RoomManager = this;

            enemies.Add(gungeonEnemy);
        }

        // Store the list of all spawned enemies for tracking purposes
        RemainingEnemies = enemies;
    }

    private static bool IsPointWithinCollider(Collider2D collider, Vector2 point)
    {
        return collider.OverlapPoint(point);
    }

    private static Vector3 RandomPointInBounds(Bounds bounds, float margin = 0)
    {
        return new Vector3(
            RandomRange(bounds.min.x + margin, bounds.max.x - margin),
            RandomRange(bounds.min.y + margin, bounds.max.y - margin),
            RandomRange(bounds.min.z + margin, bounds.max.z - margin)
        );
    }

    private static float RandomRange(float min, float max)
    {
        return (float)(Random.NextDouble() * (max - min) + min);
    }

    /* ... */
}
Note: As the process of choosing enemy spawn points is random, we hope that the success rate is quite high, and we do not have to spend too much time on it. However, if we wanted to spawn too many enemies or there were too many holes in the collider, we could have problems with performance. In that case, it would be better to use a different approach.
Doors
Our goal is to close neighbouring corridors with doors when the player enters the room and then open the doors when all the enemies are dead. The only slightly complex part is how to obtain the game objects that represent the doors. To make our lives easier, we added the doors directly to each corridor room template. That means that after the level is generated we just have to retrieve the doors from corridor room templates.
We can do it like this:
- Prepare a custom post-processing task
- Go through all non-corridor rooms
- Find all the corridors that are connected to the room
- Get the door game object from each neighbouring corridor
- Store all the doors in the room manager
When we have the game objects, we can simply activate them when the player enters the room and then deactivate them when enemies are dead.
Note: Check the game manager implementation if you want to see how and when are the doors opened.
Show code block
[CreateAssetMenu(menuName = "Edgar/Examples/Gungeon/Post-processing", fileName = "GungeonPostProcessing")]
public class GungeonPostProcessingTask : DungeonGeneratorPostProcessingGrid2D
{
    public GameObject[] Enemies;

    public override void Run(DungeonGeneratorLevelGrid2D level)
    {
        /* ... */

        foreach (var roomInstance in level.RoomInstances)
        {
            var room = (GungeonRoom) roomInstance.Room;
            var roomTemplateInstance = roomInstance.RoomTemplateInstance;

            // Find floor tilemap layer
            var tilemaps = RoomTemplateUtilsGrid2D.GetTilemaps(roomTemplateInstance);
            var floor = tilemaps.Single(x => x.name == "Floor").gameObject;

            // Add current room detection handler
            floor.AddComponent<GungeonCurrentRoomHandler>();

            // Add or get room manager
            var roomManager = roomTemplateInstance.GetComponent<GungeonRoomManager>();
            if (roomManager == null)
            {
                roomManager = roomTemplateInstance.AddComponent<GungeonRoomManager>();
            }

            if (room.Type != GungeonRoomType.Corridor)
            {
                // Set enemies and floor collider to the room manager
                roomManager.EnemyPrefabs = Enemies;
                roomManager.FloorCollider = floor.GetComponent<CompositeCollider2D>();

                // Find all the doors of neighboring corridors and save them in the room manager
                // The term "door" has two different meanings here:
                //   1. it represents the connection point between two rooms in the level
                //   2. it represents the door game object that we have inside each corridor
                foreach (var door in roomInstance.Doors)
                {
                    // Get the room instance of the room that is connected via this door
                    var corridorRoom = door.ConnectedRoomInstance;

                    // Get the room template instance of the corridor room
                    var corridorGameObject = corridorRoom.RoomTemplateInstance;

                    // Find the door game object by its name
                    var doorsGameObject = corridorGameObject.transform.Find("Door")?.gameObject;

                    // Each corridor room instance has a connection that represents the edge in the level graph
                    // We use the connection object to check if the corridor should be locked or not
                    var connection = (GungeonConnection) corridorRoom.Connection;

                    if (doorsGameObject != null)
                    {
                        // If the connection is locked, we set the Locked state and keep the game object active
                        // Otherwise we set the EnemyLocked state and deactivate the door. That means that the door is active and locked
                        // only when there are enemies in the room.
                        if (connection.IsLocked)
                        {
                            doorsGameObject.GetComponent<GungeonDoor>().State = GungeonDoor.DoorState.Locked;
                        }
                        else
                        {
                            doorsGameObject.GetComponent<GungeonDoor>().State = GungeonDoor.DoorState.EnemyLocked;
                            doorsGameObject.SetActive(false);
                        }

                        roomManager.Doors.Add(doorsGameObject);
                    }
                }
            }
        }

        /* ... */
    }

    /* ... */
}
Locked doors
The last thing that we have to handle are doors that should be locked even if there are no enemies. These doors are used to separate reward/shop rooms from other rooms and force the player to find a different path to the reward room. When the player discovers the reward room, all the neighbouring locked doors are unlocked.
Fog of War
In this example, the Fog of War feature is enabled. For more information on how to set up the feature, please see the documentation. In order to integrate the Fog of War into this example scene, I modified the current room detection script (GungeonCurrentRoomHandler class) to trigger the fog when a player enters a corridor room, and I also modified the GungeonPostProcessTask class to set up the fog after a level is generated.
Note: The integration of the Fog of War effect into this example could be improved. I think that it looks better when the next room is revealed only after the player walks through the middle of a corridor and not right when he enters the corridor. Also, the integration with doors is not ideal - you can reveal rooms behind locked rooms if you go close to the door. I want to improve this in the future.
Note: To disable the Fog of War effect, go to the main camera and disable the Fog of War component.