(PRO) Minimap
In this guide, we will learn how to implement a simple minimap functionality.
Example scene
An example scene can be found at Examples/Grid2D/MinimapExample and Examples/Grid2D/MinimapExample2.
Setup
Create a Minimap camera
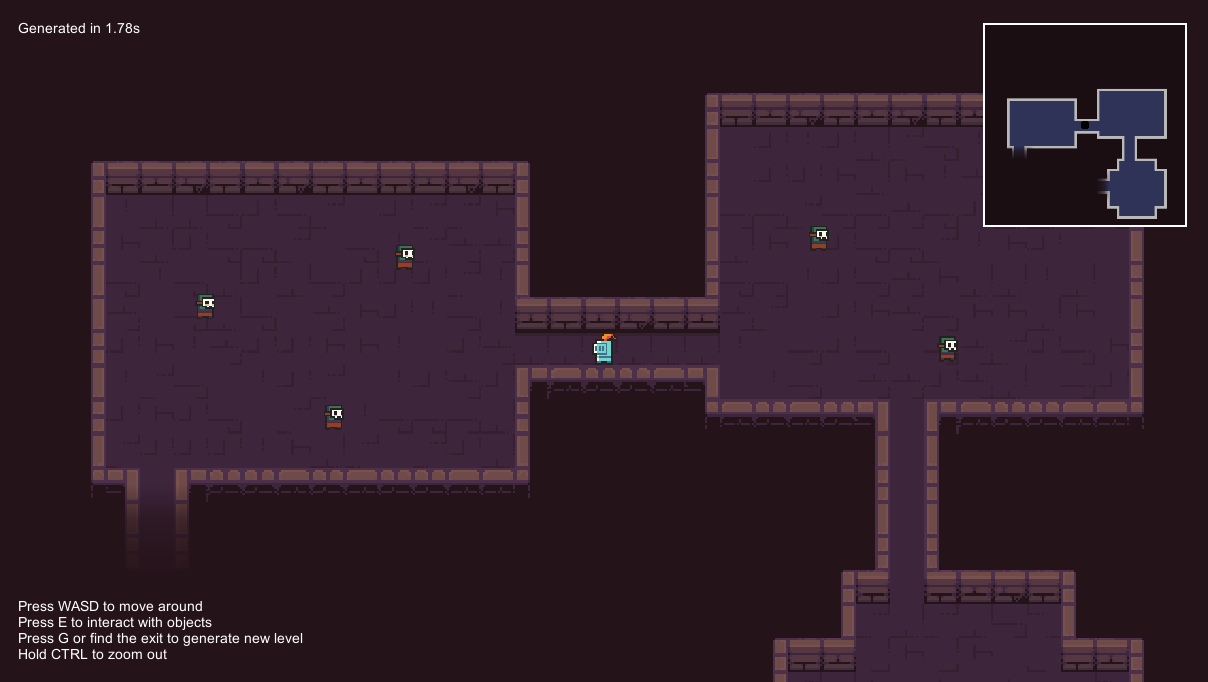
The first step is to create an additional camera that will render the minimap view. For starters, configure the camera so that it renders the same things as the main camera. Later, you will be able to change the background colour or zoom it out. Do not forget to make the camera follow your player so that it is always centred on the player.
Create Render Texture
The next step is to create a Render Texture that we will use to show the minimap inside the UI. Go to Create → Render Texture to create the render texture and set its size to e.g. 512x512.
Assign render texture to the camera
The next step is to assign the render texture to the Target Texture field of our minimap camera. By doing so, the camera will now render its view to the render texture instead of on the screen. If you run the game now, you should see that the render texture changes as you move in the level.
Prepare UI elements
The next step is to show the render texture in our UI. To make this tutorial simple, we will create a simple square minimap with a solid white border. However, it should be very easy to customize the look of the minimap - make it circular or add a custom border.
First, create a canvas if you do not have one already. Next, add an Image (UI → Image) element inside the canvas. Set its colour to white and the size to e.g. 204x204. Move the image to the top-right corner so that it looks like the left image below. Next, add a Raw Image (UI → Raw Image) element inside the white image. Set its size to 200x200 and move it to the centre of the white background. And finally, assign our render texture to the Texture field of the raw image. The screen should now look like the right image below.

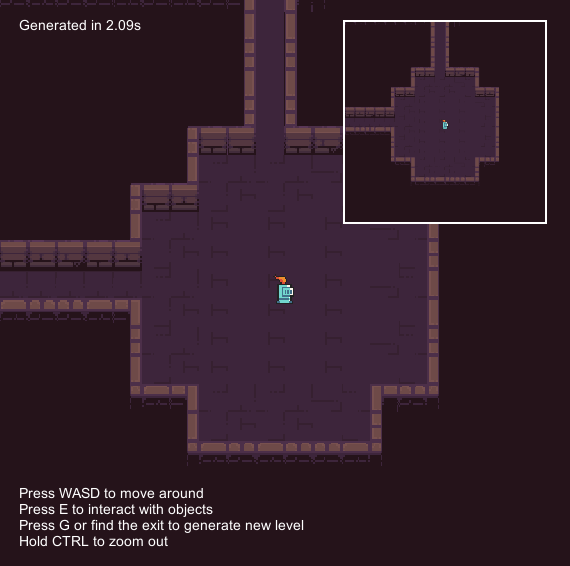
The minimap is now fully functional. The following steps are optional, but I recommend checking them out.
(Optional) Post-processing
Usually, a minimap is not just a zoomed-out view of the game. We often want to show a simplified view of the game. The goal is the following: we will create an additional tilemap layer in which we will create a simplified version of the level with single-coloured tiles. We will also create a special Unity layer, assign this layer to the new tilemap layer and then set up cameras in a way that only the minimap camera displays the new layer.
The first step is to create a new Unity Layer, called, for example, "Minimap".
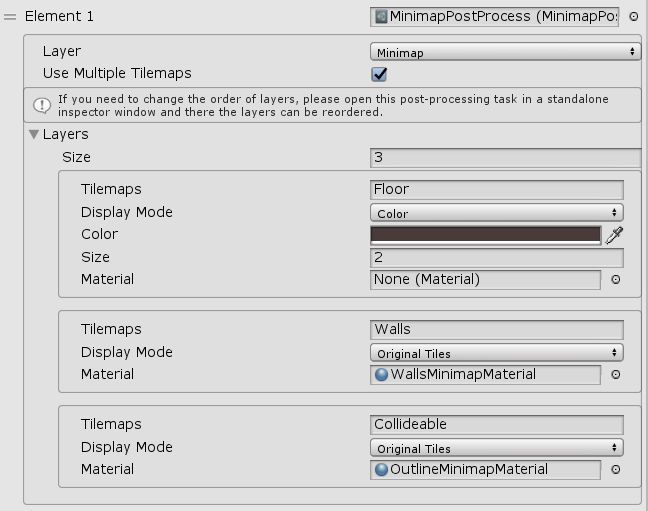
Next, we have to create an instance of the MinimapPostProcess scriptable object. In order to do that, head to Create → Edgar → Features → Minimap post-process, which should create a new file for you. Now drag and drop this file to the Custom post-process tasks section of the dungeon generator in order to enable it. After you do that, you should see several editor fields in the post-processing task:
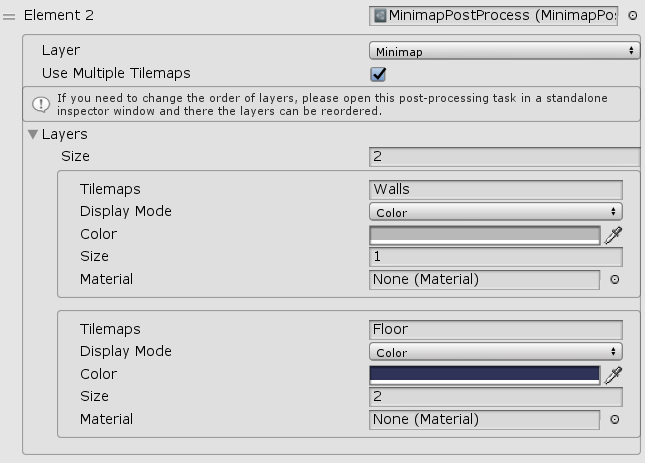
First, change the Layer field to match the layer that you created for the minimap.
Next, take a look at the Layers array. Here you can configure which tilemap layers should be displayed in the minimap. By default, the minimap comes with two layers - the first layer is for the Walls tilemap layer and the second one is for the Floor tilemap layer.
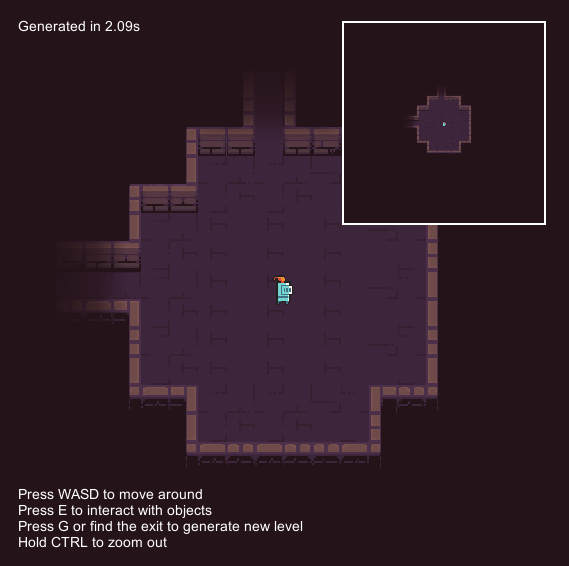
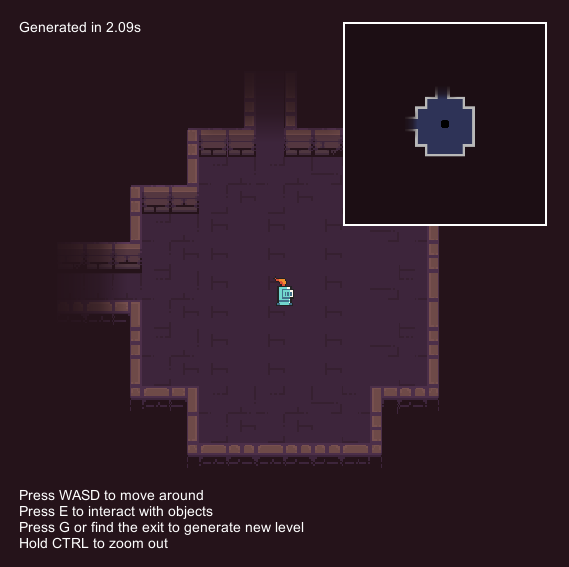
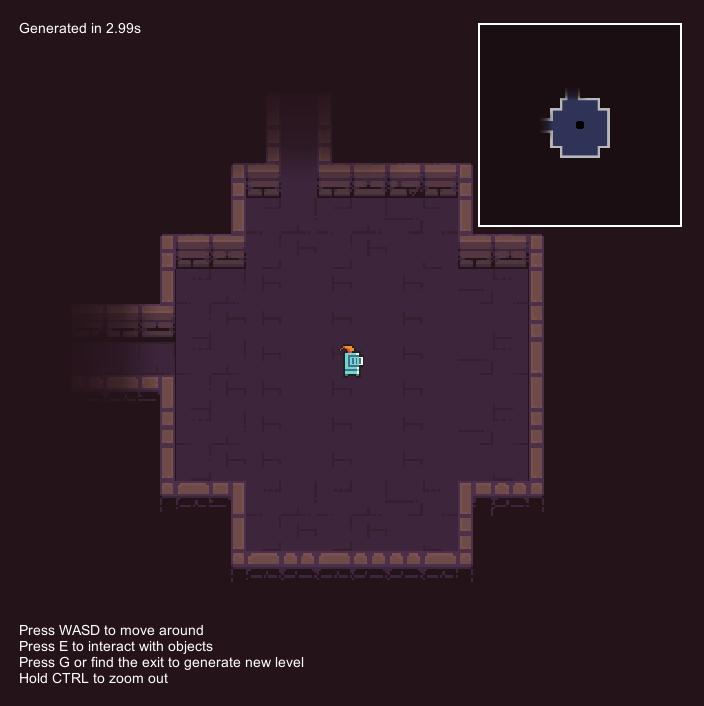
Next, check that the Walls Tilemaps and Floor Tilemaps match the names of your wall tilemap layer and floor tilemap layer. After you generate a level, you should see something similar to the image below. You can see that there is an additional tilemap layer on top of the level, and it contains a simplified view of the level.
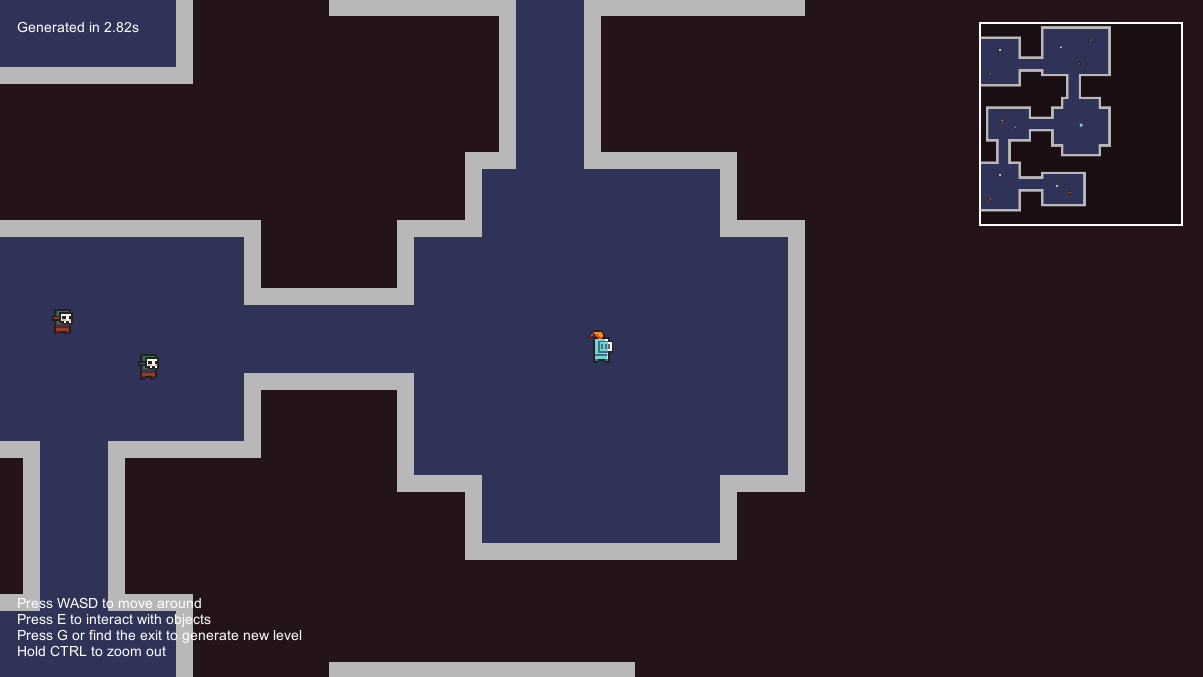
The last step is to change which camera renders which layers. In your main camera, exclude the minimap layer from the Culling Mask field. In your minimap camera, render only the minimap layer. After doing that, you should see something similar to the image below.
(Optional) Fog of War
The minimap works really well with the Fog of War feature. If you have the Fog of War already working, it is very easy to use it together with the minimap. Because the Fog Of War component is a singleton, we cannot directly add it to the minimap camera. However, there is the Fog Of War Additional Camera components that was created for this exact purpose. If you add this component to the minimap camera, the fog effect will be applied to both cameras.
Post-processing
Usually, a minimap is not just a zoomed-out view of the game. We often want to show a simplified view of the game with simple graphics or remove some tilemap layers from the minimap. For this purpose, there is the MinimapPostProcessing task that should help you customize the look of the minimap.
Note: It is expected that you know how to add the MinimapPostProcessing task. (See the Setup section)
Note: If you change something in the task settings, you have to generate the level again to see the changes applied.
Layer
This field controls on which layer should the minimap be rendered. This was already described in the Setup section.
Use Mutliple Tilemaps
This field controls if each minimap layer should get its own tilemap layer of if they should all share a single layer. It is usually recommended keeping this checkbox enabled.
Layers
The Layers field is the main configuration section of the minimap post-processing task. The core idea is that the minimap consists of multiple layers of tiles, and each such layer corresponds to one or more tilemap layers that are present in the level. For example, if we wanted to display all wall tiles using the colour white and all floor tiles using the colour blue, we would add two minimap layers and configure them accordingly. Below are described all the fields of minimap layers.
Tilemaps
This field controls which tilemap layers are displayed in the minimap layer. Usually, it will be a single tilemap layer (for example "Walls"). As a result, the post-processing task will copy all the wall tiles from the level to the minimap layer. If there are multiple tilemap layers with the same configuration, we can concatenate their names with a comma (for example "Walls,Collideable").
Display Mode
There are current 3 ways of displaying minimap layers:
Color- tiles are rendered as a single colourCustom Tile- a given custom tile is used instead of the original tilesOriginal Tiles- original tiles are used
Below are properties that change the behaviour of individual modes.
Color (Color mode only)
This field controls the colour of tiles in the layer.
Size (Color mode only)
This field controls the size of tiles and is used to correct the sizes of minimap tiles (see Size correction #1). The default value is 1 - tiles have their original sizes. If we set the size to 2, the size will be two times as large and the tiles will occupy part of the space of neighbouring tiles.
Tile (Custom Tile mode only)
This field controls the tile that will be used instead of the original tiles.
Material
This field controls which material is used in the Tilemap Renderer component. The default material is used if null. This field can also be used for size correction, see Size correction #2.
Size correction #1
When using the Color display mode, we will often encounter a problem with minimap tile sizes being different to actual tile sizes used in the game. An example of this problem can be seen in the image below. In the left image, we can see how the minimap looks with equal sizes of wall and floor tiles (i.e. Floor layer size set to 1). The problem is that the original wall tiles do not occupy the whole tile which results in the outline of the minimap view looking more "chunkier". To compensate for that, we can increase the size of the floor minimap layer. If we set the floor layer size to 2, the floor tiles will occupy some space of the wall tiles and as a result, the wall tiles will look thinner.
For this to work, the floor layer must be rendered on top of the wall layer (i.e. the floor layer must be under the wall layer in the Layers array). Also, it is not possible to decrease the size of wall tiles, we always have to increase the size of a suitable layer.
Note: All files from this example can be found at Edgar/Examples/MinimapExample.
Size correction #2 and overlapping tiles
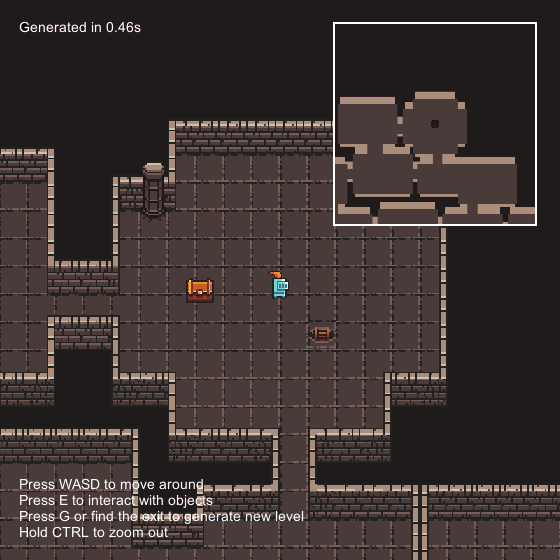
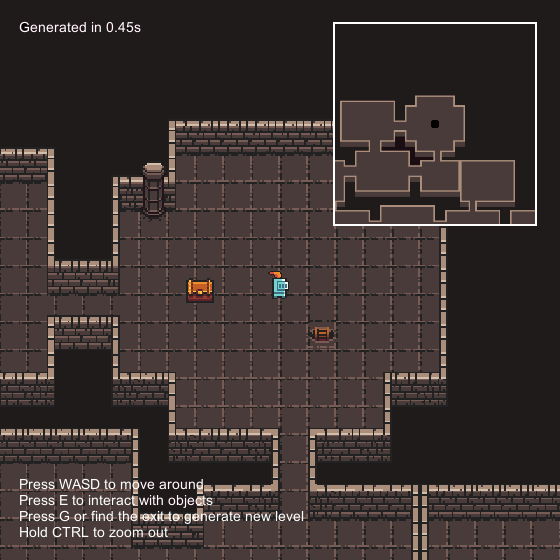
For some tilesets, the previous approach for size correction will not work. The previous approach can work only for tilesets, where there are no tiles displayed over one another. This does not hold for the tileset that can be seen in the image below because the lighter wall outlines are displayed on top of floor tiles. In the left image, we can see how the minimap looks without any size correction. Once again, the wall tiles are much thicker when compared to the original game view. And in the right image, we can see how it looks like when we apply the previous size correction approach. The problem is that with the previous approach, the floor minimap tiles must be drawn on top of the wall tiles, which causes the vertical wall tiles to completely disappear.

To fix this issue, we will utilize the fact that when a given tile does not occupy the whole square tile space, the rest of the pixels are transparent. Instead of using the Color mode, we will use the Original Tiles mode together with a custom shader that keeps all transparent pixels intact and transforms all the other pixels to a uniform colour.
First, create a new material for each tilemap layer (Create → Material) that contains non-square tiles. For the example above, we will need two materials - one for the walls and for the lighter wall outlines. Open these materials, set their shader to "Edgar/Minimap Single Color Tile" and configure the Tile Color field to match the desired colour of the minimap layer. The last step is to assign the materials to the Material field of the tilemap layer. The final setup should look like this:
Note: All files from this example can be found at Edgar/Examples/MinimapExample2.
Customization
Shape of the minimap border
See 3rd party tutorials here or here.
Background colour
To change the background colour of the minimap, change the background colour of the minimap camera.
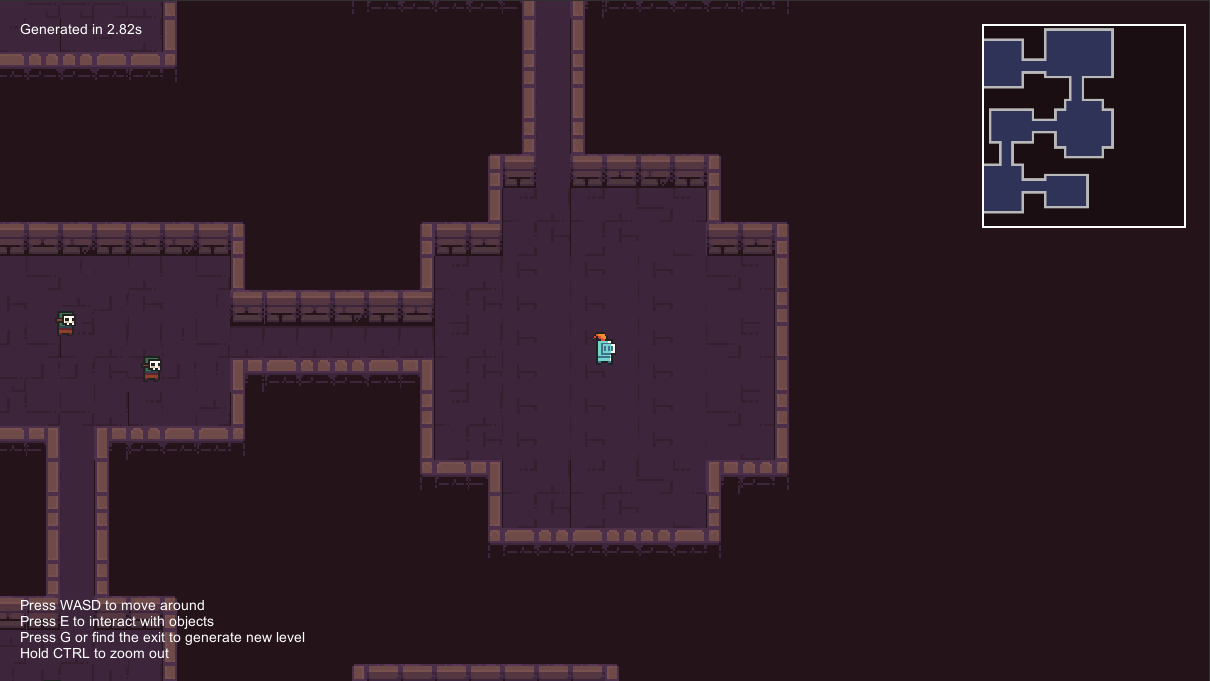
Zoom level
If you want to zoom out the minimap view, just change the Size field of the minimap camera to a larger number.
Add player (or other) icon(s)
You can easily add a player icon to the minimap. Add a child game object to your player, add your player icon as a sprite to the game object and change its layer to the minimap layer. By doing so, the sprite will be only visible on the minimap. You can do the same thing with enemies, treasures, etc.