Level graphs
Level graph is an abstraction that lets us control the structure of generated levels.
Note: In the context of this plugin, the term graph is used to refer to a mathematical structure consisting of nodes and edges, not a way to visualize functions.
Basics
Level graph consists of rooms and room connections. Each room corresponds to a room in a generated level and each connection tells the algorithm that the two rooms must be connected either directly to each other or via a corridor.
Below you can see a simple level graph with 5 rooms and 4 connections. If we use this level graph as an input for the algorithm, each generated dungeon will have exactly 5 rooms and room 1 will be connected to every other room in the dungeon.
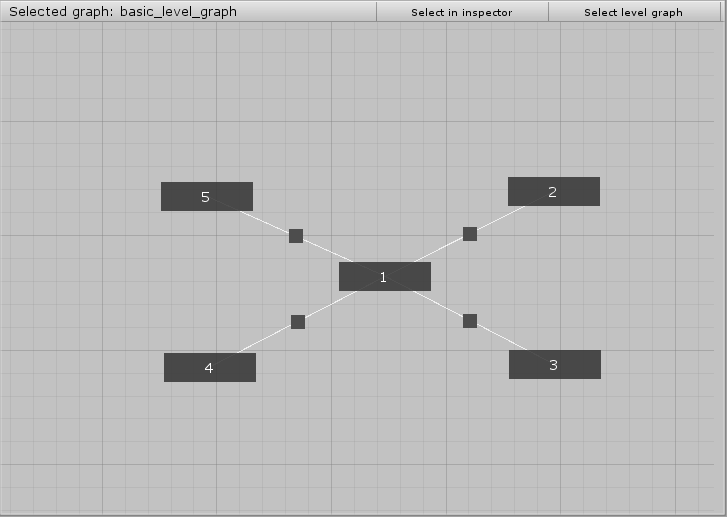
Note: It is not important how we draw the graph. It is only important how many rooms there are and which rooms are connected to each other.
Limitations
Planar graphs
Level graphs must be planar. We say that a graph is planar if it can be drawn on the plane in such a way that no two edges intersect. In our case that means that no two connection lines may intersect. If the input graph was not planar, we would not be able to find a dungeon without rooms or corridors overlapping one another.
Note: A level graph may be planar even if we draw it in a way that some edges intersect. It is because even if one drawing of the graph is "incorrect", that does not mean that there are intersecting edges in all the drawings.
Connected graphs
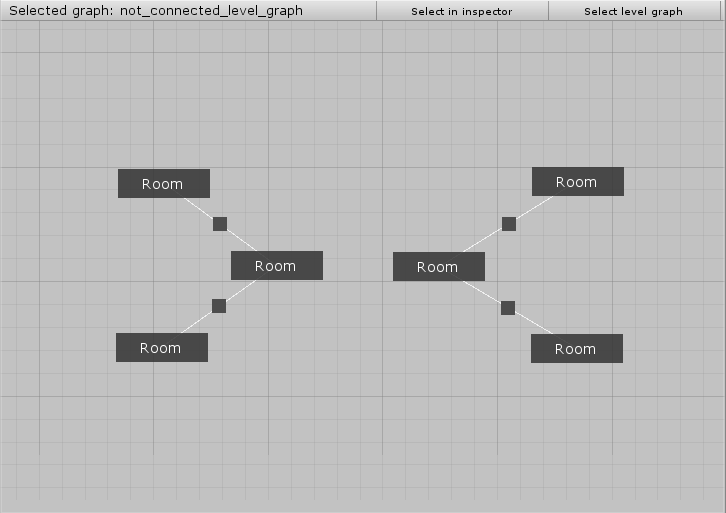
Level graphs must be connected. We say that a graph is connected if there is a path between every pair of vertices. Below you can see a level graph that is not connected because there is no path between vertices on the left side and vertices on the right side.
Creating level graphs
LevelGraph is a ScriptableObject that can be created by navigating to Create → Edgar → Level graph. Below you can see how are level graphs displayed in the Inspector window.

Graph editor
The Graph editor window can be opened double-clicking the level graph ScriptableObject.
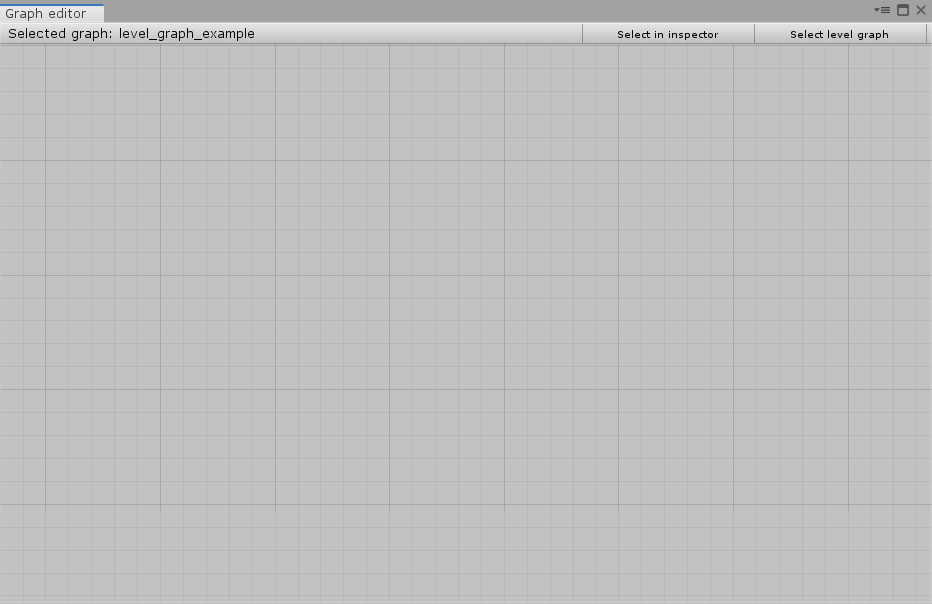
Window controls:
- Selected graph: the name of the currently selected level graph
- Select in inspector: selects the current graph in the inspector window
- Select level graph: selects a different level graph
Working with level graphs:
- Create room: double-click on an empty space in the grid
- Configure room: double-click on an existing room
- Delete room: press Ctrl + Del, or right-click on a room and select Delete room
- Move room: left click and then drag around
- Add connection: hold Ctrl while left-clicking a room and then move the cursor to a different room
- Delete connection: right-click on a connection handle and select Delete connection
Room templates
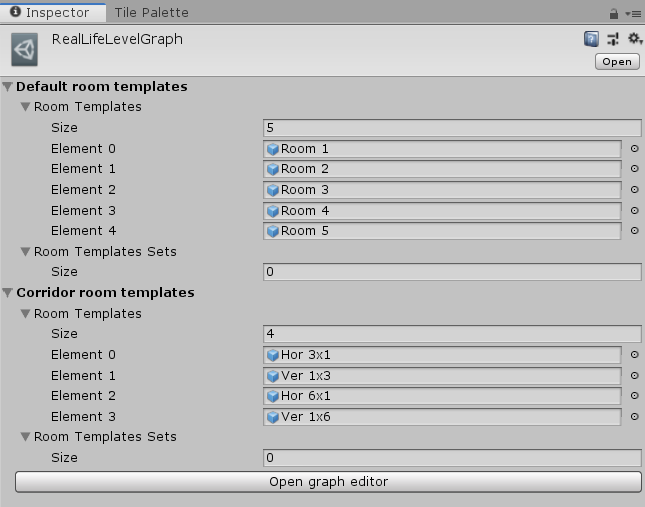
When we have our rooms and connections, it is time to set up room templates. In the Level graph inspector window above, we can see 2 sections - Default room templates and Corridor room templates. These sections are used to specify which room templates are available for which room. Below you can see the setup from Example 1.
Room templates sets
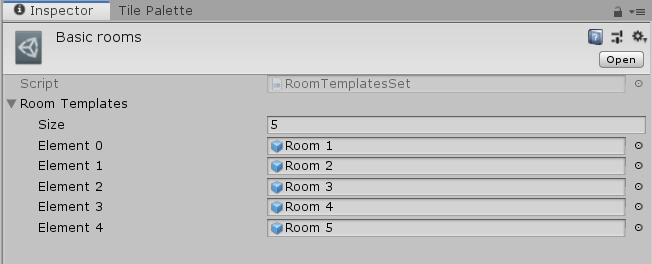
It may sometimes be useful to group our room templates into groups like Shop rooms, Boss rooms, etc. We can create a so-called Room templates set by navigating to Create → Edgar → Room templates set. It is a simple ScriptableObject that holds an array of room templates, and we can use it instead of assigning individual room templates one by one. The main advantage is that if we later decide to add a new shop room template, we do not have to change all the shop rooms to include this new template - we simply add it to the room templates set.
Default room templates
Room templates
Array of room templates that will be used for rooms that have no room shapes assigned. We can use this for our basic rooms and then configure our special rooms (spawn room, boss room, etc.) to use a different set of room templates.
Room templates sets
Array of room templates sets that will be used for rooms that have no room shapes assigned. Room templates from these sets are used together with individual room templates.
Corridor room templates
Room templates
Array of room templates that will be used for corridor rooms. These room templates will be used if we set up the algorithm to use corridors instead of connecting rooms directly by doors. Can be left empty if we do not want to use corridors.
Room templates sets
Array of room templates sets that will be used for corridor rooms. Room templates from these sets are used together with individual room templates.
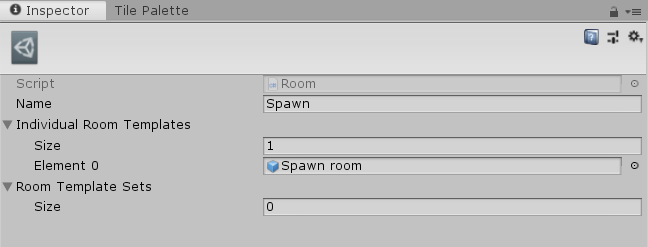
Configuring individual rooms
If we double-click on a room in the Graph editor, it gets selected, and we can configure it in the inspector. We can set the name of the room which will be displayed in the Graph editor. We can also assign room templates and room templates sets that will be used only for this room. By assigning any room template or room template set, we override the default room templates that are set in the level graph itself.
(PRO) Custom rooms and connections
It may be often useful to add additional information to individual rooms (or connections). For example, we may want to add a type to each of the rooms and then do something based on the type. To achieve that, we can provide our own implementation of the RoomBase and ConnectionBase classes. There are at least two possible approaches.
| Dead Cells | The definition of rooms is enhanced with a custom type |
Inherit from Room
The first approach is that we create a class that inherits from the Room class which is the default implementation that is used in level graphs. This approach is good if we want to just add something and do not want to change how the room works. We can also override the GetDisplayName() method to change how is the room displayed in the level graph editor.
This is the recommended approach for the majority of users.
Inherit from RoomBase
The second approach is that we inherit directly from the RoomBase class. If we do that, we have to implement all the abstract methods (currently GetDisplayName() and GetRoomTemplates()). An advantage of this approach is that in some situations, we may not need any logic related to room templates, so we just return null from the method, and we will not see anything related to room templates in the inspector of the room. This may be useful in a situation where we resolve room templates manually based on the type of the room.
Note: The same logic applies to inheriting from Connection or ConnectionBase.
Configure level graph
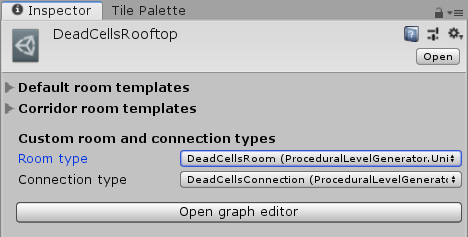
When we have our custom room or connection type ready, we have to configure the level graph to use them. If we open the level graph in the inspector, we should be able to choose the custom types from the dropdown.
Note: It is not possible to easily convert a level graph from using one room/connection type to another. Therefore, it is important to decide if you want to use a custom room/connection before you create your level graphs. Otherwise, you will have to recreate them later with the correct types.
Accessing room information
If we add some additional information to a room or connection, we probably expect to somehow use this information later. The first step is to get access to the [RoomInstance][RoomInstance#properties] class which is described here. When we have an instance of this class, we can use the RoomInstance.Room property. This property is of the RoomBase type, so we have to cast it to our custom room type.
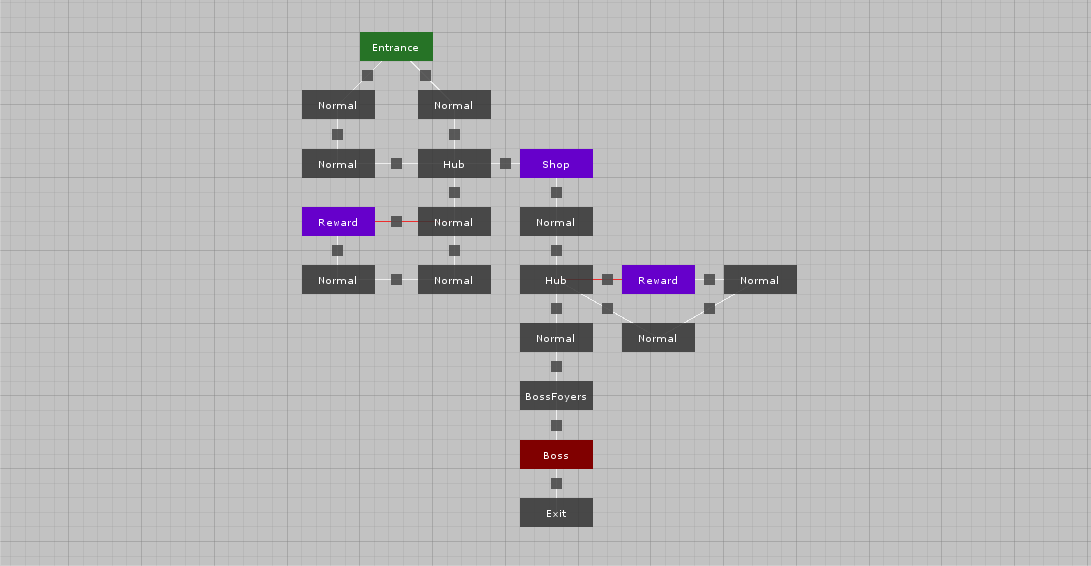
Custom colours in the level graph editor
It is also possible to change how custom rooms and connections look in the level graph editor. We just have to override the GetEditorStyle() method and return an instance of RoomEditorStyle or ConnectionEditorStyle.
public class GungeonRoom : RoomBase
{
    public GungeonRoomType Type;

    /* ... */

    public override RoomEditorStyle GetEditorStyle(bool isFocused)
    {
        var style = base.GetEditorStyle(isFocused);

        var backgroundColor = style.BackgroundColor;

        // Use different colors for different types of rooms
        switch (Type)
        {
            case GungeonRoomType.Entrance:
                backgroundColor = new Color(38/256f, 115/256f, 38/256f);
                break;

            /* ... */
        }

        style.BackgroundColor = backgroundColor;

        // Darken the color when focused
        if (isFocused)
        {
            style.BackgroundColor = Color.Lerp(style.BackgroundColor, Color.black, 0.7f);
        }

        return style;
    }
}
(PRO) Directed level graphs
By default, all level graphs are undirected, meaning that it does not matter whether you create a connection from Room 1 to Room 2 or the other way around. If you want to have more control over generated levels, you can make level graphs directed and combine that with entrance-only and exit-only doors. See the Directed level graphs guide for more information and examples.